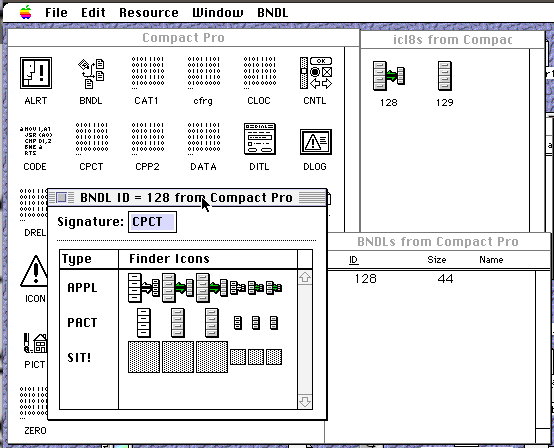
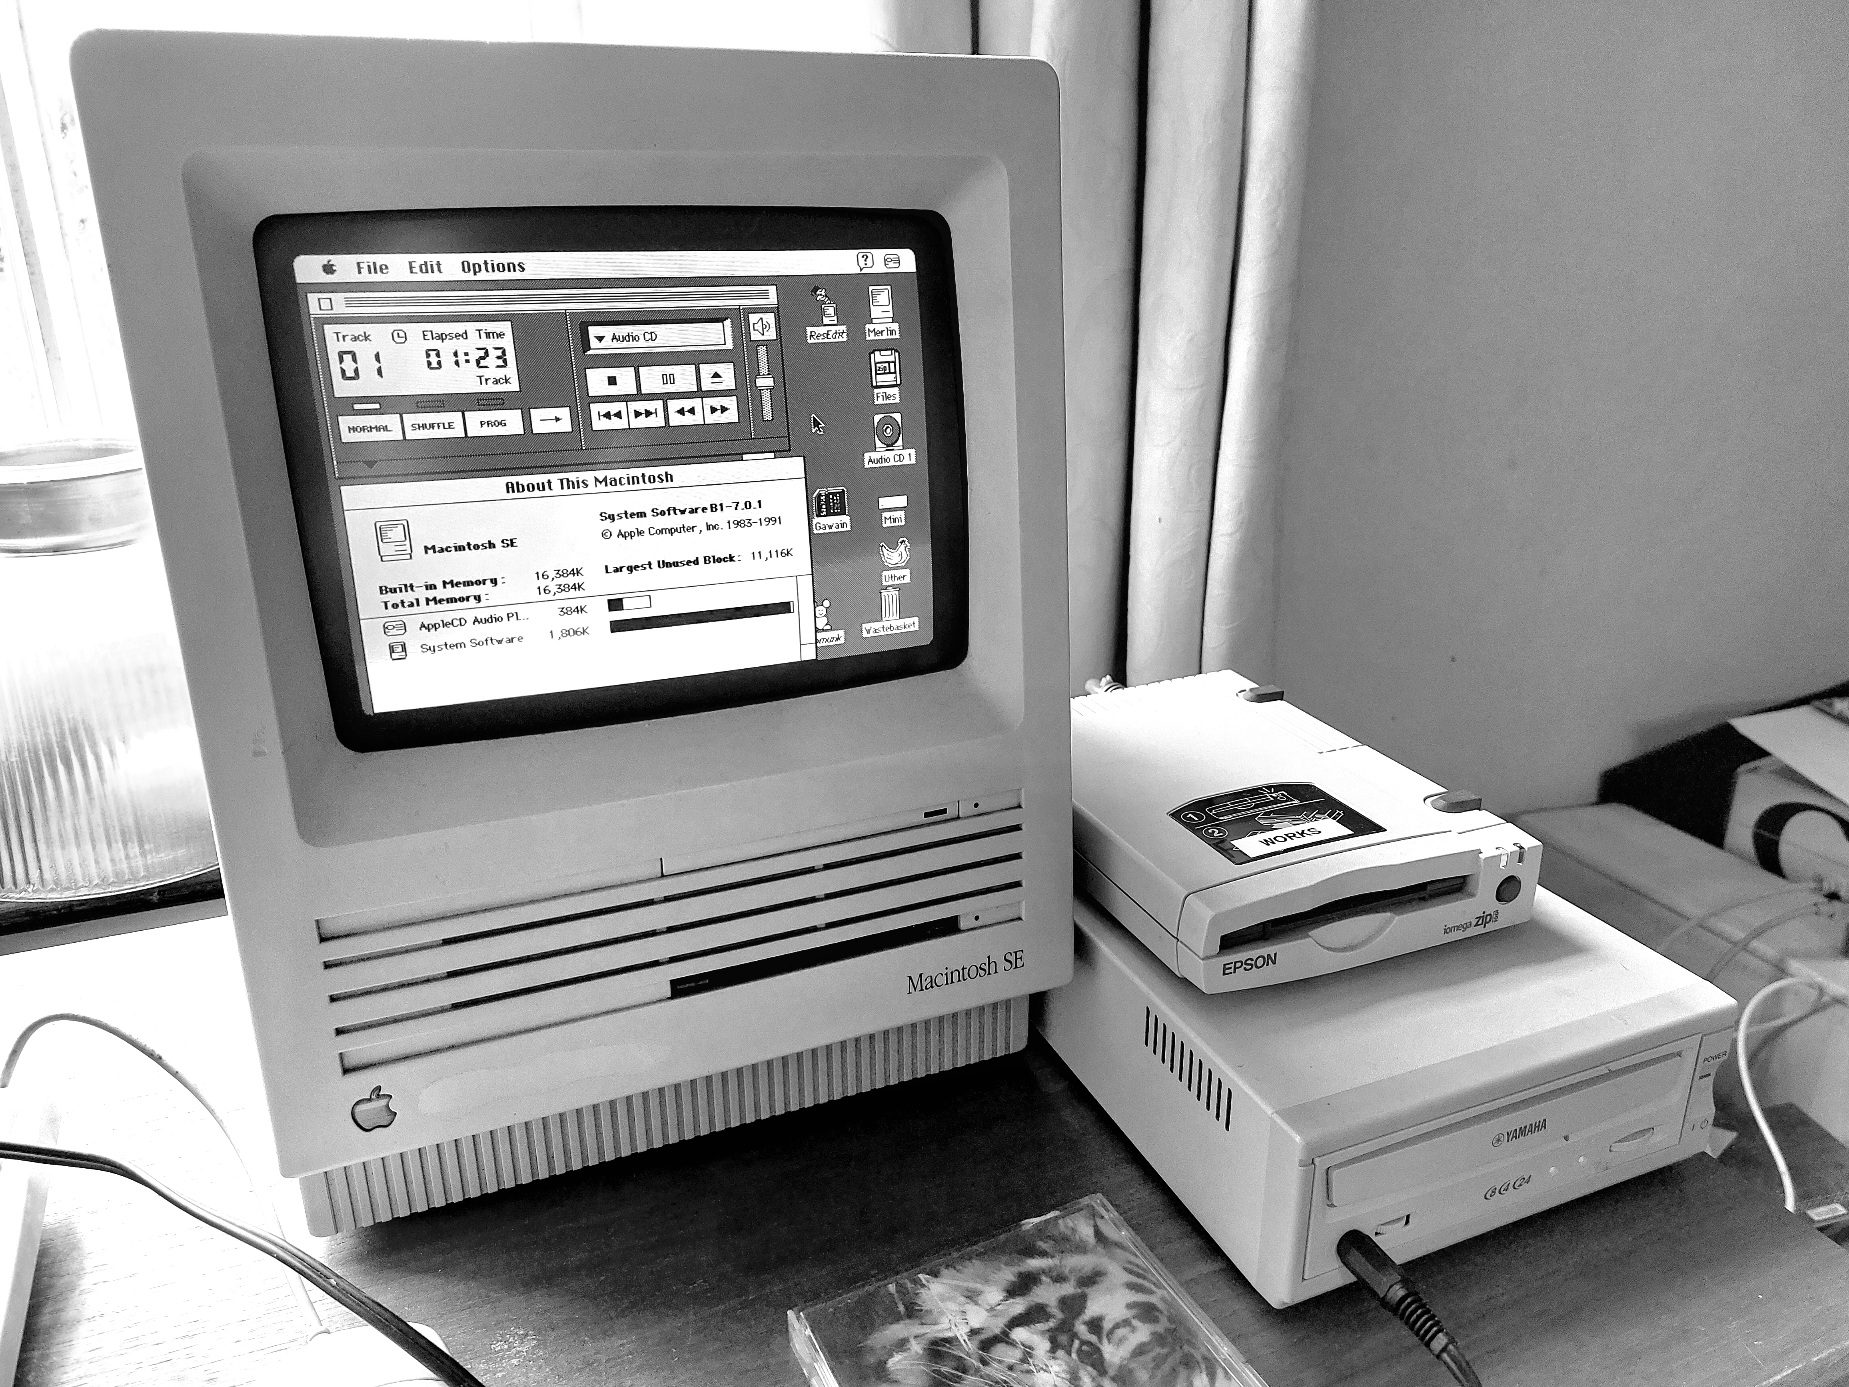
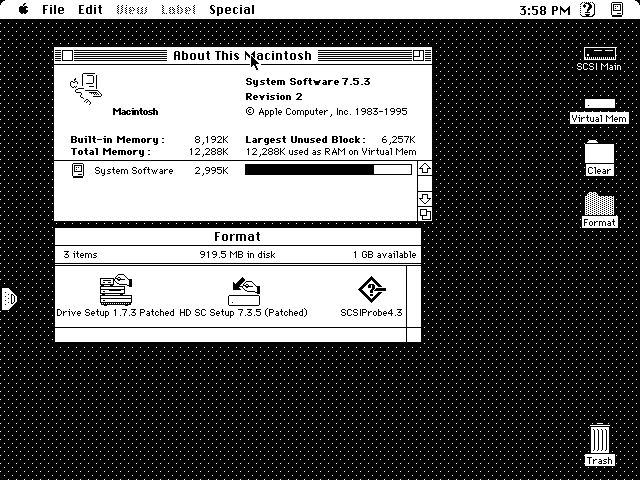
Try Compact Pro instead of Stuffit for sharing files with other users of vintage Macs – you might be surprised.
It is useful because you can create self extracting files protected from the ravages of the internet and you don’t need to worry about what compression software, or realistically, what hardware or OS version the recipient is using as the single format is extremely broadly compatible with Systems from 4.2 to Mac OS 9.2.2.
Macintosh Files
Classic Mac OS (System versions 9.2.2 and older) used a file format that is a bit different to what is used on most systems. Each file has two forks, a data fork, which contains binary data similar to any normal Windows / DOS / Linux / CP/M, and a second resource fork, that contains structured data called resources. Resources can be anything from pictures and sounds, to icons and even application code.
The Problem
A major issue with working with vintage Macs is that if you move a file with a resource fork onto a drive formatted as FAT or NTFS or most disk formats, including web servers, the resources are stripped from the file, an irrecoverable disaster as most files have all of the important information in resources.
The Solution
The common method to solve this issue is to process your files and convert them into a data fork only file, that can be later converted back to match the original files. Common formats that just do this are MacBinary (.bin), AppleSingle, and AppleDouble. BinHex (.hqx) is a format designed to allow the transmission of files through protocols that might otherwise corrupt, I think by misinterpreting parts of the file and making well meaning changes (Versions of Fetch and some web browsers cause this issue to files that aren’t converted to BinHex or MacBinary etc.). Additionally, it is possible to use compression formats such as the Stuffit (.sit / .sitx) compression format and Compact Pro format (.cpt) as these do not have any important data in the resource fork.
The Complication
Most vintage Macintosh users seem to have settled on using Stuffit Expander as their main decompression tool in recent past, and I assume Drop Stuff as their main compression utility. This is interesting as it wasn’t always the case with these tools becoming more popular in the late 90s and early 2000s, likely partly because older versions of Stuffit compatible software tended to be paid software.
My frustration with everyone using Stuffit, is that there are effectively three Stuffit formats – Versions 1 – 4 (.sit), Versions 5 – 6 (still .sit, but not fully compatible) and Version 7+ (.sitx). Version 3.5 is required to work on System 6 and Macs with a 68000 processor, but this version wont open “.sit” files made with Stuffit 5. Version 5.5 seems to be the last version to work on 68k Macs and opens most files, but requires System 7.0 or 7.1 (I forget which) and a 68020. I have had better luck opening some partially corrupted files using 5.5 over 5.0 – I suspect it does some simple repairs for common issues. “.sitx” files require Stuffit Expander 7 which does not run on 68k Macs. Further more, it is possible to set the level of compression, with higher levels of compression taking longer to expand, hugely so on older computers. Some files will crash some versions of Expander, but not others so you usually end up needing multiple versions (4.5 and 5.5 perhaps) installed.
The common mistake that people make is to compress a file, intended for use on an 8MHz computer from the 1980s and running System 6, using the high compression mode and saving in the later (requiring version 5 or later) format making the files inaccessible on original hardware.
My Preferred Solution
In my household growing up in the 90s, we tended to use the compression tool “Compact Pro”, which was ShareWare, but fully functional without registration. This worked well and let you save archives which can be moved between computers, even stored on servers and PCs, and later extracted on another Mac running Compact Pro. Compact Pro has minimum requirements of a Macintosh Plus running System 4.2 and will work just fine on a G4 running Mac OS 9.2.2.
The next huge advantage is that in the save dialogue box, there is a “Make Self Extracting” checkbox. If you check this, the saved file is an application. Running this application will extract the compressed files without even needing to have a copy of Compact Pro on the destination computer – the complication? An application needs resources… never fear – there is a menu option that allows you to convert any file, including these Self Extracting Archives (.sea) into a BinHex (.hqx) file, which is server, Windows, Linux, FTP, http etc. safe. Additionally, almost any archive software including StuffIt will convert the file back into the application from the BinHex so you’re not excluding StuffIt users (note that for many years Stuffit Expander came on Apple Mac OS installer CDs and was installed by default). An extra bonus is that some web browsers and FTP clients automatically convert BinHex files.
By processing a file like this, it will be possible for it to be worked with by the destination user, regardless of what OS they are running as long as it is newer than System 4.2, there are fewer format issues, fewer unexpected, Stuffit Expander just quitting when you drop the file on it, or throwing a mystery error, the files work on anything from a 68000 to a G4.
The only disadvantage is that there is a small overhead for the application / extraction code and so if a file barely compresses (such as sound or a JPEG image) the resulting file might end up being slightly larger than the original, or if you are trying to minimise size to the last few kB.
How To
First download Compact Pro 1.52 onto the computer running Mac OS (real or emulated) that you want to use to compress your files. It can be found here.
Compact Pro
Once installed, follow these steps to generate a self extracting archive stored as a BinHex.
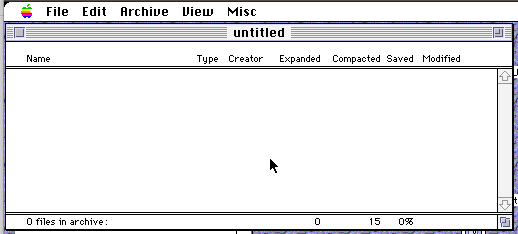
Launch Compact Pro and it will open showing a new untitled archive. You can add files and folders here.
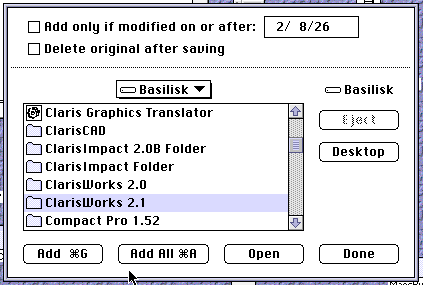
You can go to the “Archive” menu to either create new folders (“New Folder…”), or directly “Add Files…” and folders.
You can chose to add all files at the current location, or just what is selected. You can keep adding things until you have finished, and then click “Done”. You can also choose to “Add only if modified on or after” which is handy if you have a file full of many documents and, for example, want to add all the ones you’ve modified today.
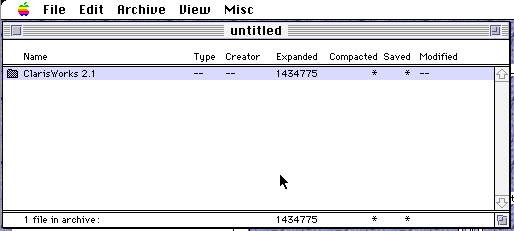
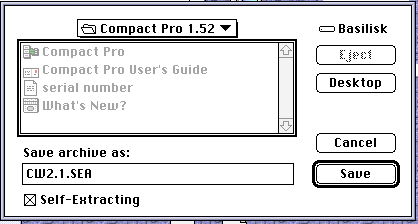
Now that we have added our files, we can navigate and modify things if we like, but I’m going straight to “Save As…” in the File menu. I have selected the “Self-Extracting” checkbox and named the file “CW2.1.SEA”. I then click “Save” as usual, after navigating to where I want to save my Self Extracting Archive.
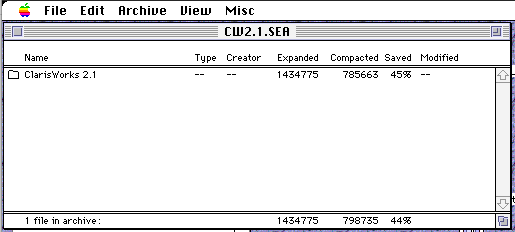
After saving, the archive window updates to show details of what filesize savings we made. In my case, I saved 45% of the original size of the files. Woo!
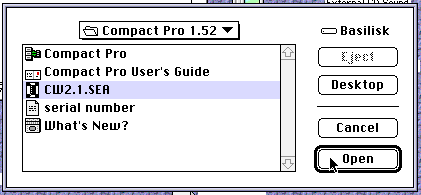
Keep in mind that at this point we can move the file between Macs on a Mac formatted disk, but, because we specifically saved as a self extracting archive, to retain that feature when moving via the internet or a PC, we need to convert the file to a BinHex. This is done with the “Convert to BinHex4…” option in the Misc menu. Select your file and click Open.
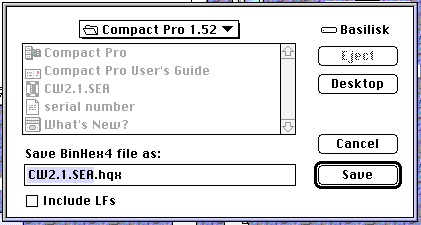
You will be asked where to save the file. I don’t tend to check “Include LFs” (Line Feeds) – Let me know if it is something that is needed in a specific situation using my contact form under the “About” menu on this page.
That’s it – you now have a .hqx file that is safe to move on to a PC floppy disk, transfer over FTP to a PC, upload to Macintosh Garden etc. The end user just needs to open the file with something that converts back from BinHex, which as mentioned could be one of many programs including Stuffit Expander, and then double click the resultant file and the contents will be extracted. One of the reasons I like this method is that the BinHex is just a plain text file but once converted back, the Self Extracting Archive retains all its file type and file creator characteristics.
NOTE – If you do make a mistake and forget to convert your Self Extracting Archive into a BinHex and the resources are removed during the transfer process, the resultant file will still be a valid Compact Pro archive! This means that at the destination, the damaged file can still be expanded by manually opening it in Compact Pro, or if I remember, a registered copy of Stuffit Expander / Stuffit Deluxe.
UPDATE 31st July 2024 – This post has been updated to reflect more recent versions of QEMU m68k as I was notified that the instructions I had followed were out of date. The 68k specific patches have more recently been integrated into the main build and so it is no longer necessary to use the q800.upstream branch I originally used.
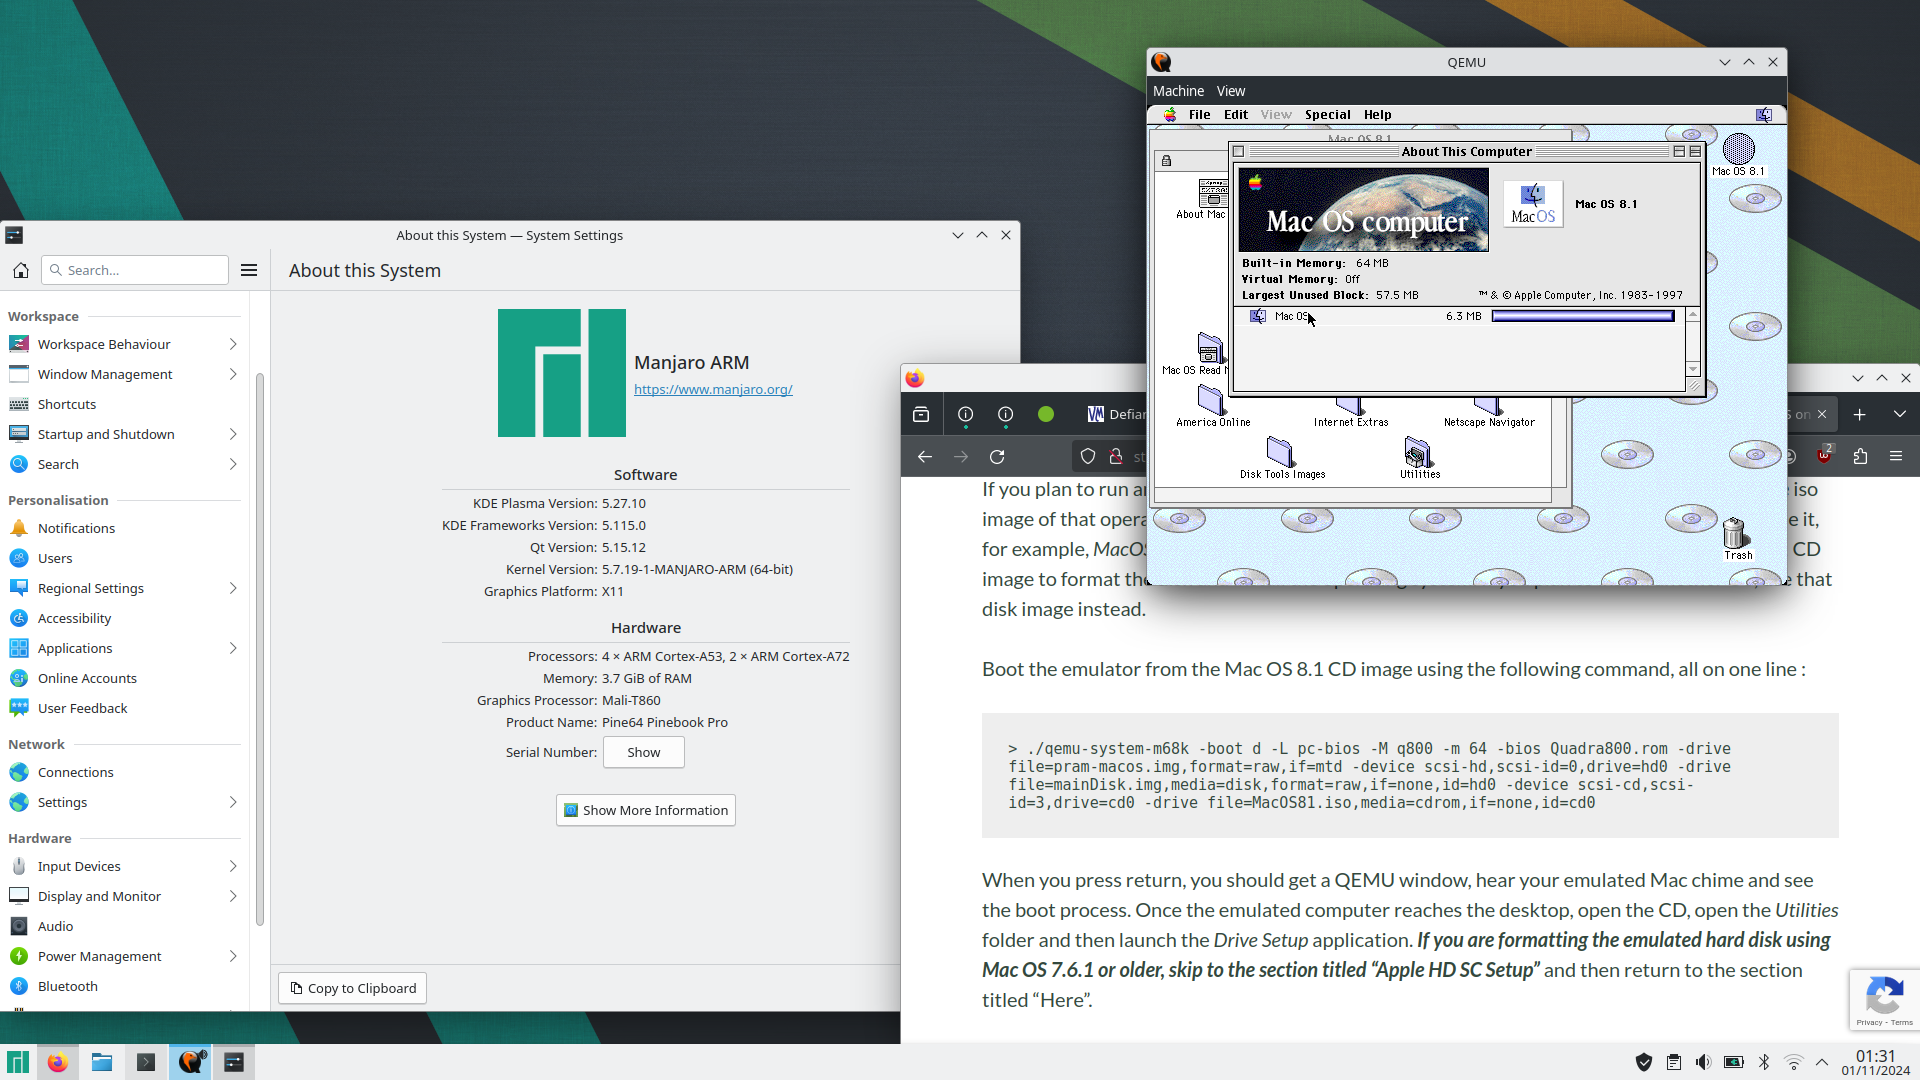
UPDATE 1st November 2024 – Last night I was able to build and run 68k QEMU on an 64bit ARM based PineBook Pro running Manjaro Linux. Manjaro uses yum instead of apt, so grabbing software was different, but all I needed to do was update installed software, then I installed the repository’s copy of qemu-system-m68k (a lazy way of getting most dependencies), then I had to install the build environment ninja. After that, everything worked exactly as described below, although compiling took quite a while. I haven’t benchmarked the system, but it feels like it runs pretty well. Mac OS 8 didn’t take too long to install. Given this, I would expect this software to be happy compiling on other ARM based Linux PCs and SBCs, such as the Raspberry Pi.
QEMU m68k Running Mac OS 8.1 on Manjaro-ARM (click to view)
Introduction
I recently installed the 68k version of QEMU on Linux (Pop! OS) and struggled to find detailed step-by-step instructions by googling, so thought I’d upload some notes to help others. I suspect that part of what tripped me up is that previously, it was necessary to build from a branch and not the central source, which led me down the wrong path to to get the m68k variant of QEMU to build, but in truth building the main branch source now gets you to a working emulator (although not the copy in the Debian software repository). This is slightly muddied by the out of date threads that are returned as the primary results when you search for instructions on building QEMU for 68k on Linux.
Building m68k QEMU
My primary source for building qemu-system-m68k for Linux was here but ultimately I needed some guidance from a contributor to the project who saw my post and got in touch to point me in the right direction. I’m very appreciative of the time they took to help me on my way. This assumes you plan to run Classic Mac OS (between 7.1 and 8.1), and not AUX or anything more exotic.
Navigate to your home folder

> sudo apt update
> sudo apt-get build-dep qemu-system-misc ninja
> git clone https://gitlab.com/qemu-project/qemu.git
> cd qemu
> ./configure --target-list=m68k-softmmu --enable-gtk --enable-sdl --enable-slirp
> make -j4
I then copied the executables qemu-system-m68k and qemu-img from the build folder, into the folder I wanted to run them from.
Creating / Getting the Required Files
To run, you will need to generate two disk images, and a copy of the Quadra 800 ROM. Place the ROM in the same folder as the executables, and name it Quadra800.rom. I next used some of the instructions from here to work out how to generate the needed image files as follows. Run these two commands in the location you placed qemu-system-m68k and qemu-img previously.
> qemu-img create -f raw -o size=1G mainDisk.img
> qemu-img create -f raw pram-macos.img 256b
On the first line, change “1G” to other values to change the image size from this example of 1 gigabyte.
Launching the Emulator for the First Time
The emulator “captures” the mouse (and keyboard) once you click in the window. To free the mouse, press Ctrl+Alt+g.
To initially format the disk image, you can use Drive Setup (Mac OS 8.x) or Apple HD SC Setup (7.6.1 and older) while booted from the OS installer CD. It is critical that the CD iso image you use has been properly created and includes the driver partitions and is bootable, otherwise you will just get a flashing question mark on a floppy disk icon. If you do not already have an image, you can grab one from the Macintosh Garden here (which is a direct link to download #6 (at time of writing) on this page), or from my own site here.
Rename the iso image as MacOS81.iso and place it in the same folder as qemu-system-m68k and qemu-img.
If you plan to run another version of Mac OS on the emulated computer, download a bootable iso image of that operating system, for example Mac OS 7.6.1, place it in the same folder and name it, for example, MacOS761.iso. In the following instructions I will assume that you are using a, 8.1 CD image to format the disk and install the operating system. If you plan to install another OS, use that disk image instead.
Boot the emulator from the Mac OS 8.1 CD image using the following command, all on one line :
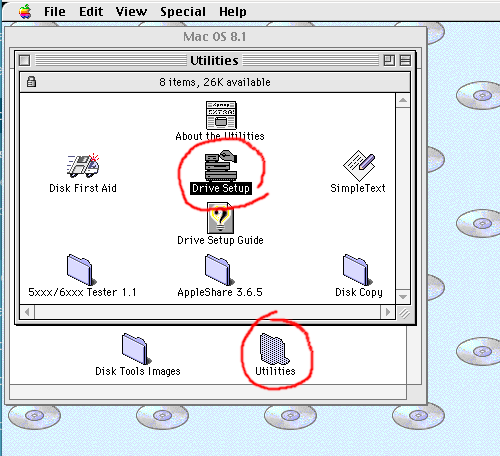
When you press return, you should get a QEMU window, hear your emulated Mac chime and see the boot process. Once the emulated computer reaches the desktop, open the CD, open the Utilities folder and then launch the Drive Setup application. If you are formatting the emulated hard disk using Mac OS 7.6.1 or older, skip to the section titled “Apple HD SC Setup” and then return to the section titled “Here”.
In Drive Setup, select the unformatted hard disk from the list, click the Initialize button, and then in the Initialize dialog box, click the Custom Setup… button, select “1 Partition” from the Partitioning Scheme popup menu, ensure the other popup menu says “Mac OS Standard” and not “Mac OS Extended” (if you plan to use the hard disk image with Mac OS 7.x), click OK, and lastly click Initialize. Once this is done, you can quit out of Drive Setup, and rename the hard disk you just formatted if you haven’t already. “Macintosh HD” is traditional. Once you’re done, you can install your operating system.
Here
To install an OS, navigate to the desktop. If you have just booted you will be there by default, otherwise if you are following these instructions and have just formatted your “hard disk” you may need to quit out of the formatting utility and close some Finder windows. Once you get to the desktop, open the CD and run the main installer application. Follow on-screen instructions to complete the install. If you’re unfamiliar with the process, the default settings should be just fine. Selecting Restart (if offered in a dialog box, or from the Special menu at the desktop) should bring you back up in your installed copy of Mac OS.
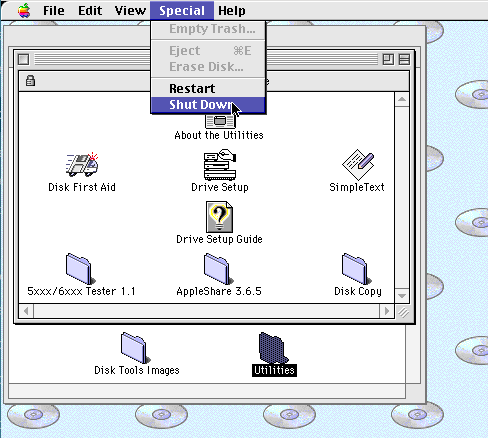
You can shutdown the emulated computer by selecting Shutdown from the Special menu while at the desktop.
If you wish to start QEMU again, but from a different CD image, for example a Mac OS 7.6.1 iso image we downloaded and called MacOS761.iso, enter and execute the following command, which is identical to the previous command, except the CD Image filename has been updated.
Once you’re done, Shutdown and we’ll set up a simpler (less typing intensive) way of launching the emulator, as well as consider a couple of helpful customisations.
Create and edit a new bash script in the folder with qemu-syetem-m68k…
On the first line “-g 1152x870x8″ sets the display to 1152 by 870 pixels (Apple’s 21” monitor resolution) at 256 colours (8bit). If you want to run the display at 640 by 480, or 800 by 600 at 24bit colour, delete the “-g 1152x870x8” text (move the cursor with the cursor keys in nano. The default display mode allows you to switch between 640×480 and 800×600 from the Monitors control panel within the emulated computer.
If your host computer has an optical drive, the last two lines set up the emulator to directly access disks put in that drive. If you do not have an optical drive, you may need to delete these last two lines.
Press Ctrl-x and when prompted, press “y” to exit and save changes.
Now, when you want to launch the emulator, you can run the bash script launch68k.sh, for example by navigating in the terminal to the folder, and then typing ./launch68k.sh.
Apple HD SC Setup
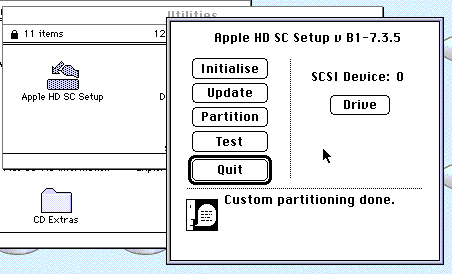
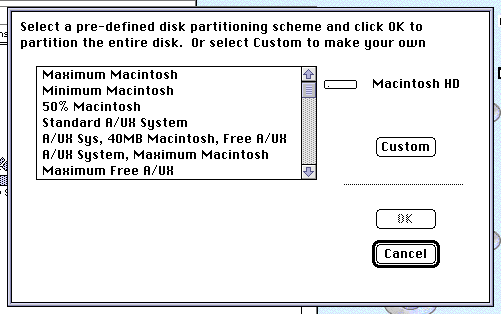
If you format the emulated hard disk using a Mac OS 7.6.1 or older version of System 7, you will need to use the formatting utility Apple HD SC Setup. This is because older versions of Drive Setup were exclusively for PowerPCs and / or formatting IDE hard disks (and we’re emulating a SCSI disk). While the process is pretty simple, an quirk I noticed while setting up my emulator was that Apple HD SC Setup only created a very small data partition on the emulated hard disk. This is simple to fix though.
Step 1
Launch Apple HD SC Setup, likely in the Utilities folder on the top level of the CD you have booted from. Select the SCSI ID of the emulated hard disk you want to format by clicking the Drive button, you most likely want “SCSI Device: 0”. Do not get this wrong or you could erase the data on whatever hard disk image you have mounted in your emulator.
Step 2
Click the Initialize button and wait. This takes quite a while.
Step 3
Click the Partition button, then click on the Customize button if available.
Step 4
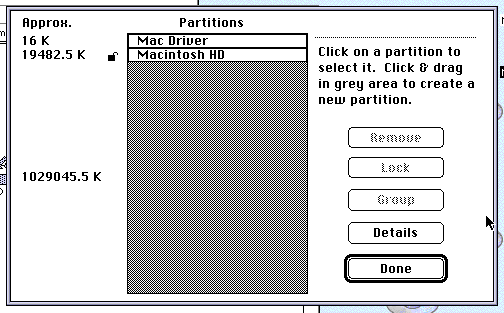
If the disk utilisation graphic shows partitions taking up most of the disk, you’re good to quit out of the utility, but if like me, the data partition is only using a small portion of the disk and the remainder is grey half tone, select the partition and click remove.
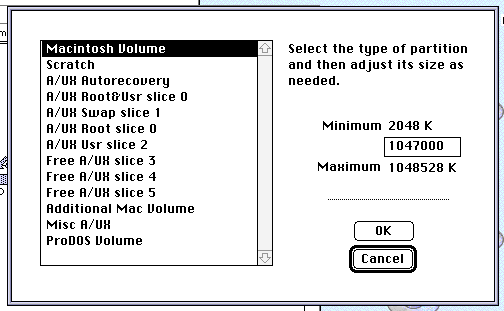
Click towards the bottom of the grey area. In the dialog box that appears, select the option “Mac Volume” on the left, and then in the text field on the right hand side, enter a value (in K) that is about 1000 less than the maximum value quoted below the text field. Click OK once you’re happy. You should now have a small amount of grey between the disk driver and the data partition. Click Done.
Step 5
Quit Apple HD SC Setup and return to the heading “Hear” above, to install the operating system.
Getting Software onto the Emulator
At this point, if you have an optical drive, you should be able to install any software you own on original CDs. This only gets you so far though. I’ve actually been moving files onto the disk image using another emulator. Basilisk II allows access to the host file system and while QEMU isn’t compatible with my Basilisk II disk images, the QEMU image works fine in Basilisk II. Other emulators might also work in this fashion, such as the Infinite Mac website, SheepShaver and others.
Make sure you don’t accidentally launch both emulators at the same time or you will possibly cause issues and corruption.
Limiting Processor Usage
On my fairly elderly laptop, when I run QEMU it consumes 100% of two cores (from the OSes perspective, as hyperthreading is on this isn’t strictly correct). This is enough to either cause the fan to ramp up to an annoying level, or if I am running from the battery, significantly reduce battery life.
The truth is, I don’t actually offer all of the speed this offers me, so I decided to look into how I might best throttle the performance of m68k QEMU to reduce the CPU time it consumes at the cost of emulator performance. Ultimately, I settled on using the program cputool which I had to install, but was available from the Debian repositories so a simple apt get install cputool sorted that.
This solution isn’t perfect as it makes the emulated graphics redraw stuttery, but it is OK if you’re mainly typing and not playing games or drawing.
After installing cputool, I was able to make a new script to launch QEMU, that just called my existing script. What I ended up with was a bash script containing…
cputool -c 50 -- ./startqemu.sh
Where “startqemu.sh” was my existing start script, “50” is the percent of each core’s total time I’m allowing. QEMU m68k uses two threads, so with this setup, I see the total CPU usage by the emulator halved and visible as 50% usage on two cores.
The above method should probably work with other emulators that consume all of an available core or core’s resources regardless of whether it is needed or not.
Advantages and Disadvantages
I’m pretty pleased with this emulator, with the only slight disadvantages I’ve seen so far (since installing an up to date version) are that it runs slower than some other emulators, it is harder to install and transferring files between the host and emulator isn’t as trivial as in emulators that mount the host file system on the desktop by default. This plays off against much better stability and compatibility when compared to Basilisk II for example, which I have been mainly using lately. One big compatibility improvement is sound. For example, SoundEdit 16 was not usable on Basilisk II due to constant crashes.
The driving factor for me trying QEMU was a bug that manifests in Basilisk II when writing software in REALbasic – if I convert an integer into a string in my REALbasic program, I get an incorrect result. This does not happen on real hardware such as my Centris 650 or my PowerBook G3, and also does not happen in QEMU.
Further Work
At this point, I should probably look into better ways of transferring files into the emulator. I believe that network filesharing, either using netatalk or possibly FTP, would be a fairly simple thing to setup. I’ve not looked into mounting the host system within the emulated Mac, I’m told this is possible, and will add instructions here when I look into it.
Obsolete Comments
This post was originally made with respect to an older, unofficial, build of QEMU with which I had a number of issues. I’ve moved the old list of issues here so that if someone is searching for terms they contain, they will still find this guide.
Issues (some minor) I experienced with the development branch and thread detailing how to build on Linux…
Build instructions don’t mention all dependencies.
Could not run configure due to permission issues if you try in a location outside your home folder, specifically on a secondary partition in my instance (I haven’t tried this again with the latest source).
The emulator is debouncing double clicks on my computer so they only count as a single click. It is not possible to double click in the normal manner. -fixed-
Disk image compatibility is very picky and the emulator does not seem to work with existing disk images.
After generating a disk image using QEMU’s own tool, it will not format, or even show on the emulated SCSI bus in Mac OS until you format it in Mac OS 8.1. -fixed-
The man pages are exclusively about x86 PCs even when called in relation to the m68k executable.
Resolution support is limited, more limited than real hardware.
The SDL mode does not work on my computer and just results in a blank screen.
Installing from the Debian repositories results in a non-working executable.
The most frustrating of these issues have been entirely fixed in the newer version of qemu-system-m68k, although some of the minor issues are still present (and others I haven’t re-checked for at this point). I have marked items I’ve tested and found solved as “-fixed-“.
Later versions of the Classic Mac OS let you use AppleShare (the regular client version) to directly connect to a specified IP address over the network or even internet, to access remote shares. But what some people don’t realise is that it is possible to install newer versions of the AppleShare software on older OSes to gain this functionality on older computers. This can be great for file sharing with friends over the modern internet, although some consideration should be given to security.
Requirements
I haven’t done extensive testing yet, but can confirm the described setup works on a Quadra 650 connecting to a remote AppleShare (crossing the Atlantic in my case). My expectation is that this setup would work back to System 7.1 on a 68020. This will need verifying.
An Ethernet capable Macintosh with a 68020 or later, running System 7.1.
The Open Transport 1.1.2 installer (provided).
The AppleShare 3.0.1 or later. 3.7.4 installer (provided).
An ethernet network with an internet connection.
Installation
First of all, download the following two installers, transfer them to your classic Mac and expand them.
Install Open Transport 1.1.2 only if your current version is older (or you don’t have any version installed). You can check the version by viewing file info for any of a number of Open Transport related extensions in the System Folder. After Installing, you will be forced to restart.
Install AppleShare 3.7.4. You will be once again instructed to restart.
In the Network or TCP/IP Control Panel, select the Ethernet option you intend to use and DHCP.
Make sure the System date and time is correct as this can be important with some networking. You may need to use the third party “SetDate” Control Panel to do this. I find the newest version crashes my computer, so use one of the older copies available on Macintosh Garden.
Ensure you are physically connected to your network and restart the computer.
Making an outgoing connection.
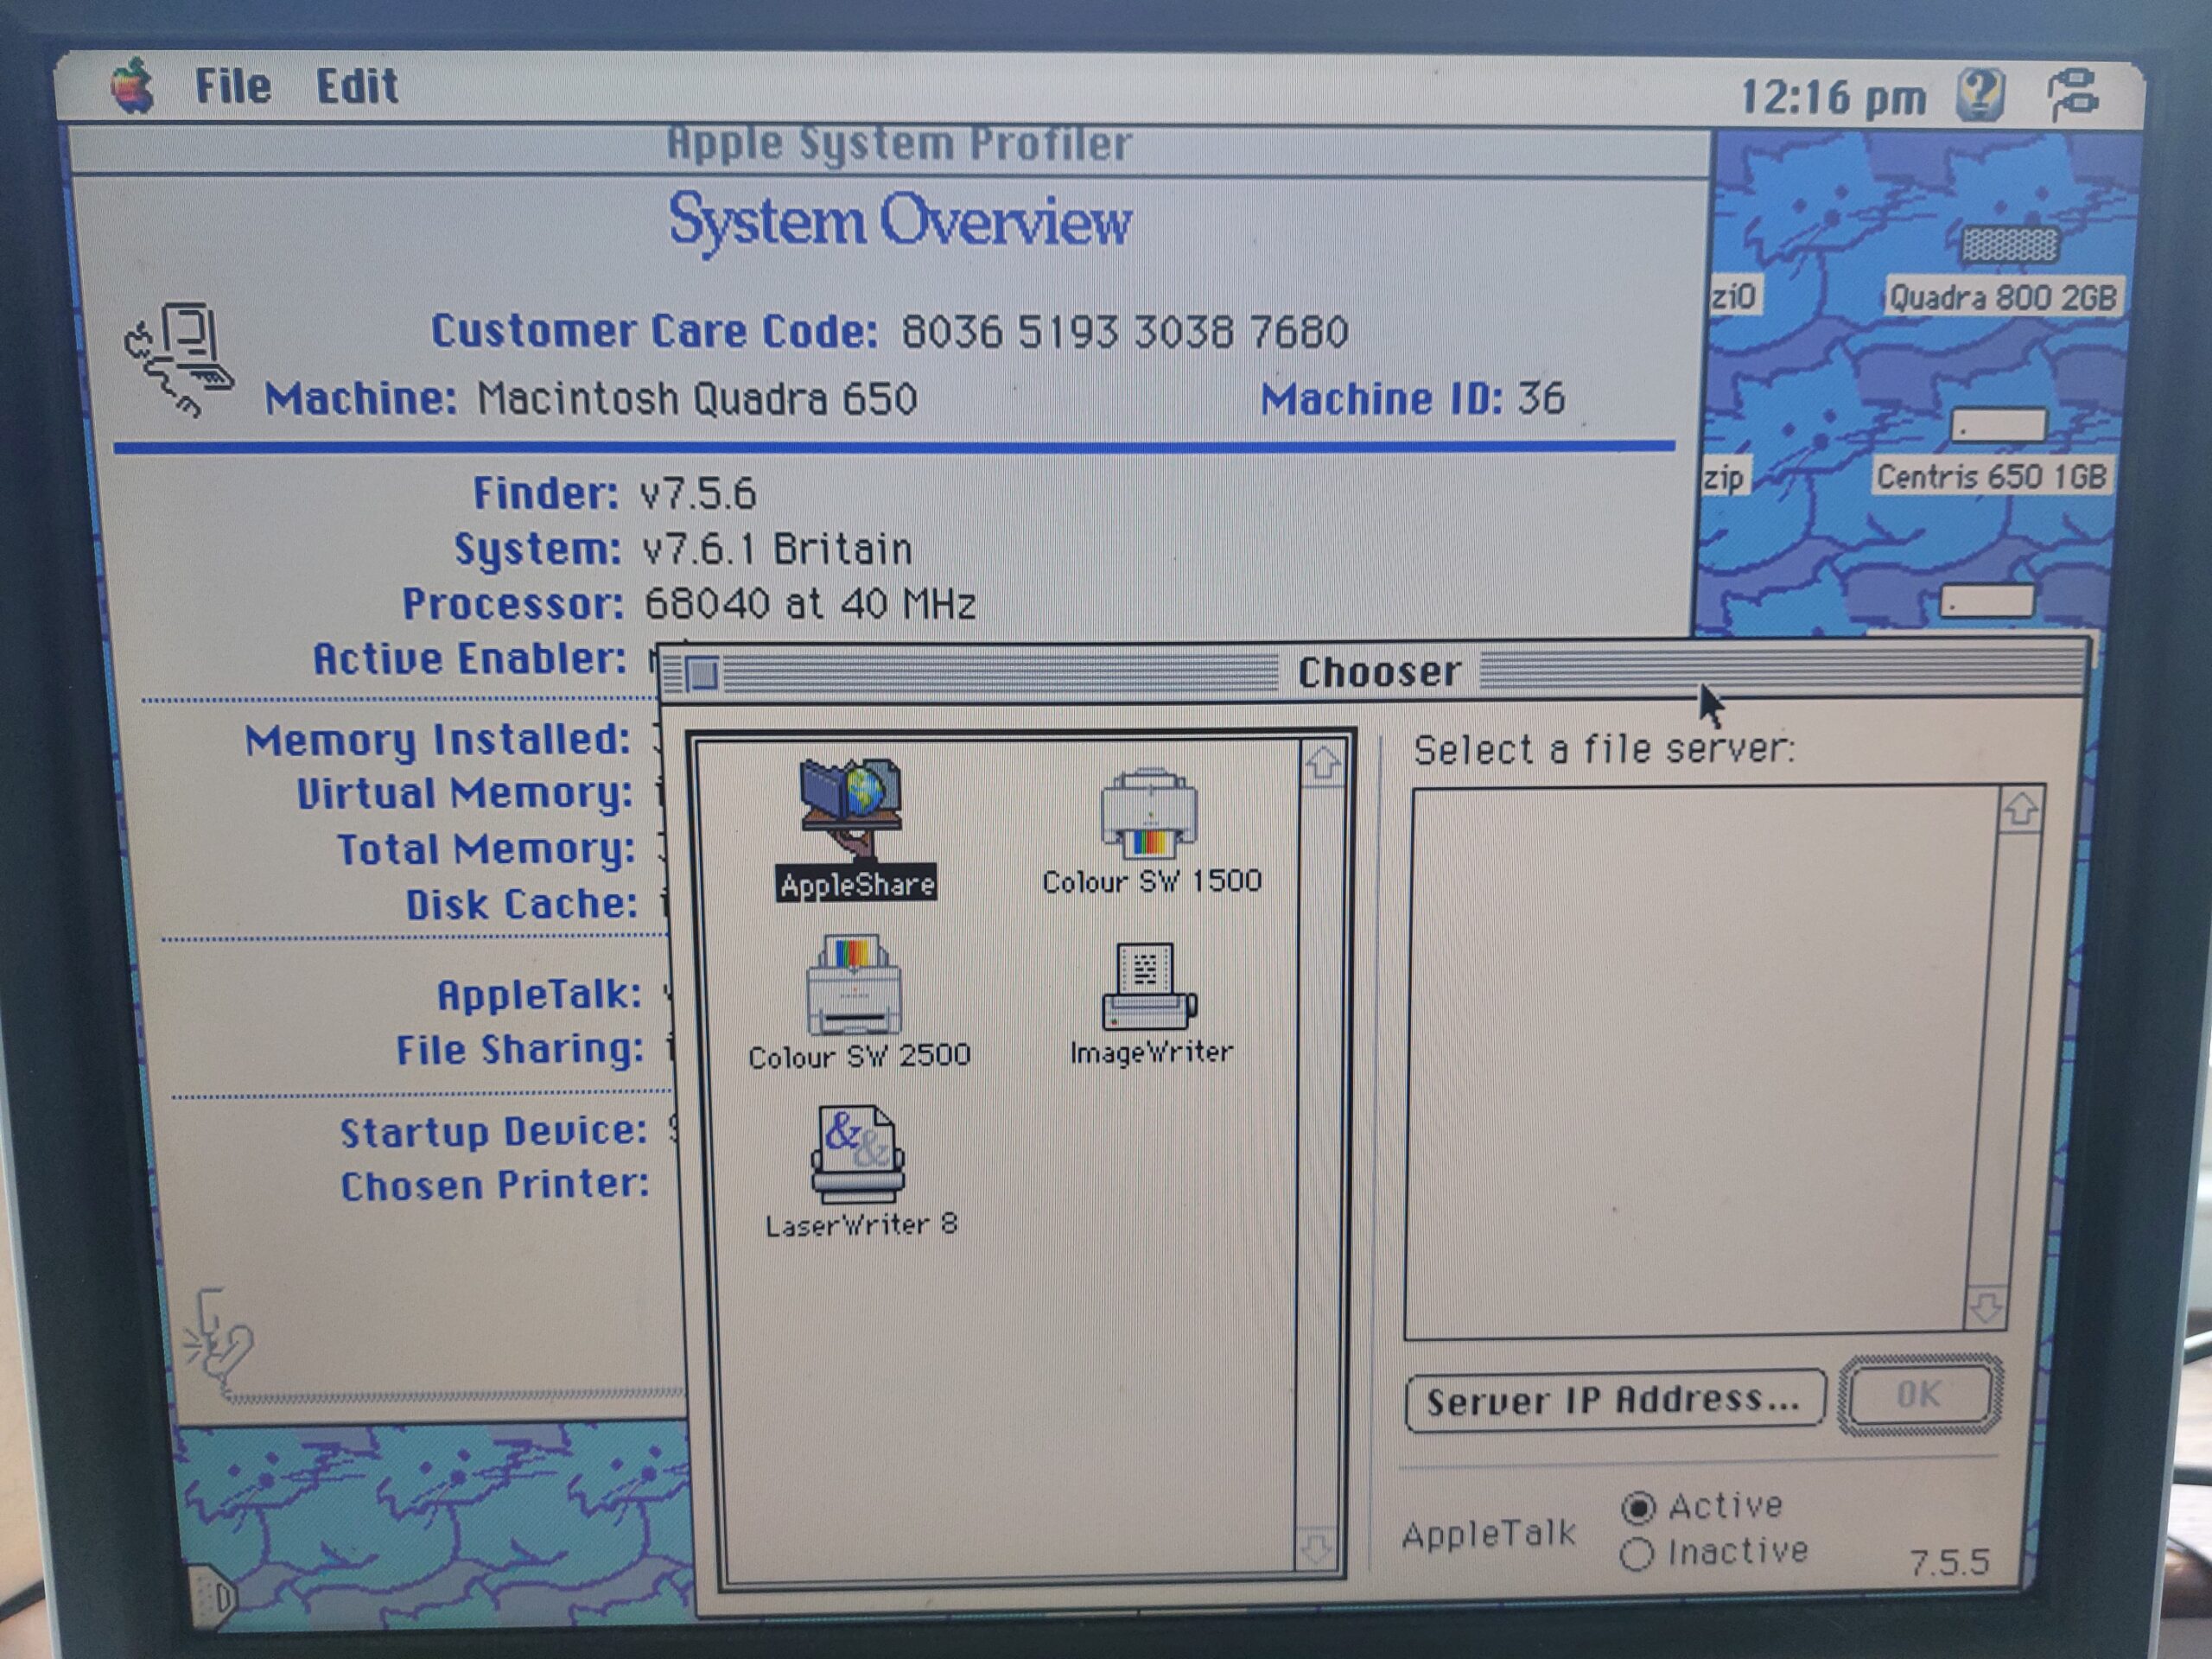
After ensuring the network is connected and AppleTalk is set up as described above, open the Chooser.
Select the AppleShare option, usually in the top left.
Click on the “Server IP Address…” button and in the dialog box that appears, enter the IP address or URL for the remote server you’re connecting to and click “Connect”.
Select “Guest” or enter the login details required for authentication and click “OK”.
At this point, if everything is successful, you should be presented with a list of available shares. You don’t need to click the checkboxes, they are only to save the servers so that they automatically mount at startup. To connect to a share, you just need to select it. You can select multiple shares by command-clicking.
Click “OK” and the remote share should mount on your desktop. Take things easy, especially if you are a long way from the server you have connected to as AppleShare is a little slow over the internet. Try to only do one thing at a time and consider how big a file or folder is before copying. Try to avoid getting info on folders containing a lot of files. Also, avoid opening files directly from the remote share – take a local copy first.
With my overclocked Quadra 650, I was able to get a little less than 1MB/s for transfers over a long distance. This is pretty good considering 10baseT is only about 1.2MB/s maximum, and has some overheads. I suspect the speeds I achieved are not much slower than I would get over a local network.
Preparing for an Incoming Connection
Turn on file sharing in the “Sharing Setup” Control Panel (moved to “File Sharing” on newer versions of Mac OS).
Turn off file sharing in the “Sharing…” option in the Finder’s “File” menu (moved to “Get Info” on newer versions of Mac OS) for all disks.
Create a new user in the Users and Groups Control Panel (moved to “File Sharing” on newer versions of Mac OS).
Create a shared folder and copy files you want to share into this folder.
Set the Sharing options for the shared folder so that it is read only for the user you created.
Optionally, create a drop box (a folder with write only permissions) inside the shared folder, or a guest folder (with read and write permissions) for people to upload their own files.
Log into your router’s settings page. Identify the IP address of your classic Mac.
Using instructions specific to your router, set up port forwarding to forward port 548 as TCP to the IP address associated with your classic Mac. Save and reset your router as required.
Security Suggestions
As AppleShare is an old and unsupported protocol, it is unlikely to be as secure as modern networking protocols. For example, traffic will be unencrypted and visible to anyone sniffing the connection. The following are a number of suggestions to improve security a little.
When you are not expecting incoming traffic, disable port 548 forwarding on your router. This removes a “hole” in your firewall and reduces the chance of someone stumbling on it, who might want to test your other security.
Don’t share with guest access enabled unless you are confident in what you are doing. Always set up a password protected user account for incoming connections.
Only share specific files you need to share, not whole disks.
Disable sharing when you’re not using it.
Ensure that you do not transfer private information over AppleShare.
Check that you don’t accidentally include personal information or files containing passwords / account details in the shared folder.
If you know how, consider setting up an SSH tunnel or VPN to transfer the AppleShare connection between local and remote sites. This will encrypt AppleShare traffic and shield transfers from prying eyes, although this will also make connecting more difficult.
So you’re thinking of buying a vintage Apple Macintosh Computer? Perhaps for the nostalgia, or maybe to find out what computing was like in the early, Wild West days?
This post is intended to help you decide what to get that meets your needs, but also as a warning. Buying an old Mac is like buying a vintage car – they are not maintenance-free and can be hard work and/or expensive, depending on whether you do the work yourself or pay an expert. Within the context of this post, a vintage Mac is considered to be anything that runs the pre-Mac OS X “Classic” Mac OS – i.e. System 1 through to Mac OS 9.2.2. This said, the post will not look further back than the Macintosh Plus as, due to their rarity, the original Macintosh (aka 128k) and the 512k and immediate derivatives are pretty specialist, as is the Macintosh XL.
I’ve split my original post into three parts as it was getting too long. The following Topics list covers the three parts, although Part 2 and Part 3 are currently still in draft form and not published.
Retrospectively – I’ve never posted parts two and three as this post just caused people to argue with me, something I didn’t expect or particularly enjoy.The same is true of the interactive database / buyer’s guide I was writing.
Topics
Part 1 – Introduction
Project Type
No work, just play
Maintainer – DIY (Got Skills / Learn Skills)
Restorer – DIY (Got Skills / Learn Skills)
What to Look For in Your First Vintage Purchase
What to Avoid in Your First Vintage Purchase
Mandatory Extras
Extras that are Nice to Have
Where to get Support
Part 2 – Common Issues – Cancelled
Capacitors
Batteries
Analogue boards and PSUs
Missing peripherals
Replacing hard disks
Bad floppy drives
CD-ROM Drives
Making boot disks
Moving data from modern computers
Part 3 – Vintage Mac Top Trumps – Cancelled
68k Compact Macs
Other 68k Macs
Beige PowerPC Macs
The Vibrant Era
PowerBooks and iBooks
Project Type
It is important to ask yourself before you buy your vintage Mac – what experience are you looking to get? I feel that there are broadly three main groups of people.
No work, just play – Those that just want to get the retro experience, as close to as it felt back in the day. That want to experiment with software or use the machine for distraction free productivity and not need to get their hands dirty. Those that want to buy something that Just Works.
Maintainer – This second group anticipate that a 30 or 40 year old computer will likely need some maintenance and either have electronics experience, or are interested in learning such skills. They would like to play with their purchase when it arrives, perhaps make some upgrades and are willing to do some soldering when needed.
Restorer – The third group are looking for a challenge. Willing to buy a non-working machine without having seen inside, and wont be disappointed whatever the condition of the insides when it arrived. The journey makes the experience, not the destination. I anticipate this group either have significant technical skills already, or are going to try their very hardest to learn them. Not shy of putting the hours in, or paying for some parts.
Group 1 – No work, just play
Users in this group must buy the right machine, in terms of model and condition to increase the chance that they will get a good period of use without critical failing parts. Alternatively, they must be prepared to spend a fair amount of additional money (possibly even as much as the computer cost) getting the machine restored as soon as it is acquired. Care must be taken as many eBay sellers list items as “refurbished” when what they actually mean is “cleaned”, which is absolutely not good enough in this scenario. Buying a vintage Macintosh in a condition that enables it to operate for many hours of use without intervention will likely cost a premium. Capacitor condition is primarily a concern for Macs from about 1988 to 1994 (at time of writing in 2024 – the end date is likely to move forward with time), but issues are not impossible outside of this time range.
When choosing a machine to buy the computer should…
Be of a type that is low maintenance (there aren’t many – see “Vintage Mac Top Trumps”).
Have a recapped logic board, or the logic board was fitted from factory with capacitors which do not leak.
Not have evidence of damage due to a battery leak.
Ideally, have a recapped power supply (PSU) and analogue board if applicable (“Compact” and AIO (All-In-One) Macs – models with a built in display usually have an analogue board).
Be guaranteed to be working on delivery – run a hardware test the day the machine arrives to test as many circuits as possible.
If possible, be available for local collection. The postage system destroys brittle plastics and CRTs and this gives an opportunity to meet the seller, and test before you buy.
Come with all the peripherals you need. On their own, items such as keyboards and mice can be surprisingly expensive, especially for the Macintosh Plus, or you want a more desirable keyboard. If you are buying a Macintosh with ADB ports, make sure the keyboard and mouse you are getting are ADB. Even though the connectors look similar, PS/2 and serial keyboards and mice are (almost) never appropriate for Macs that use ADB.
If you’re buying a computer that doesn’t have a built in monitor, don’t get hung up on CRTs, they’re unreliable, big, heavy, easily break during shipping and are surprisingly expensive. Instead, if buying a Mac that is older than approximately 1999 (at which point Macs changed to VGA and later DVI and ADC monitor connectors) invest in an adapter that converts from the (non-standard) vintage Apple video port to VGA. It is generally best to buy one that has ten dip switches as these provide the most universal compatibility. It is usually possible to use your vintage mac with an LCD from the early 2000s, although some have better compatibility than others with 1980s Macs. You can often get an old LCD for free by asking your company IT department very nicely, or asking your family and friends (“has anyone got an old LCD they don’t want” type Facebook post for example). The ideal LCDs have a 4:3 aspect ratio, and a resolution of 1024×768.
If buying from abroad, make sure you consider voltages before plugging your vintage Mac into a power outlet. Is this machine dual voltage? Is it set for the right voltage?
Things to ask the seller :
Get a high resolution photo of the logic board, share it on the 68kmla forum and ask the forum has it been well re-capped (if applicable), and is it in good condition.
What new parts were fitted during refurbishment? What repairs were needed? What type of capacitors were used?
Have they removed / replaced the original battery?
If you are planning to use floppy disks on a 68k era machine, have they serviced the floppy drive / drives? Does it boot from a floppy disk? On newer, PowerPC era machines, you shouldn’t be using floppy disks as they’re small and unreliable.
What tests have they run to verify functionality? It is recommended that tests are run using Snooper, TechTool Pro or Mac Test Pro (MTP).
How do they plan on protecting the computer during shipping (if applicable)?
Things to consider moving forward :
These machines are decades old, it is very likely they will have a failure, even quite soon after you purchase them, especially if you use them a lot. Almost nothing is irreparable and it most likely isn’t the sellers fault.
If you don’t plan on doing board level repairs yourself, you will need to budget to pay for repairs.
If you use the original style of 1/2 AA battery, or another battery that might leak, never leave a flat battery in the computer, and ideally replace batteries at least every 10 years regardless of condition. Many users run their vintage macs without a battery to avoid the risk, although this can be frustrating as the computer will forget a number of settings including the date and time, mouse speed and network settings every time you shut down.
Firms that specialise in repairing vintage Macs are few and far between, especially outside of the USA. Individuals with the skills are often reluctant to repair boards belonging to others because a single bad experience can be very painful when people are emotionally involved.
Don’t leave a vintage machine on for long periods unattended.
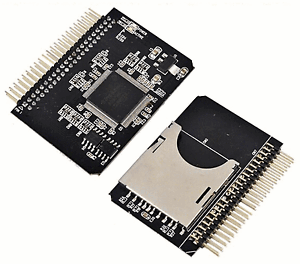
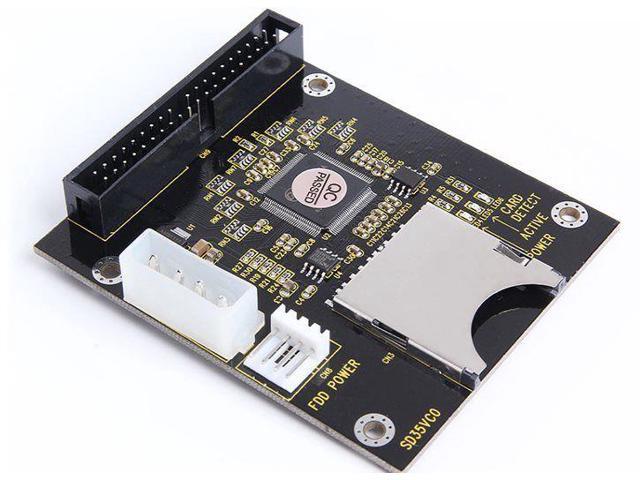
Backup everything onto a modern computer and make multiple copies. Don’t rely on vintage spinning hard disks, they will fail, and probably fairly soon. Buy an SD card or CompactFlash hard disk replacement adapter if your computer doesn’t come with one already. It needs to be SCSI compatible for most vintage macs. Ask for advice on the 68kmla forums.
How do you plan on moving files to your vintage Macintosh? It is often non-trivial and usually requires special hardware as well as understanding of file formats. A machine with an Ethernet port can be a wise choice, but the initial setup is often challenging.
It might be worth learning to do basic repairs yourself as this will save you money in the long run.
Things to ask yourself :
Are you really sure you want to get into this?
Have I experimented with an emulator to see if this is what I really want?
If you chose to buy a 68k Macintosh that has not been fully overhauled and has SMD electrolytic capacitors (they look like little tin cans), and it is a machine that suffers from capacitor failure (for example the very popular SE/30), you must, at the very least, replace any SMD electrolytics. This type of capacitor is universally failing in this age of computer, and leaking a corrosive liquid onto the logic boards of all Macintosh computers they were fitted to, at this point in time, up to about 1994 (today is 2024). The failing capacitors are not always immediately obvious when you look, but the damage they cause is expensive and difficult to repair. It is best to pre-emptively replace the capacitors before the computer actually fails. It will need doing at some point anyway, and not having to do trouble shooting and trace or chip repairs will save you a lot of time, effort and money.
Consider re-capping one of these age of computers to be like changing the oil in your car – you wouldn’t drive it until the engine failed and then replace the engine, that would be expensive. These components were not rated for 30 to 40 years of use, but it is not the fact that they are life expired that is the main issue, it is that the failure mode causes significant collateral damage.
Group 2 – Maintain
An individual in this group should expect to own a soldering iron and be comfortable dismantling equipment that was often designed to be slightly difficult to dismantle. They may not already have the skills required, but be willing to learn some skills as they go.
Be aware – we all lift the occasional pad. These boards are old and damaged by electrolyte, don’t worry about it, just repair it and keep going. While people online give the impression that they never make mistakes, it isn’t the reality, its just that people tend to feel sheepish about such things when they happen and… sometimes don’t mention it.
Make sure you buy a machine that is shown to be working and run hardware test software such as Mac Test Pro as soon as you get your hands on the machine. You should not buy without having seen detailed photos of the logic board (especially the sound circuit area which usually has a cluster of capacitors if you’re buying a 68k Mac with “tin can” electrolytics, and of the battery area on any vintage Mac). Don’t buy a machine if the battery looks like it has leaked, or if there is dark staining in the dust around groups of “tin can” electrolytic capacitors. Especially if there is any green on component legs, but even if there is a significant grey buildup that blurs the distinction between chip pins. A machine with these symptoms may need more than casual work.
If your purchase is a 68k mac, you should start working out what you need to do to recap the logic board if it has “tin can” SMD electrolytic capacitors as soon as possible. I recommended that you recap the logic board within the first week if at all possible. Analogue boards and power supplies are less critical in that they don’t usually cause collateral damage (IIsi aside which has a self destructing power supply – I’d actually recommend not buying a IIsi unless you know what you’re letting yourself in for), so I suggest only recapping these based on condition – i.e. if they stop working or the voltage is way off etc.
Generally avoid the… LC, IIsi and Classic… as these are often in the worst condition of any macs. The SE/30 is also often in bad condition, but as these are a more desirable machine, it might be worth the struggle!
Tools it is worth having include… a 50W or higher soldering iron (higher for early Mac II family machines, or if you plan on removing ports. A pair of needle nose pliers for removing capacitors (brutal, but the “twist method” does seem to cause the least amount of damage to boards, counter-intuitively). Pre-fluxed solder wick. No clean flux. Either a fibreglass abrasive pen… or if you’re cheap like me, a little bit of broken PCB for removing the solder mask when doing trace repairs. A scalpel for cutting thin wire and gently prodding pins that you suspect might have come free from their pad. Some very fine enamel wire, with a “solder through” insulating coating.
Other things that may require maintenance are…
Clean and re-lubricate the floppy drive
Clean the CD drive laser
Recap the CD drive
Clean the mouse ball and rollers
Backup the hard disk before it fails
Group 3 – Restore
An individual in this group either has extensive repair experience, or is appropriately determined to take on many hours of challenges, setbacks, skill development and occasionally sheepishly buying a replacement part.
I recommend that if finances allow, try to get a working machine as this minimises (but doesn’t eradicate) the need for repairs. I consider a machine that can show the flashing question mark to be “effectively working” because disk failures are a matter of course.
Beware of logic boards that have been cleaned – if a board looks spotless, be suspicious, unless it has a very good reason to be so (reproduction, or a New Old Stock board that was stored very, very well). Try not to hand over two much cash without seeing the logic board first, especially the battery holder location. Battery damage from a leaking battery tends to be severe, but localised to where the gunk spread. Don’t buy a machine where the battery gunk has spread over a custom chip (usually branded “VLSI”) as you pretty much have to buy another board to get a replacement, even if you’re comfortable desoldering and soldering QFP parts.
Be on the lookout for, and do not buy, machines that are a collection of bad parts. Some sellers have been assembling a tidy machine from multiple ones for themselves, and will have put all the worst parts in one box. This type of purchase is a nightmare to work on because compound problems mask each other. Additionally, they are often extremely expensive in parts to repair (more expensive than buying a better machine). The exception to this is if you know and trust the individual.
Generally I’m also reluctant to buy machines photographed on a professional electronics repair workbench that are listed as not working, or worse, “untested”. Remember, the best “not working” purchases are from people that haven’t already been through it checking for an easy fix, and taken out all the cards, swapped in a bad power supply, a bad floppy drive, kept the hard disk and put their most yellowed lid on it. A computer listed as “untested” clearly sat in on an electronics test/repair bench is pretty suspect.
With respect to capacitor electrolyte damage, pay attention to the area around the sound circuit (there is usually a cluster of aluminium SMD “tin can” capacitors in this area). Look closely, no, closer, almost, now a little closer. Now get a light and a eye loupe and look closer again. You can never fully see any damage in photographs, it is even hard to see in real life, especially as sometimes it hides under other components. I feel that many people don’t know what they’re looking for and a large number of people claim “no corrosion” when there is clearly visible capacitor related corrosion on a board. Corrosion is often just minor discolouration and not “rust” or green fuzz.
The fastest way to identify leaking capacitors is to look at the solder pads that peek out from under the aluminium “tin cans” of the SMD electrolytic capacitors (if fitted) and legs of chips that are near the same capacitors. While it is rare and almost impossible to find a 68k mac fitted with SMD electrolytic capacitors which has absolutely no corrosion at all, it is worth considering how far along the following scale from fresh (shiny) to pins about to fall off (black or green).
Shiny – Dull Grey – Dark Grey – Green Furry and/or Black
Generally, green furry and black are a bad sign and a significant amount of repair work will likely be needed. Dull grey is the norm these days. It is common to need to make at least one trace repair on most 68k macs fitted with the “tin can” style electrolytics.
Whether it is working or not, if you buy a 68k Mac with “tin can” electrolytic capacitors, it is strongly (extremely strongly, I’d force you if I could) recommended that you recap the logic board within the first week. Analogue boards and power supplies are generally less critical so I suggest only recapping these based on condition – i.e. if they stop working or the voltage is way off etc.
My main advice is don’t overpay for a broken machine no matter what your skills are. If the seller doesn’t show inside a machine that is trivial to open (especially when you can see they haven’t even bothered to put the lid back on properly in one of the photos), assume the worst. If the seller says “untested” it usually means “turned it on and it didn’t work”. If they say it “turned on” it means that the fan started, but doesn’t mean it chimed.
Generally it is good to know what you’re getting into, so buying a machine from another hobbyist can be a good move. Frequent faces on forums tend to be much more honest about what is wrong with a machine they are selling, for example “It wont power on, but I tried it with another PSU and it chimed, so while I’m not promising the logic board is perfect (it needs recapping!), the fundamental issue is the PSU. I’ve included a spare logic board for parts, the floppy drive is missing and you’ll need a keyboard and mouse”… instead of “Vintage RARE mcintosh, signed by Steve Jobs?! Untested. I know what I got. $2000”, to paraphrase Facebook Marketplace.
What to Look For in Your First Vintage Purchase
Does it work?
Is it affordable?
How much more will I likely need to spend after the fact? (Now double it).
Does it need to be, and has it been recapped, and to what extent?
Does it have the required stock parts like the ROM if applicable, or for example, a card of some description in the PDS slot in the case of the PM 7100 and 8100.
Does it have all the required peripherals? (keyboard, mouse, hard disk).
Are the peripherals the correct ones for the computer?
Does it run a version of the software you are interested in?
Are they available in your local area? Collection saves money and reduces shipping risk.
Does it have enough RAM for your purposes? Some types of RAM can be quite expensive.
Does it already have an SD card adapter or Ethernet card that might save you money in the future?
It should be remembered that while most people looking to get into the hobby dream of having a compact mac with a 9″ black and white screen, these are often the least flexible of vintage macs, and some, like the SE/30 and Classics are difficult to maintain, expensive to upgrade and are restrictive with respect to what software they can run. To counter this, machines from 1995 onwards are massively more powerful, more expandable, and are easier to transfer files to, but will still run almost any software from about 1987 onwards. At the same time, these later machines often cost significantly less – at the moment, G4 era machines (2000 to about 2004) sell at very low prices in the UK and are sometimes even given away.
What to Avoid in Your First Vintage Purchase
Spending too much on junk that doesn’t work. Many sellers don’t consider whether their machine works or not, so the difference in price between a working machine and a broken machine is significantly less than the cost to repair the broken machine.
CRT Monitors. They actually get in the way of enjoying the hobby!
For your first purchase, I’d recommend avoiding the popular SE/30, Classic, Classic II, LC and LC II. These are often perceived as desirable for this situation, but they’re actually quite difficult or expensive to keep running.
Shipping long distance with courier firms that have a bad reputation for how they treat packages. Your computer should be packed to withstand an 2.5 metre (~8′) drop… upside down.
Don’t go wild with how much RAM you install. 68k Macs perform a memory test on power on, and this can take a long time if you max out the RAM on some machines. Apple designed some of their computers to take absolutely crazy amounts of RAM. The IIci which shipped in 1MB or 4MB configurations, can take up to 128MB of RAM. If you fit this much RAM in a IIci, it will take approximately 2 full minutes to perform the memory test, during which time the computer will sit with a blank screen and you might be mistaken into thinking that it isn’t working. Additionally, there are complex rules about how memory is fitted that change machine to machine. Some can take individual DIMMs, so have to be upgraded in pairs, and some in groups of four. Additionally, which slots can be left empty and which filled first can be critical. Read the manual on RAM upgrades.
Mandatory Extras
Assuming you already have the Macintosh computer, keyboard, mouse, required cables and a compatible monitor you intend to use, the following subsections cover things that you will require to get use out of your vintage computer.
Transferring Files
You will need a method to move files from modern computers to your vintage Mac. Even if you have Ethernet, you might need to get software onto the Mac in the first instance, to use Ethernet on a modern network. Tools which you might find useful include…
A SCSI / SD Card adapter such as the GBSCSI2, MacSD, SCSI2SD, RaSCSI, ZuluSCSI, etc.
If your Mac has an external floppy port, you might consider a FloppyEMU from BMOW.
The AirTalk can be used to network a vintage Mac to an emulated mac.
If you have a SCSI CD-ROM drive, and a modern CD writer, you may be able to write CDs of software you need.
It is possible to write 1.44MB Mac formatted floppy disks from PCs and newer macs, it is very difficult to write 800k floppy disks from a modern machine. 800k floppy drives were used in the Mac II, some Mac IIx and SE machines, and the Mac Plus.
You do not need all of the following, but at least one, appropriate for your specific needs, is going to be necessity.
From the Power Macintosh 7200 onwards, Macs targeting professionals included a modern style 10baseT ethernet port. This was not true of most similar era consumer macs such as the 6500. From the G3 era onwards, most if not all Macs have an ethernet port.
While some G3s and G4s support wireless networking, the Classic Mac OS does not support modern WiFi security protocols (even WPA2, the minimum requirement for most modern networks) and so can not be trivially used on a modern network. Do not turn off your wireless security for the sake of convenience – you never know who might connect and what they might do using your internet. You do not want to end up in court defending yourself just because you turned off security to move a game and someone did something… extremely nasty… over your internet.
Connecting to a Monitor
If your vintage Mac doesn’t have a built in screen, you will likely need to connect to a monitor. While some people enjoy the retro experience CRT monitors bring, I personally don’t, because their inconveniences get in the way of enjoyment. I would recommend avoiding them unless you really, really want one. If you are concerned about appearance, there were early LCDs made in appropriately coloured plastics which look really nice with a vintage mac.
However, if you are planning to connect your Macintosh to a VGA monitor, you need to be aware that almost all beige Macs with video out do not use the VGA standard connector (the first Macs with external video pre-date VGA, so it pretty lucky that adapting to it is as easy as it is). To connect a VGA monitor you will need a special Mac video port (15 pin DSub) to VGA adapter (15 pin HD DSub). The best ones to get are the ones with ten dip switches, as they are compatible with the most machines. The adapters with no switches at all tend to work well with Macs built post circa 1993, but often don’t work with older macs.
Macintosh Video to VGA Ten Dip Switch Adapter
Extras that are Nice to Have
Additional items which might be worth additionally buying, or might sweeten the deal if provided with a purchase might include…
Useful spare parts such as a PSU, CD-ROM drive or logic board.
External drives such as a CD-ROM drive, CD Writer, Zip, Jaz or MO drive.
Processor Upgrades or L2 cache cards.
A comfortable amount of RAM.
Original software on disk.
Original Manuals for the computer, peripherals and software.
Creating a Disc Image of a Classic Mac OS Bootable CD
The most important thing when making bootable disc images is to test them. After you create your disc image file and before you upload it anywhere, make sure you burn it back to a CD and test it On Real Hardware. If you do not have an appropriate vintage computer, speak to a friend that does. There are so many mistakes that it is possible to make that in a recent review, approximately one third of images uploaded to an archive page had been rendered un-bootable in some way. While testing takes a little time, it is nothing compared to the time a bad image wastes for dozens of users downloading it, to say nothing of the frustration it causes new users who may not have the experience to realise what the issue is.
NOTE – If your source CD contains true multimedia (for example, data and CD Audio, like many game CDs from the 90s), you very likely will need to create a bin + cue image of the source. I’m aware that a lot of people don’t like these, but sadly, there is no alternative that I know of. Genuinely, bin+cue isn’t a superfluous format designed to annoy you, it has a specific purpose and some CDs can not be properly burnt to new discs without it.
Classic Mac OS
Toast
Warning, this method likely very slightly modifies the CD, but other methods, using other options within Toast, will significantly modify the original content of the CD, rendering them less useful or even unbootable on any system, so this is the best you’re going to get! Do not use the “Mac Volume” option!
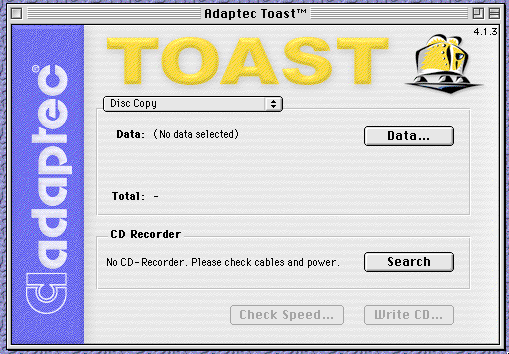
Launch a copy of Toast in Classic Mac OS, I’m using Toast 4.1.3, running on Mac OS 7.5.5 as an example.
Select “Disc Copy” as the operation type in the window. Then click the “Data…” button and select the disc you want to copy.
From the File Menu, select “Save as Disc Image…”. Save the file, conventionally as a “.toast”, but this file can actually be treated as a “.iso” file by many good CD burning programs.
Current macOS
NOTE – You will need an external optical drive as recent Macs do not come with a built in optical drive.
With a GUI
Disk Utility
Warning, this method likely very slightly modifies the CD. If a better alternative method is known, please propose it and I will add it here.
Launch Disk Utility, select the disc (not the partition – you must select the top level of the device you are trying to copy). Then select “Image From <device name>…” from the File menu.
Under the “Format” popup menu, select “DVD/CD Master” and ensure that no encryption is applied. Navigate to where you want to save, enter an appropriate file name and click save.
The resultant “.cdr” file can actually be treated as an “.iso” and can be renamed and burnt with many good CD burning programs.
AARU
I am not familiar with this software, but it can apparently also produce a good disc image.
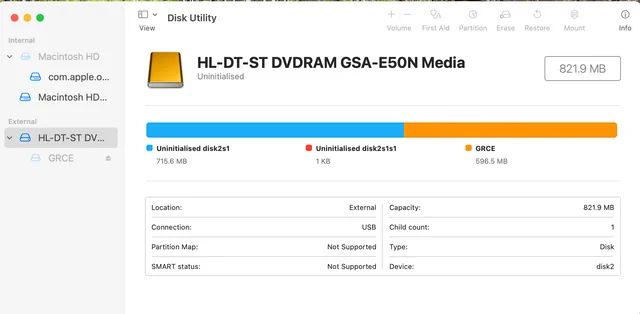
To save a disc image of your CD to your desktop, first you need to work out what the Operating System calls your CD Drive. To do this, launch Disk Utility, and click on the optical drive top level.
This will display some information about the drive, including, as shown above, in the lower right hand corner “Device”, which is in the example given “disk2”. This is your Device Name.
Alternatively, this information can be obtained by typing “diskutil list” (without the quotation marks) and pressing enter in a Terminal window and identifying the optical drive by its description. There will usually be an entry for “disk#” where # is a number, and then a number of additional entries with the same name, followed by “s#”, again where # is a number. Each of these additional entries are partitions on the disk. What we want is the top level name, so the one in the format “disk#”. This is your Device Name.
In a Terminal window, type “cd ~/Desktop” (without the quotation marks) and press enter. This will change the current directory to the desktop folder of the current user. Then, very carefully (making sure that there isn’t already a file called “cdimage.iso” on your desktop – if there is, you can change the filename in the following command (it is generally best to avoid spaces to keep things simple)), using the Device Name obtained above in place of the text “<disk#>”, enter the following command :
dd if=/dev/<disk#> of=./cdimage.iso bs=2048
This command will copy the “if” (input file) to the “of” (output file) with a “bs” (block size) of 2048 bytes. This should give us a nice pure and unadulterated disc image of the CD.
dumptoiso
I’ve not tested this script, but the following has been designed to simplify the process with dd :
In older versions of Mac OS X, it is possible to use methods similar to the “Toast” instructions given for Classic Mac OS, or for “Disk Utility” for current macOS, with minor interface differences.
Command line instructions remain effectively identical to current macOS instructions above when using dd in older versions of Mac OS X.
dumptoiso, linked above, also works back to 10.3, if not earlier.
Linux
With a GUI
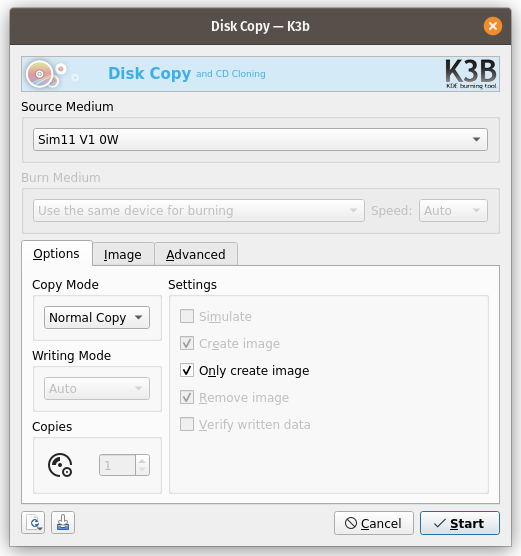
Install the application “K3b”.
Launch and select the “Copy Medium…” option from the “Tools” menu.
Verify the correct drive is selected in the “Source Medium” popup menu, make sure “Copy Mode” is set to “Normal Copy”, and check the “Only create image” checkbox.
Switch to the “Image” tab and enter a filename and path.
Click “Start”.
You should now have a disc image of your CD saved at the location you selected. When burning Mac HFS images from K3b it will complain that it does not recognise the format. Don’t worry, just dismiss the dialogue box and continue.
With the Command Line
To save a disc image of your CD to your desktop, first you need to work out what the Operating System calls your CD Drive. To do this, you can launch you disk management application such as gparted or “Disks”.
This will display some information about the optical drive, including the “Device” path, which on my computer is “/dev/sr0”. This varies more on linux than on other platforms, depending on the flavour of linux you run. This is your Device Name.
Alternatively, this information can be obtained by typing “df -h” (without the quotation marks) and pressing enter in a Terminal window and identifying the optical drive by its description. If there are multiple partitions mounted, what we want is the top level name. This is your Device Name.
In a Terminal window, navigate to the location you want to save your disc image. Then, very carefully (making sure that there isn’t already a file called “cdimage.iso” at the location – if there is, you can change the filename in the following command), using the Device Name obtained above in place of the text “<device>”, enter the following command :
dd if=/dev/<device> of=./cdimage.iso bs=2048
This command will copy the “if” (input file) to the “of” (output file) with a “bs” (block size) of 2048 bytes. This should give us a nice pure and unadulterated disc image of the CD.
Windows
ImgBurn
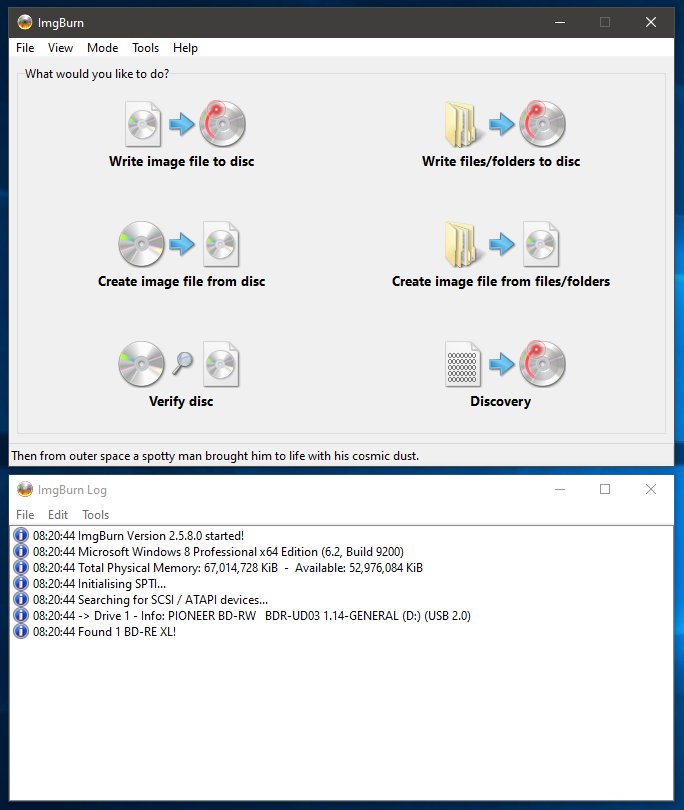
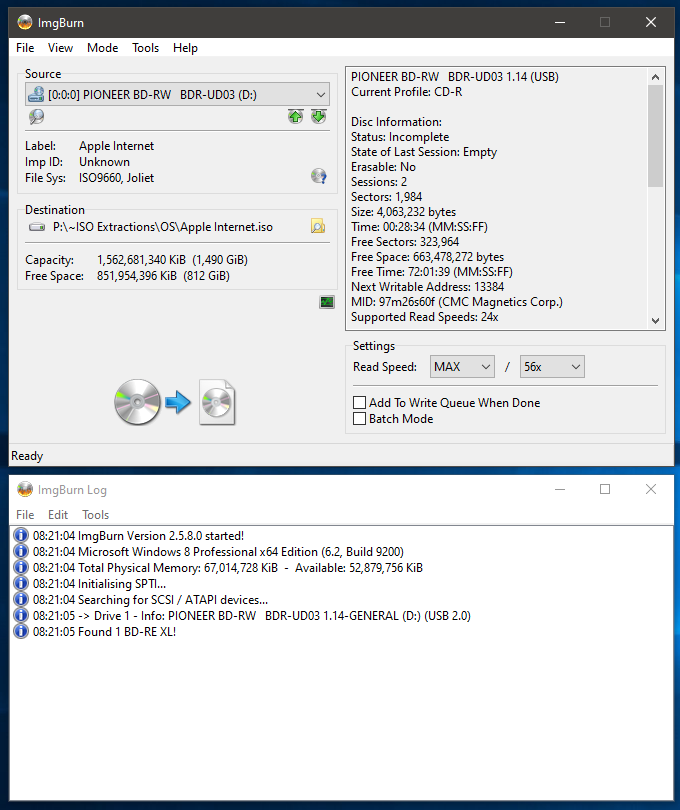
After installing ImgBurn, launch the application and select “Create Image file from Disc”.
Insert the disc you want to copy and select a destination.
Click on the CD to file pictograph / button (that doesn’t look one bit like a button, and shown below for clarity) and ImgBurn will create your disc image.
The display will change to show progress and a message appears on screen once the process has completed.
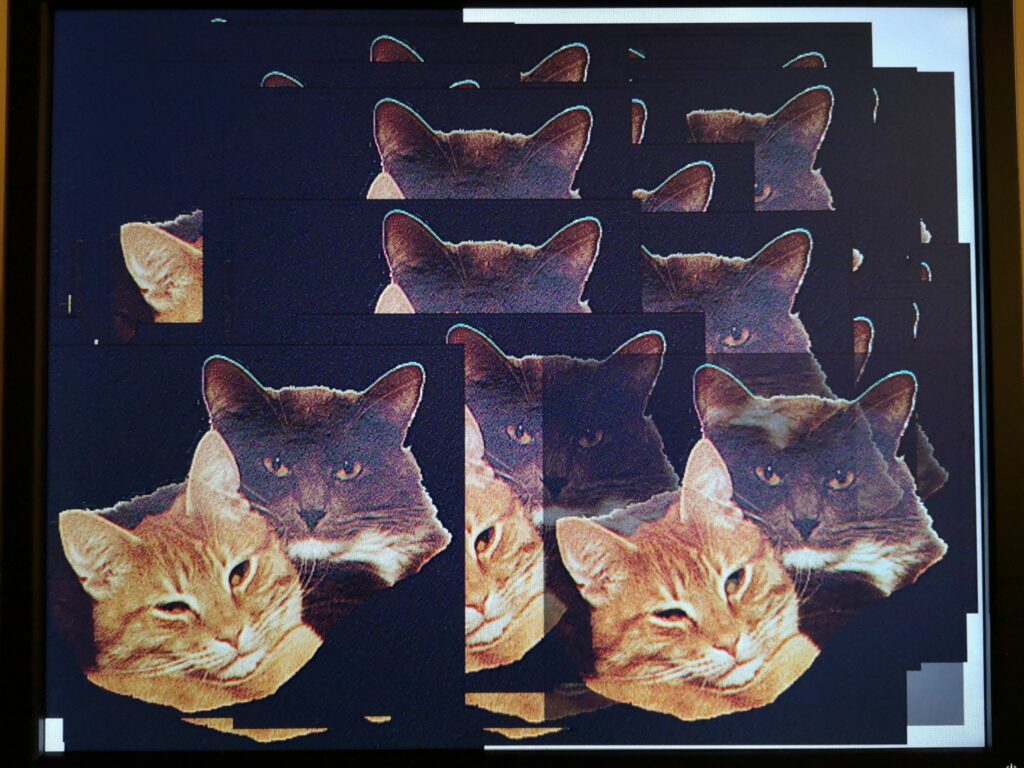
There are a number of classic Mac OS benchmarking tools available. Different ones have various benefits and personal preference is a major factor in choice. I’ve always used Norton’s System Info, which is provided as part of the Norton Utilities suite for Macintosh. I believe that it was first included with version 3 of Norton Utilities, but I need to verify that. As a kid, this was simply the only benchmark we owned, I like that it makes it clear what it is doing to benchmark (tests are named for the low level function that is being tested, often Macintosh Toolbox routines), and it uses a photo of two cats for the graphics tests that is clearly just a photo of a programmer’s pets. Its not even a very good photo, but this little human touch cheers me up every time I see it, and that’s worth a lot.
Lots of Norton Cats
System Info requires System 7 to run, and so an alternative benchmarking tool such as Snooper would be needed if you are running System 6. The newest versions of Norton Utilities claim to need Mac OS 8.* but it isn’t actually true.
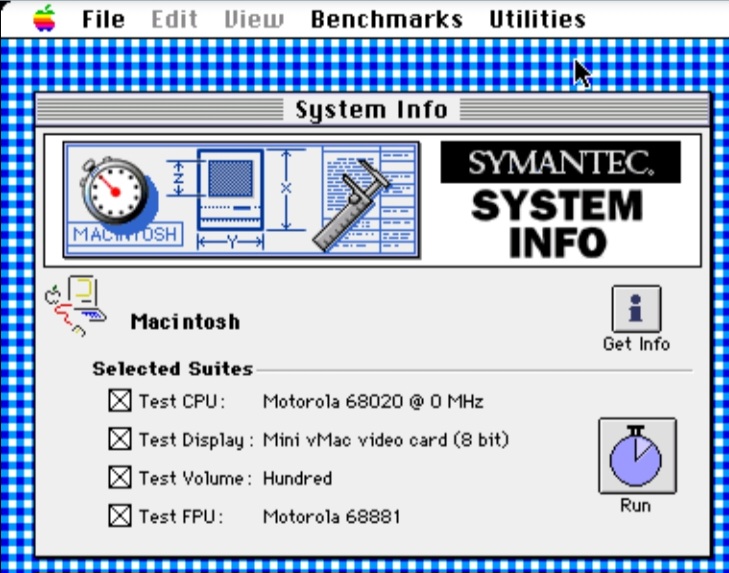
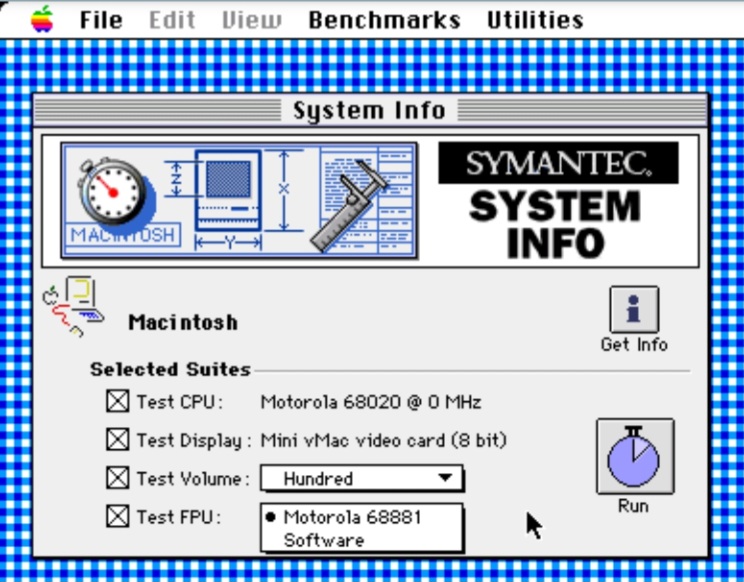
Over time, there were few obvious changes within the System Info application. Included benchmarks and System used as the baseline (100 in tests) varied through time. I… think it started as the SE, but haven’t seen this version lately… but more common versions were the Quadra 700, and later the Power Macintosh 6100/60. The following shows System Info’s default window on launch. Later versions show a splash screen while launching, earlier versions did not.
Norton System Info Default Window
Features include
Native 68k and PPC support.
An extensive collection of included benchmark results files for both stock and some accelerated Macintosh computers.
Top level CPU, 2D (Quickdraw) graphics, disk and FPU scores.
Ability to select PPC or emulated 68020 performance on a PowerPC, and physical or software FPU where available.
Ability to select which video card and which disk.
Advanced mode which shows more detail during tests, and gives more detail in results. Graphical and tabulated results available, with the ability to show tabulated results in relative or absolute terms.
Results can be easily shared as saved individual files for each test run.
A detailed description of the computer and settings automatically saved with the results file.
Warns about some system settings which may impact performance, such as AppleTalk, Virtual Memory, video bit depth and Disk Cache.
A tiny application.
Ability to export tab separated values (TSV).
Disadvantages
New users don’t notice the need to enable advanced features and assume the tool is more simplistic than it is.
As is often the case, the performance benefits of a relatively small cache are possibly exaggerated as the tests seem to be repetitive and fit within the cache (difficult because caches give significant real world advantages, but not in all instances).
Tests are very much function based and not representative of real world activities.
Graphics tests are only QuickDraw 2D, and don’t include any QuickTime, RAVE, QuickDraw 3D, Glide or OpenGL tests.
Not scriptable?
The CPU speed shown in the main window in MHz isn’t always correct, especially if the accelerator is only enabled during boot, or is able to change speed.
Tips and Tricks
Even if the version of Norton you’re using is too new for the computer you are using, if you go into the “Norton Tools” folder and run “System Info” from there, it will launch in most circumstances, as long as you have System 7 or newer.
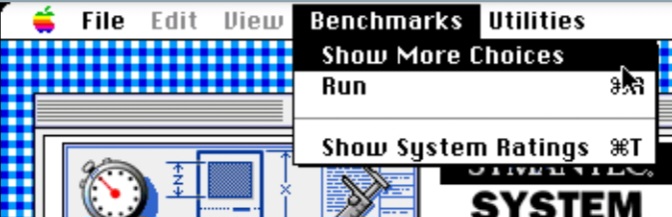
To enable advanced options within the software, select “Show More Choices” from the “Benchmarks” menu. This provides a number of additional drop down menus for fine tuning and seeing results in a greater level of detail throughout the application, as well as some additional menu items.
Selecting Show More Choices
System Info Default Window More Choices Shown for Volume and FPU, With the Latter Selected
Note that generally, the higher the video bit depth you run, the slower graphics performance will be, except where acceleration is only provided at higher bit depths. It was fairly common for video cards to not provide acceleration at bit depths below 8bit, and a small number of cards only provided 24bit acceleration.
Screen resolution doesn’t appear to have a significant impact on video scores for many machines, although running at 640×480 is probably best to ensure consistency with built in benchmarks. This said, Computers that use main memory as VRAM like the IIci, IIsi and 6100 can see significant CPU performance changes depending on video settings.
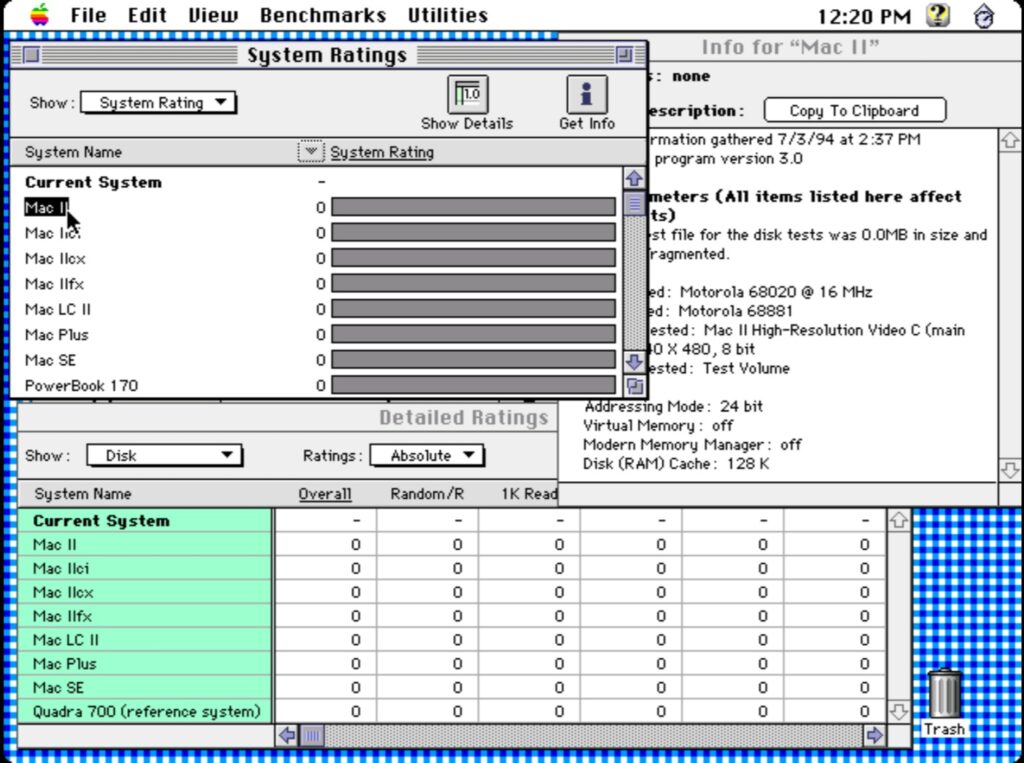
When in the “System Ratings” window, selecting a system from the list and clicking the “Get Info” button (see image “All Results Windows” below) will show a description of the system the benchmark was performed on. Details are given of both hardware, software and some system settings.
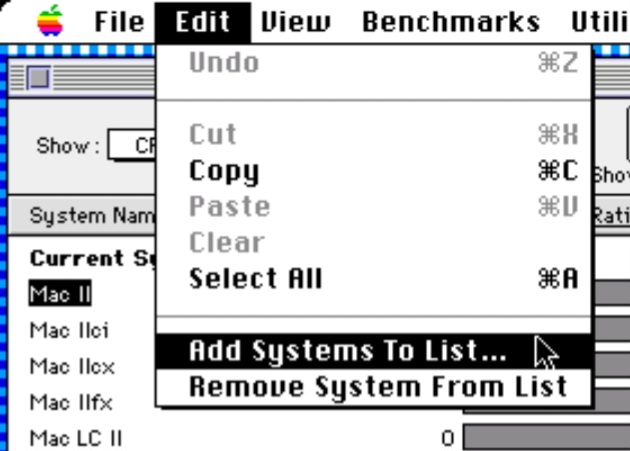
Additional results supplied, but not shown by default, can be added to the various results windows using the “Add Systems To List” menu item from the “Edit” menu.
Add Systems To List
Running a Test
Use the “Selected Suites” checkboxes to enable and disable each of the CPU, video, disk and FPU test suites and if in advanced mode, select between the real and emulated CPU, video card, disk (in reality, the list given is mounted partitions) and FPU or software. Not all of these options will be available at all times, depending on the computer under test.
Once the options are as desired, click the “Run” button. Note that at this point Norton will inform you of any System settings it has detected which will impact the scores and which it thinks you should change. Unless you’re doing specific testing, such as comparing 24bit mode between video cards, it is generally advisable to follow this guidance. A restart may be required for some changes (for example, disk cache, and AppleTalk on some System versions).
After this the tests will start. Depending on the performance of your computer, they may take quite a few minutes to run, especially the disk tests. In the advanced mode, you will be given greater detail of what test is currently being undertaken and what each test scores. This can help with the boredom of waiting for the tests to complete.
Once the benchmarks have completed, System Info automatically opens the System Ratings window, and lists the tests just undertaken as “Current System”. It is probably a good idea to save the results at this point if you plan to keep them for comparison.
Reviewing Results
All Result Windows
Note – the screenshot above incorrectly shows zeros for all results. This is an oddity of running the software within some emulators. Something I did for convenience when getting screenshots. On real hardware you will see actual scores for your and other computers.
Viewing Overall Rating / Test Category / Individual Tests
At the top left of the “System Ratings” window, there is a pop-up menu labelled “Show”. This allows you to select each of the four test categories, CPU, Video, Disk or FPU, as well as the default overall summary “System Rating”. The numbers to the right of each system name represent a score, relative to the baseline system (e.g. scaled where a Quadra 700 equals 100, or a 6100/60 equals 100 etc. dependant on the version of System Info you are using. The baseline system is identified in the list by the text “(reference system)” following its name). The bars to the right of these numbers (ordinarily) vary in length and graphically represent the score for each system.
If all tests were not run, the Current System will show as a dash “-” for the tests which were not completed, as well as for the overall “System Rating”.
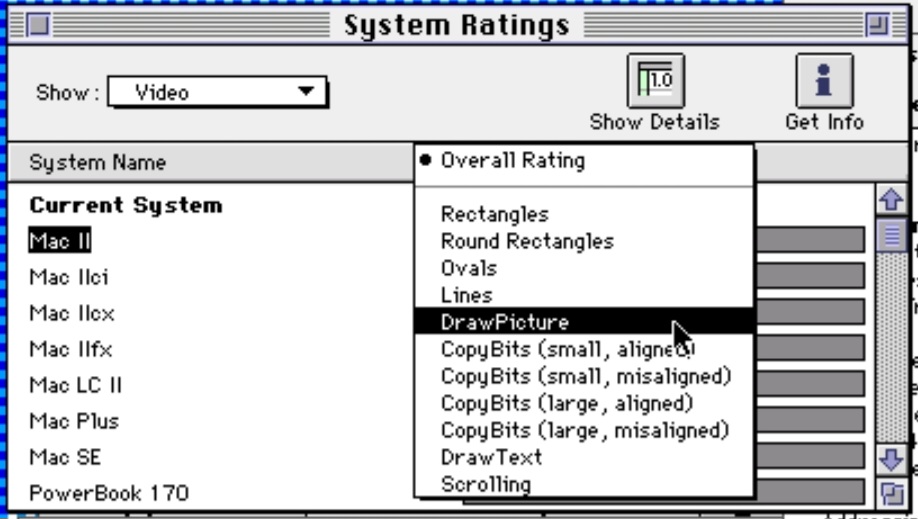
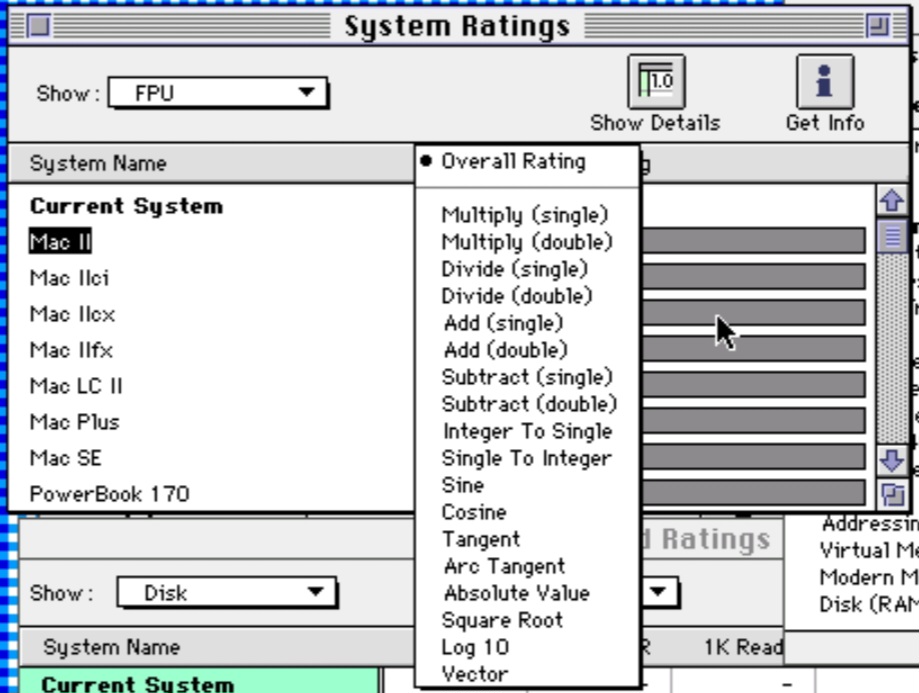
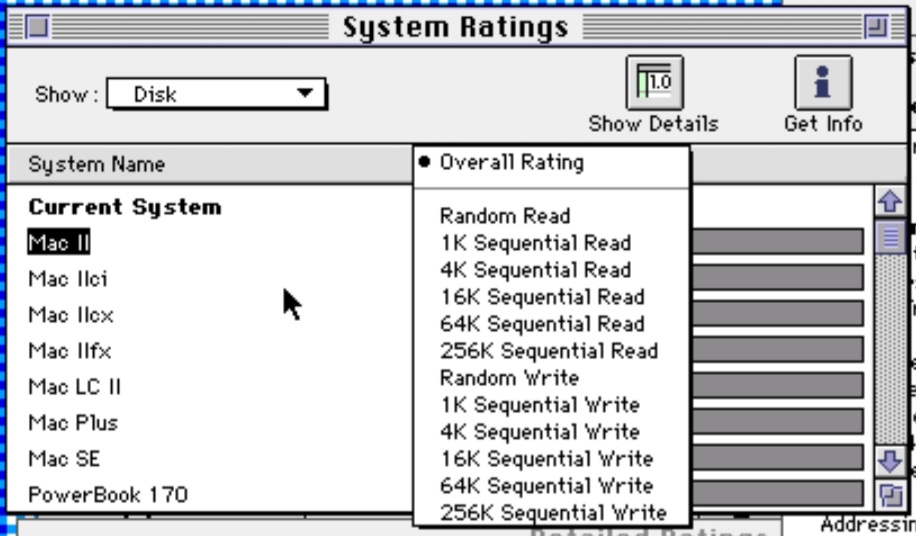
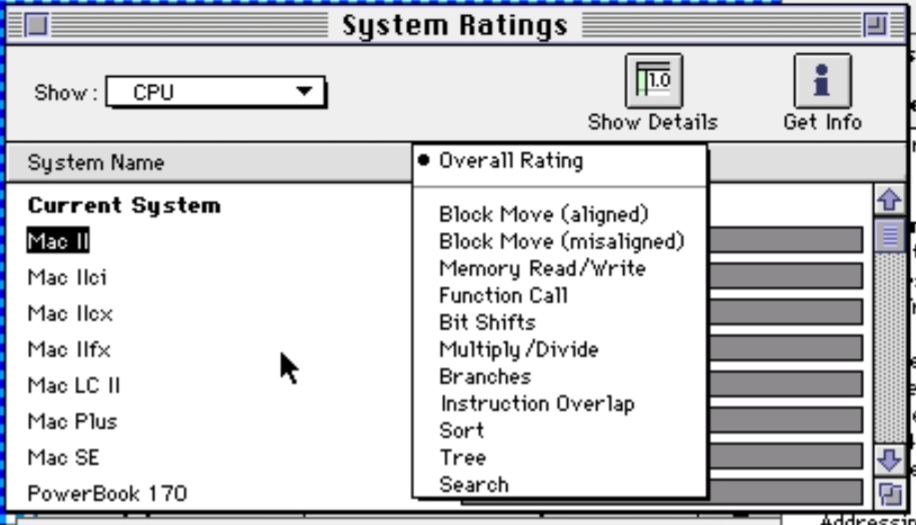
If advanced mode (i.e. with “show more choices” enabled), an additional drop down menu is available by clicking the downwards pointing triangle to the left of the “System Rating” column heading. This menu allows you to select individual tests for the category currently selected, for example, if you have selected “Disk”, then you will be able to choose to display specifically the random write, or perhaps 1K read test.
It is worth studying the results at this level, especially with respects to video accelerator performance, because it can be interesting to see how different cards perform in different areas. A card that scores well overall might be weak when it comes to rendering text compared to another card that scores lower overall. In this case, if your primary use case is… rendering text – the supposedly “slower” card might be the best card for you as it performs better in your application that mainly renders text.
Video Individual Test Results Menu
FPU Individual Test Results Menu
Disk Individual Test Results Menu
CPU Individual Test Results Menu
Each Menu for Individual Tests
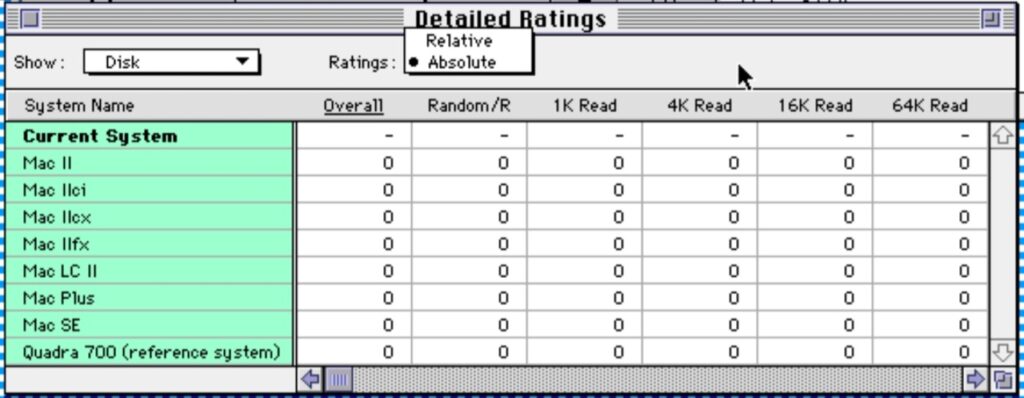
To assist in comparing results on a test by test basis, clicking the “Show Details” button presents tabulated results. Within this window, a drop down menu enables you to select between “Absolute” and “Relative” results. I find that generally, “Relative” is more usable with the exception of disk scores, as the “Absolute” scores for the disk results are given in KB/s, which is meaningful.
If you manually select a subset of results in the “System Ratings” window before clicking “Show Details” only details for those, plus the baseline system, will be shown.
Tabulated Results
Exporting Results
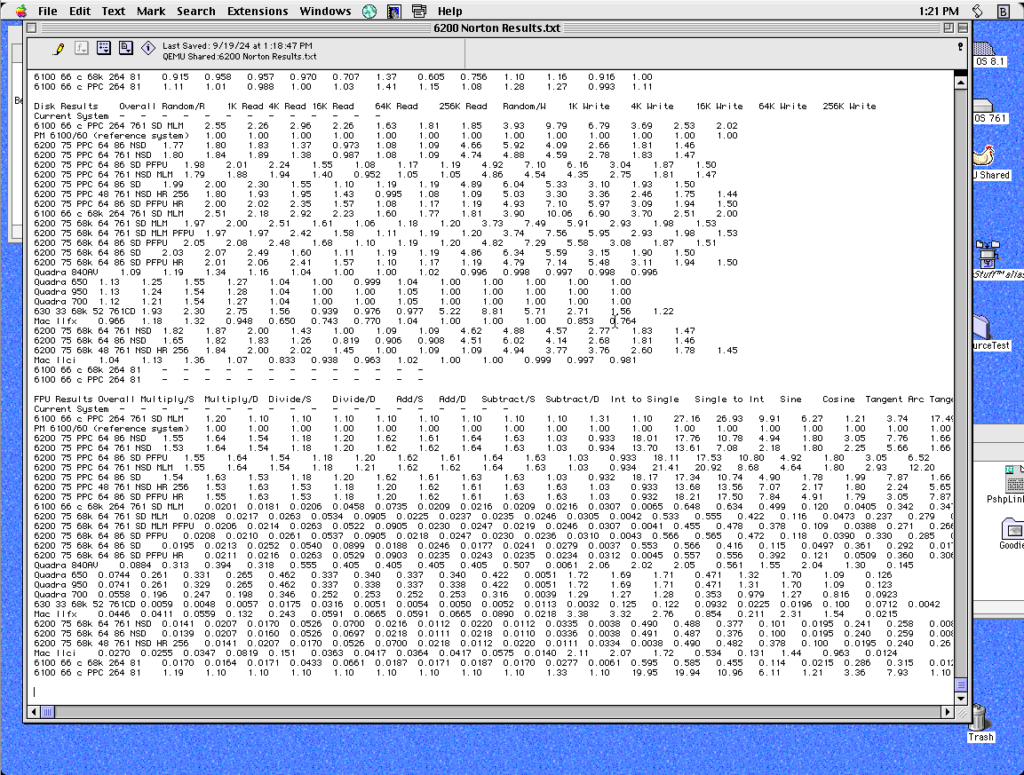
While in the Detailed Ratings view, pressing Command-C will copy a summary of all results to the clipboard. This text can then be pasted into another application, such as for example, in the following screenshot, a text document. To remove unwanted entries either select a subset of results in the “System Ratings” window before clicking the “Detailed Ratings” button, or alternatively quit System Info and move unwanted benchmark files in the “Benchmark results” folder into the “Hidden Results” folder. Any results in the hidden folder wont show in the results lists / export. Moving them back afterwards will make them re-appear next time you relaunch the program.
Results Copied from the Detailed Ratings View, and Pasted into the Text Editor BBEdit
Note that the exported text includes all result types (CPU, Video, Disk and FPU), not just the results that were currently being viewed. The data is Tab Separated Values (TSV) and should be fairly trivial to paste into a Spreadsheet such as Excel or ClarisWorks.
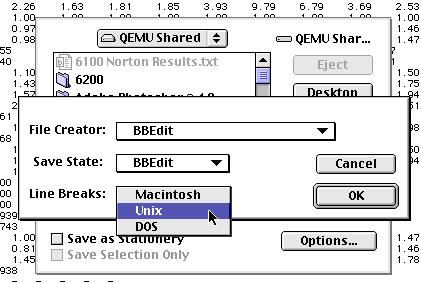
Moving data to a modern computer can be easily achieved with BBEdit. I recommend BBEdit, because it will run on 68k Macs, and is aware of the three common line ending types. By pasting in the data, selecting save, and then clicking the “Options…” button, you will get the following dialogue box, where you can select your preferred line ending type. I’m picking “Unix”, which is best for Linux and modern versions of Mac OS, but if you are on Windows, you will likely want to pick “DOS”.
Saving for Other Platforms
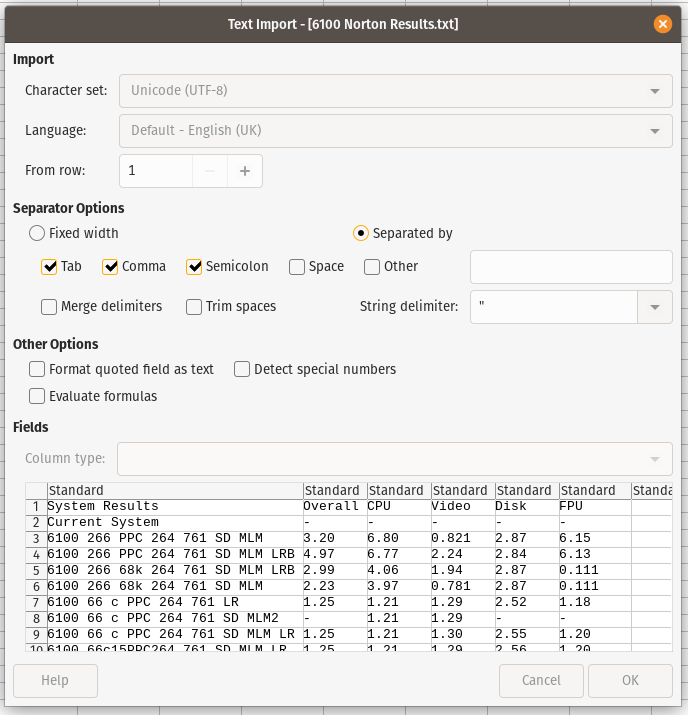
Name the file, including a “.txt” or “.tsv” file extension and save. Once you have moved the file to your modern computer, you should be able to trivially import the data. You may have minor issues if there are unusual characters, due to the classic Mac OS Roman text encoding. The following shows my example exported collection being opened in LibreOffice Calc.
Importing Norton System Info Results into LibreOffice
Note – You should probably uncheck “Comma” and “Semicolon” if you have used these characters in your system descriptions, or if you are using continental European number formats.
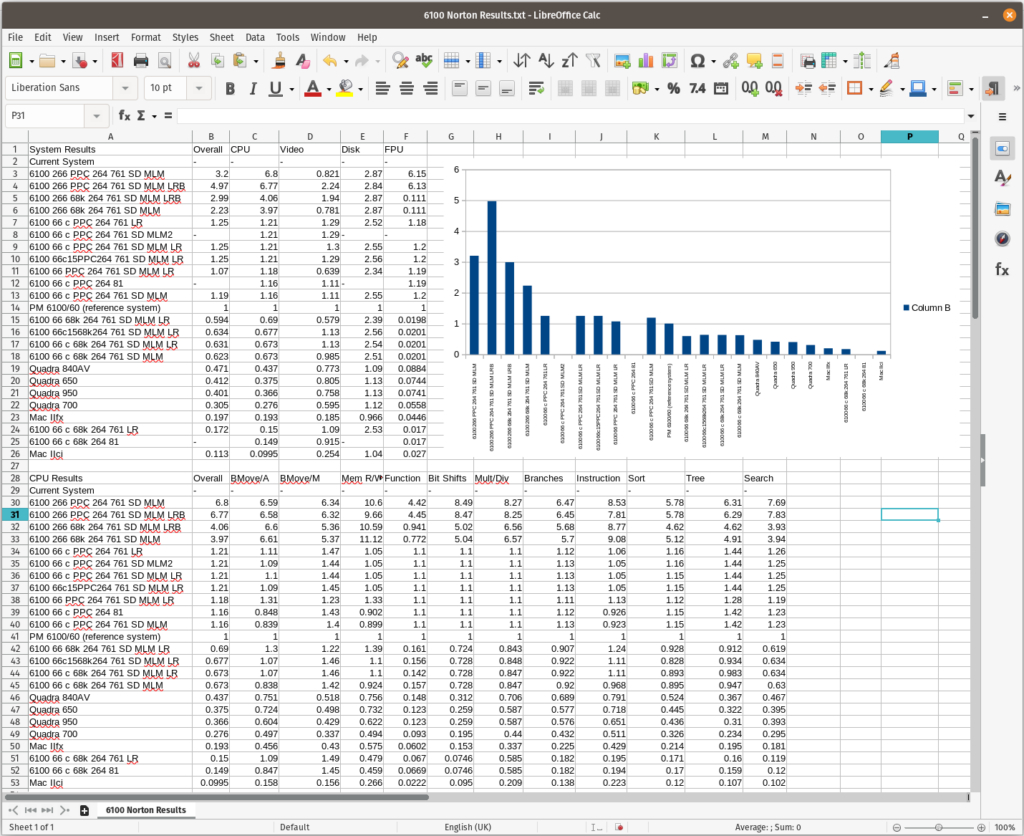
The following screenshot shows the text file imported with no further manipulation, other than creating a chart based on the “Current System” and “Overall” columns of the first table of data.
Working with Norton System Info Data in LibreOffice Calc
Description of the Individual Benchmark Tests
The following is an extract from the Norton Utilities 3.2 manual.
Manual Extract for Norton System Info Benchmarks
Variations in test results of up to 1 percent are normal. For disk tests, variations of up to 7 percent are normal due to disk drive operation.
CPU Benchmarks
Some CPU tests actually test more than the CPU itself. For example, some tests access memory (RAM), which tests not only the CPU, but the system bus, memory speed, and caching (if any). These factors can influence test results substantially. For the purposes of benchmarking, these factors are all considered to be part of the CPU.
BlockMove Aligned and BlockMove Misaligned: Measures the rate at which the Macintosh can move memory using the ROM trap BlockMove. On all Macintosh computers, BlockMove is highly optimized and thus is a good measure of memory bandwidth (how much data can be moved per unit time). An aligned and misaligned case are used because on some Macintosh computers performance is much poorer when data is not aligned properly. Newer models, such as the Power Macintosh computers, have excellent performance in both cases.
Memory Read and Write: This is also a memory bandwidth test, but the benchmark accesses memory in the way a program normally would and does not make use of any special machine instructions.
Function Call: Measures the overhead associated with making a series of function calls with arguments. Most application programs make large numbers of function calls.
Bit Shifts: Measures how fast bits can be shifted in a machine word. This type of instruction is used frequently by a wide variety of software.
Multiply and Divide: Measures speed of integer multiplication and division. The tests are slanted more towards multiplication. Application programs frequently use this type of instruction to access arrays.
Branches: Measures how fast code containing conditional branches can run. Branches are on of the most common types of instructions used and can substantially affect performance on some CPUs. Power Macintosh computers have a special processing unit dedicated to processing branch instructions.
Instruction Overlap: Measures the ability of the CPU to execute integer (not floating point) instructions at the same time it accesses memory. The benchmark is written in such a way that memory access should be able to execute at the same time all intervening computations are performed.
Sort: A high-level benchmark that sorts a large array using a quick-sort and insertion-sort hybrid algorithm that makes heavy demands on memory and looping constructs.
Tree: A high-level benchmark that builds a large, sorted binary tree by repeated insertion. Good caching and/or memory bandwidth can speed up this test considerably.
Search: A high-level benchmark that performs a sophisticated string-searching algorithm that makes extremely heavy demands on memory in a partially-sequential way. This test is designed to access memory in a way that most machines cannot cache effectively without a substantial amount of cache memory.
Video Benchmarks
The Video benchmarks test the speed at which common Quickdraw operations can be performed. The benchmarks are designed to measure frequently used operations – not esoteric transfer modes or rarely utilized Quickdraw routines. For example, scrolling operations are emphasized in the overall video rating because they are heavily used by all users. Note that as the video bit depth is reduced, video performance generally increases. If you compare video performance on two different systems, make sure to test at the same video bit depth.
Rectangles, Round Rectangles, and Ovals: These tests cycle through painting, erasing, filling, framing, and inverting the respective shapes with different fill patterns and colors, where appropriate.
Lines: Draws lines of varying slopes and colors. The video circuitry of some Macintosh computers is highly optimized for drawing lines.
Picture: Draws a bitmapped picture at the same bit depth of the screen. It tests the ability of Quickdraw to decode a PICT format picture and place its bits on the screen.
CopyBits: Measures how fast bits can be moved around on the screen using the CopyBits ROM routine, which is heavily used in screen drawing. The small cases are 32 by 32 (the size of a large icon). The small cases are significantly impacted by the overhead of calling Quickdraw and its setup. The large cases minimize this overhead and, thus, more accurately test the actual speed at which bits can be moved. Aligned (to a 32 pixel boundary) and misaligned cases test optimal and non-optimal situations.
DrawText: Measures how fast a sentence can be drawn on the screen. Primary emphasis is placed on drawing plain text, although bold and italic text are tested as well.
Scrolling: Measures how fast bits can be scrolled on the screen. Emphasis is placed on vertical scrolling, but some horizontal scrolling is also performed. Results of this test vary widely depending on the bit depth of the screen.
Disk Benchmarks
By design, the disk tests do not isolate disk speed alone. The benchmarks include factors applications normally experience, such as CPU speed, SCSI bus speed, impact of the disk cache, and fragmentation.
Random Read and Random Write: These benchmarks read or write data into a file in three 1MB bands. The data size read and written varies from 4 bytes to 4 kilobytes. These tests reflect seek time, the effects of the disk cache, and how fast a drive can process numerous small requests to read or write data. They are a good indicator of overall disk performance.
Sequential Read and Sequential Write (1K, 4K, 16K, 64K, and 256K): Measure how fast the drive can read/write data when requested in a specific size chunk. Some drives can transfer data efficiently only in large chunks, others are efficient with many small chunks, but slow down with large chunks. These sequential tests intentionally bypass the built-in disk cache (to eliminate cache overhead) and provide a better indicator of performance of the disk itself. Smart, disk-intensive applications such as Norton DiskDoubler Pro bypass the disk cache, when appropriate, to provide maximum performance. Few current applications employ this technique, however.
FPU Benchmarks
All FPU tests are directly comparable among themselves. For example, you can directly compare the speed of a multiply to an addition, square root, or cosine.
A single-precision floating-point number is 32 bits. Because of differences in the floating point formats supported on various machines, a double-precision number varies in size. For double precision, the fastest format available that is at least 64 bits in size is used.
Multiply, Divide, Add, and Subtract: Measure basic FPU performance in both single and double precision. On some machines, double precision may actually be faster than single precision because single precision numbers must first be converted to double precision before the calculation occurs.
Integer To Single and Single To Integer: Convert an integer number to a single precision floating point number and vice versa. Some machines have hardware instructions for both operations, some have neither, and some have just one. This accounts for dramatically different results that you may encounter, depending on which way the conversion goes.
Sine, Cosine, Tangent, and Arc Tangent: Measure trigonometric performance on double-precision numbers. These results can vary dramatically from computer to computer. Some older models of the Macintosh can actually outperform the new Power Macintoshes on these functions because the Power Macintoshes implement these routines in software.
Absolute Value, Square Root, and Log 10: Measure the absolute value, square root, and logarithm in base 10, respectively, of a double-precision number.
Vector: Measures how fast an array of numbers (vector) can be manipulated. Each element in the array is multiplied by a constant, a constant is added, and the result is stored back into the array (X’ = aX + B).
Getting Norton System Info
Norton System Info was provided as part of the Norton Utilities for Macintosh suite of software. The best way to get a copy of this is by buying a genuine copy on eBay, although I’m quite sure there are copies on Macintosh Garden.
Feedback on this Post
If you have any additional information which you wish to suggest is added to this page, or would like to correct any errors / inaccuracies, please use my contact form to let me know.
I childishly ordered a Nakamichi MJ-5.16, 5 disc SCSI CD-ROM changer from the US a few weeks back, not sure if it would work in my beige beasts. It arrived earlier today, so I popped it into my 9600 (after a false start where I forgot to set the SCSI ID). Other than the SCSI ID, no other jumpers were required for my setup, although there is a Termination option if required.
As expected, the drive wasn’t recognised by the stock Apple driver, so I dropped in the the 5.3.1 “works with almost everything” version, which recognised the drive and mounted the disk inserted into the first of the 5 positions only. This was promising, but not good enough, so I removed it and continued onwards.
The drive uses “LUN” to provide a number of sub devices under a single SCSI IDs. Macs have supported this since SCSI Manager 4.3 and the Quadra 840av, but it doesn’t appear to have been implemented in many drivers, so I set about testing every driver I could find. After a couple of hours I finally found that the drive fully worked with FWT CDT 4, specifically after installing the Jukebox optional software.
The software gives a few options and an extra menu next to the Applications Menu and seems to work exactly as required.
The only issue is that ejecting 5 discs takes a couple of minutes and is quite an involved process!
The strangest thing about this drive is that they can be bought at reasonable prices, despite being a bit of a novelty, even though SCSI drives usually demand a premium. Sadly the listing I got mine from is gone and alternatives are double the price. Happy hunting.
Update – I’ve since discovered that this behaviour is improved if you put newer drivers on the disk. This sounds obvious, but in most instances, if you format the disk in an older version of Mac OS, and then try to update the driver, it doesn’t work because there isn’t sufficient free space for a larger driver (I believe, let me know if I’m misunderstood). The crude and destructive way of fixing this is to delete the first data partition, create a small 1 or 2MB partition straight after the driver partition, then recreate the data partition. At this point, delete the small partition and you’re left with a little gap. If everything works out, updating the driver will use this gap and will actually work. I… haven’t done this in a little while, so I can’t remember if it is best to use one of the versions of Drive Setup that supports 68k macs, or the last version of Apple HD SC Setup.
Original Post
I’ve found that when I put a large (9GB), more modern SCSI hard disk in some of my older 68k Macs, they stopped allowing me to individually select boot partitions in the Startup Disk control panel. This is extremely frustrating as it limits you to only booting from the first partition of each installed disk, even though your desktop is full of smaller partitions.
The issue most obviously manifests when you find that if you open the Startup Disk control panel and pick a partition, closing and reopening the control panel shows all partitions on that disk as selected, and when you restart, the computer just boots from the first partition on the disk.
I haven’t worked out exactly what causes it, it may be due to my choice of partition size, or just the model of disk, but, regardless, I have found a workaround that doesn’t involve using the elderly utility “System Picker”.
I’ve found that for some reason, this issue goes away (although the the all partitions selected in the control panel remains) in Mac OS 8, and more interestingly, if you copy the Startup Disk control panel from Mac OS 8 onto other systems (I just copied it to the desktop, it doesn’t need to actually be installed), you can boot from any partition!
Useful to know.
If you don’t have a copy of Mac OS 8 or similar available, here is a copy from Mac OS 8.1 :
Macintosh System Compilations, System 7.0 to Mac OS 8.1
Based on the Anthology DVDs that Apple made available in 1999, I extracted as many system installers as I could fit on a single CD, for one region. First of all for UK versions, but then for the US and the International installers. Where I couldn’t find an installer I tried to fill the gaps, mostly with the International versions.
I put each of these region based compilations onto a CD iso disk image after adding a bootable copy of System 7.5.5. Hopefully these will be helpful to get people up and running. You just need to burn the image directly to a CD. I recommend burning the CD at the slowest speed you can tolerate, on a quality brand CD-R. Also, if your old Mac has trouble reading the disk, try dismantling the drive and cleaning the lens as roughly described here. Note that the CD should (but might not, as I don’t have the hardware to test) boot any machine between a Macintosh Plus (with 4MB of RAM) and a 9600. It might not be able to boot some 5400, 6400, 8600 and 9600 variants (although it shouldn’t boot my 9600/350 and does). It also wont boot in most third party drives.
I had to make a new HFS Standard image for the 8.1 updater, as the original was HFS Extended… which was stupid because it meant you needed 8.1 or newer to mount it, making it extremely difficult to actually use!
The installers seem to be all Disk Copy images, but note that an older copy of Disk Copy is claiming ownership of the files. To overcome this, look in the Utilities folder and there is a newer copy of Disk Copy 6.x in a folder there, along with a number of other useful recover / maintenance / troubleshooting utilities.
The following guide is designed to get up and running quickly with a IDE to SD adapter when you don’t have any installed OS on your antique IDE (aka ATA) Macintosh such as the Quadra 630, Macintosh 6500 or Beige G3.
An elderly Macintosh with an IDE interface (laptop or desktop)
A modern computer (MacOS X, Linux or Windows)
Time
I have two different types of IDE to SD adapter, although I’ve only used the smaller type as I use one in my Powerbook. The first example has a smaller laptop style connector. The second has a full size IDE connector. If you get the laptop variant, you can get adapters for your adapter. I have had issues with the second type in my beige G3 (with a Rev A ROM). Weirdly, even though they’re on independent buses, it behaves better if I unplug the CD-ROM drive. Early G3 (beige and iMac) appears to be… sensitive.
Download the following disk image onto your modern computer. This contains both a 2GB “Restore” partition with a bootable copy of Mac OS 8.1, installation disk images for Mac OS 7.1.2 to 8.1 and some utilities etc. to make life easier, as well as a second, empty, 2GB partition for you to install a second OS if you please.
Unzip the disk image in the download and save it somewhere handy, such as the desktop.
Install Etcher, insert your SD card into the modern computer, launch Etcher and follow instructions to select the downloaded disk image and your target SD card. Take care – you don’t want to flash it to your computer’s hard disk!
Once the card is written, eject it from your modern computer. Place it in the IDE to SD card adapter and insert it into your retro Macintosh.
That should be it – you should be able to boot from the disk. You’ll need to add additional partitions if you want to use the rest of your SD card if it is bigger than these partitions (~1.9GB), but I’m not sure what the best software is for this with an IDE disk – probably HDT or similar.
The following is a previous, much smaller image which I made in the past. I haven’t had a chance to test it myself as I have been working on a G3 which wont boot 7.5.3, so feedback would be appreciated. This disk image can work with a minimum SD Card size of 2GB.