Category Archives: Mac OS X

Large Disks in Vintage PowerPC Macs

Large Disks in Vintage PowerPC Macs

The main scenarios that have caused me issues with large hard disks in PCI era PowerPC Macs (Beige G3 through to G4 era) are…

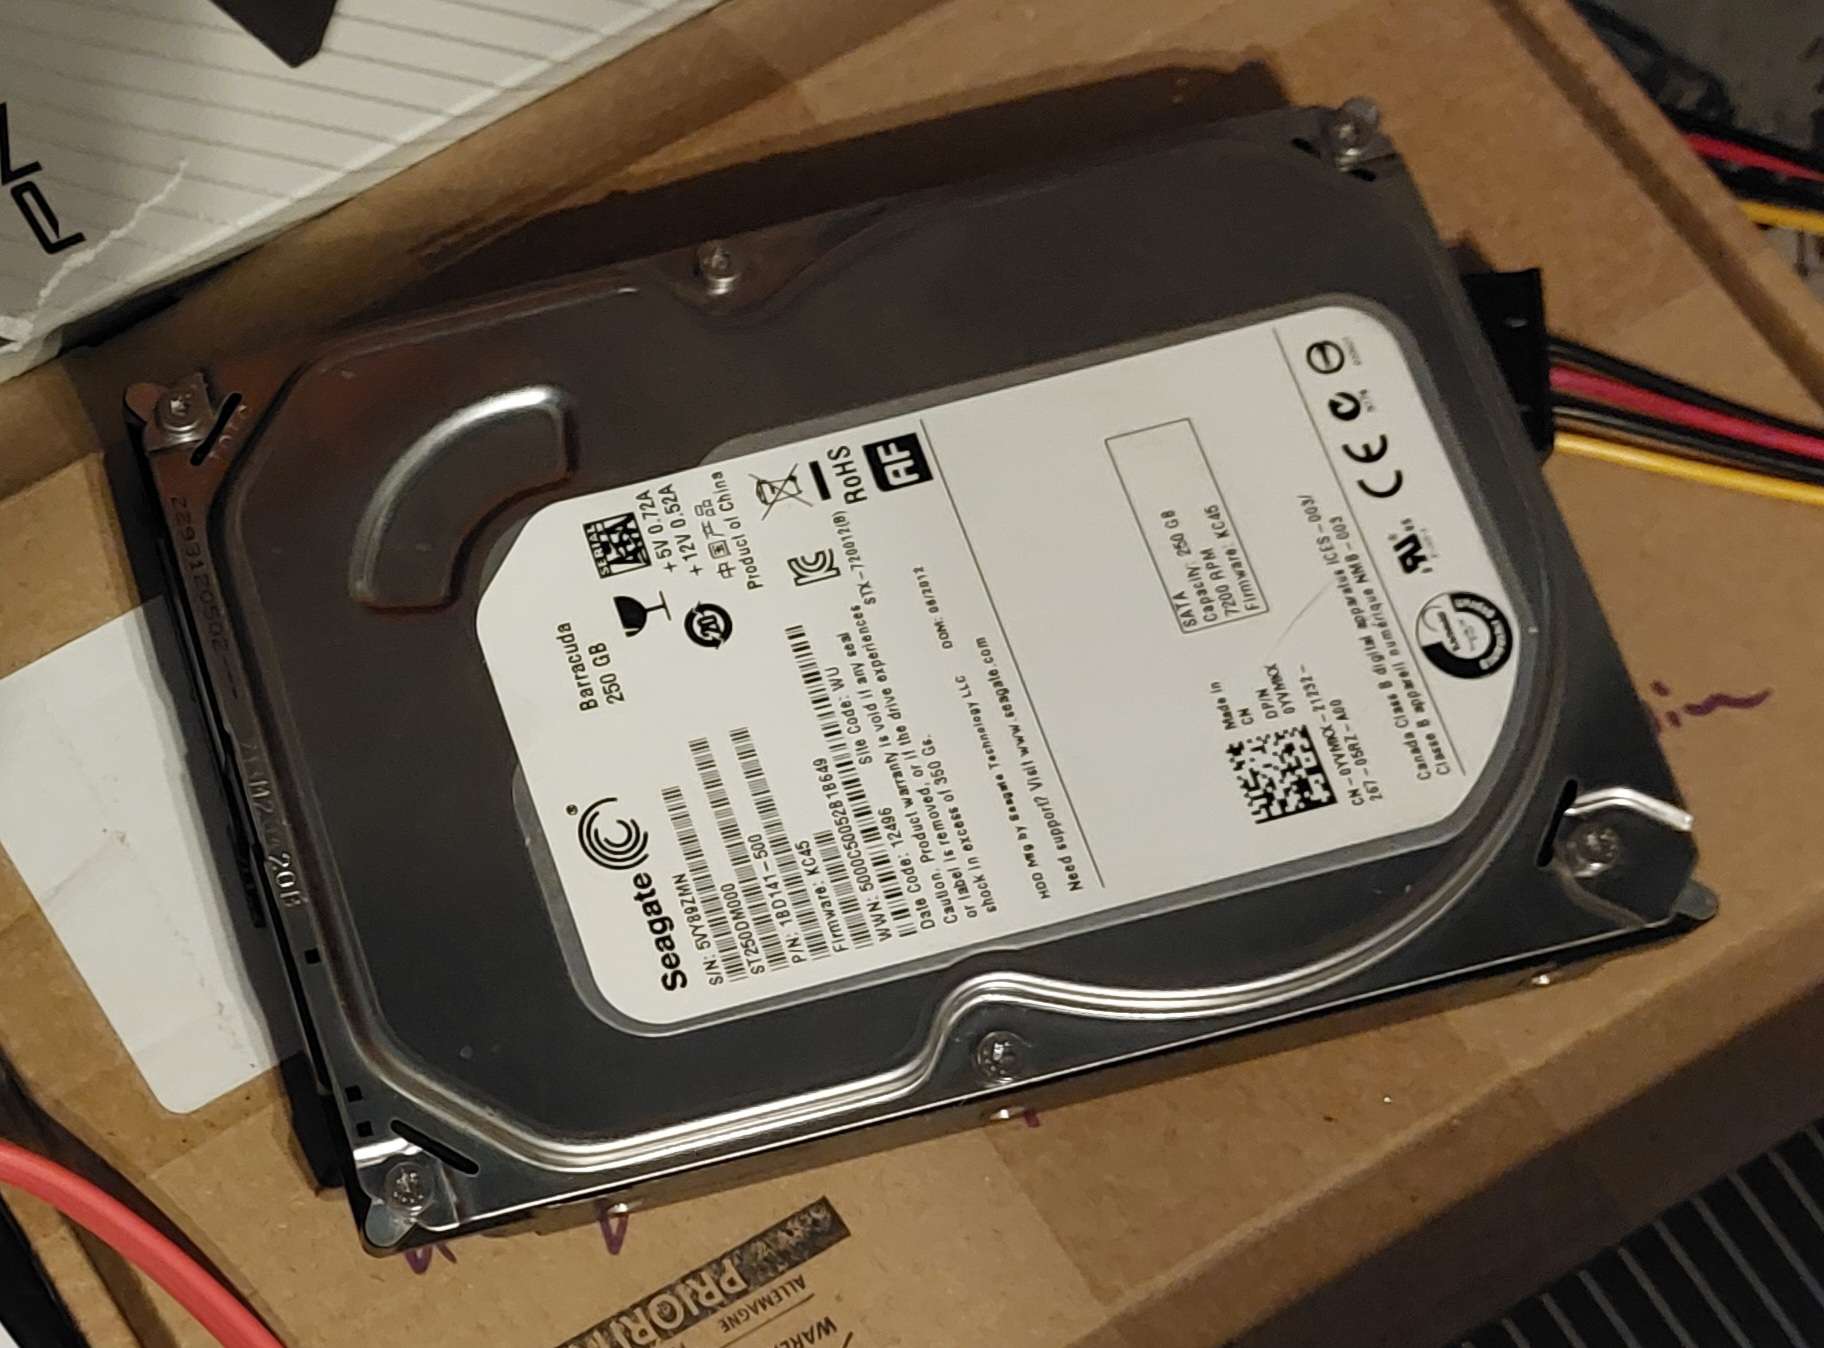
  1. Many IDE PowerPC Macs from the G3 to G4 era are limited to ~128GB disks.
  2. The operating System on some early G3s needs to be in the first 8GB.
  3. When partitioning a Terabyte scale disk in Classic Mac OS, Drive Setup fails to allow you to size partitions due to UI issues.

Lets look at each of these issue and solutions individually.

Dealing with the 128GB Limit

I believe this limitation impacts computers from the Beige G3 and original iMac through to some QuickSilver G4s. The issue is caused by the computers only supporting 28bit LBA, resulting in a 128GB limit. I usually aim for a little bit under 128GB as I believe there may be a little bit of margin needed for some reason.

  1. The simplest solution, given disks less than 128GB are often more expensive due to so many vintage machines having the 28bit limit (not just Macs), is to get a larger disk such as a 250GB disk, and format it with a 120GB partition in a more modern computer that supports it. This has worked for me in the past, but whatever you do, do not mess with the partition table in your 28bit LBA machine.
  2. The next easiest solution, but with a more significant cost, is to buy a PCI card that supports larger disks, such as an after market ATA card, or a SATA card. Note that most cards don’t support Macs, and even some of the ones that do, don’t support booting, only storage. A good option might be a SIL3112 based card as with the right firmware they have Classic Mac OS support (back to System 7.5) as well as some Mac OS X support.
  3. Intech Software wrote a special hard disk driver that enabled the use of bigger disks with both Classic Mac OS and Mac OS X (10.2 and later) on the computer’s internal ATA bus. To use the driver with Classic Mac OS, format the drive using their Hard Disk SpeedTools product, but if you want to use the drive with Mac OS X, you will need to install a software driver called SpeedTools ATA Hi-Cap Driver in every OS X install. Note! There are still a number of limitations – it is likely that any computer that suffers from needing bootable OSes in the first 8GB will still need that, so create any bootable partitions you need within the first 8GB. On later machines using this disk driver to use larger disks, they will not be able to boot from beyond 128GB on the built in interface, so ensure that you put a partition divider around 120GB and only use partitions beyond 120GB for storage, and not bootable OSes. There are extensive warnings and guidance in the manuals for this software.

Please note that I’m not overly familiar with the limitations on older Performa 630 -> 6500 family IDE implementations. I have attempted to put a 120GB disk in a 630 but had odd, intermittent write errors. This is an ongoing project and I hope to find out what can and can’t be done with that family of machines.

Keeping the OS Within the First 8GB

Historic understanding of this is that the OS must be within the first 8GB of the hard disk on the Beige G3 and early iMacs, although this has been disputed at times. My personal experience of this is that I’ve had issues over time when I failed to partition a 40GB disk in a 233MHz beige G3 (with a Rev A ROM), but given this was back in something around 2003, I don’t have extensive notes! My thoughts are that more investigation is required with different hardware and ROM revisions to understand what is going on, but in the meanwhile, to be safe…

  1. Partition your disk. I usually create a couple of small partitions and then a larger partition, using the larger if I want to run an early version of OSX. For example, I might create a 2GB partition and a 6GB partition for a Classic Mac OS install and a Mac OS X install. Alternatively, I might create two 1GB partitions, a 2GB and a 4GB if I’m experimenting with lots of OSes. I then usually create a single large partition with the remainder of the disk (assuming it is less than 128GB – see above) for applications and storage.
  2. Use a PCI SATA or ATA card. Many cards make drives appear as SCSI drives meaning that the host’s ROM doesn’t use the code that prevents booting beyond 8GB (the bug is in the ATA code, and doesn’t apply to SCSI disks).
  3. Using a helper partition – given the issue only exists very early in boot, it is possible to use a small helper partition and the software XPostFacto. XPostFacto is able to put a small number of files on a bootable partition, that then hooks into a larger OSX (I don’t think it supports OS9? I’m not sure, please correct me) installation on a large, unbootable partition. This trick can also be used to boot from FireWire drives on machines that don’t support booting from FireWire. Theoretically you could create 10 small partitions within the first 8GB of the hard disk and use each as a helper partition to boot huge partitions later into the disk.

Partitioning Multi-Terabyte Disks Under Classic Mac OS

Note – I believe that you are limited to 2TB disks in Classic Mac OS, but have not personally tested exceeding this limit.

When I installed a 1.5TB disk in my 9600 I found that I was able to format and use the disk using Apple’s Drive Setup, but that if I tried to partition the disk, I could not type in custom partition sizes (my usual trick with a big disk is to use the tab key to cycle through partitions that are visually too small to click on in Drive Setup). After some experimentation with various software, I found that I was able to easily set up partitions, once again using Hard Disk SpeedTools. As such, this is my recommendation for setting up a very large disk (I assume SATA) in a classic Mac OS system.
Creating a Disc Image of a Classic Mac OS Bootable CD

Creating a Disc Image of a Classic Mac OS Bootable CD

The most important thing when making bootable disc images is to test them. After you create your disc image file and before you upload it anywhere, make sure you burn it back to a CD and test it On Real Hardware. If you do not have an appropriate vintage computer, speak to a friend that does. There are so many mistakes that it is possible to make that in a recent review, approximately one third of images uploaded to an archive page had been rendered un-bootable in some way. While testing takes a little time, it is nothing compared to the time a bad image wastes for dozens of users downloading it, to say nothing of the frustration it causes new users who may not have the experience to realise what the issue is.

NOTE – If your source CD contains true multimedia (for example, data and CD Audio, like many game CDs from the 90s), you very likely will need to create a bin + cue image of the source. I’m aware that a lot of people don’t like these, but sadly, there is no alternative that I know of. Genuinely, bin+cue isn’t a superfluous format designed to annoy you, it has a specific purpose and some CDs can not be properly burnt to new discs without it.

Classic Mac OS

Toast

Warning, this method likely very slightly modifies the CD, but other methods, using other options within Toast, will significantly modify the original content of the CD, rendering them less useful or even unbootable on any system, so this is the best you’re going to get! Do not use the “Mac Volume” option!

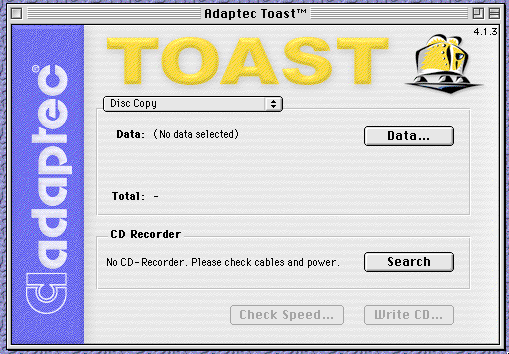
Launch a copy of Toast in Classic Mac OS, I’m using Toast 4.1.3, running on Mac OS 7.5.5 as an example.

Select “Disc Copy” as the operation type in the window. Then click the “Data…” button and select the disc you want to copy.

From the File Menu, select “Save as Disc Image…”. Save the file, conventionally as a “.toast”, but this file can actually be treated as a “.iso” file by many good CD burning programs.

Current macOS

NOTE – You will need an external optical drive as recent Macs do not come with a built in optical drive.

With a GUI

Disk Utility

Warning, this method likely very slightly modifies the CD. If a better alternative method is known, please propose it and I will add it here.

Launch Disk Utility, select the disc (not the partition – you must select the top level of the device you are trying to copy). Then select “Image From <device name>…” from the File menu.

Under the “Format” popup menu, select “DVD/CD Master” and ensure that no encryption is applied. Navigate to where you want to save, enter an appropriate file name and click save.

The resultant “.cdr” file can actually be treated as an “.iso” and can be renamed and burnt with many good CD burning programs.

AARU

I am not familiar with this software, but it can apparently also produce a good disc image.

https://www.aaru.app/#/

With the Command Line

dd

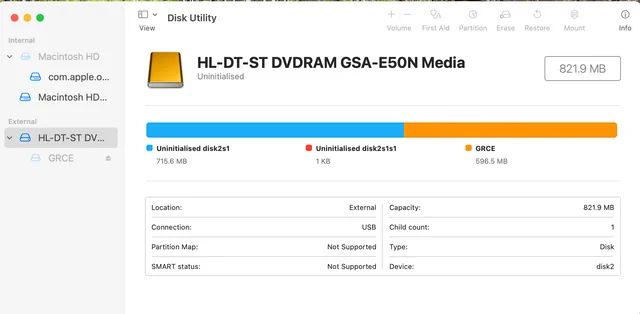
To save a disc image of your CD to your desktop, first you need to work out what the Operating System calls your CD Drive. To do this, launch Disk Utility, and click on the optical drive top level.

This will display some information about the drive, including, as shown above, in the lower right hand corner “Device”, which is in the example given “disk2”. This is your Device Name.

Alternatively, this information can be obtained by typing “diskutil list” (without the quotation marks) and pressing enter in a Terminal window and identifying the optical drive by its description. There will usually be an entry for “disk#” where # is a number, and then a number of additional entries with the same name, followed by “s#”, again where # is a number. Each of these additional entries are partitions on the disk. What we want is the top level name, so the one in the format “disk#”. This is your Device Name.

In a Terminal window, type “cd ~/Desktop” (without the quotation marks) and press enter. This will change the current directory to the desktop folder of the current user. Then, very carefully (making sure that there isn’t already a file called “cdimage.iso” on your desktop – if there is, you can change the filename in the following command (it is generally best to avoid spaces to keep things simple)), using the Device Name obtained above in place of the text “<disk#>”, enter the following command :

dd if=/dev/<disk#> of=./cdimage.iso bs=2048

This command will copy the “if” (input file) to the “of” (output file) with a “bs” (block size) of 2048 bytes. This should give us a nice pure and unadulterated disc image of the CD.

dumptoiso

I’ve not tested this script, but the following has been designed to simplify the process with dd :

https://macintoshgarden.org/apps/dumptoiso-a-script-os-x-dump-cds-and-dvds-iso-files

Older Versions of Mac OS X

In older versions of Mac OS X, it is possible to use methods similar to the “Toast” instructions given for Classic Mac OS, or for “Disk Utility” for current macOS, with minor interface differences.

Command line instructions remain effectively identical to current macOS instructions above when using dd in older versions of Mac OS X.

dumptoiso, linked above, also works back to 10.3, if not earlier.

Linux

With a GUI

Install the application “K3b”.

Launch and select the “Copy Medium…” option from the “Tools” menu.

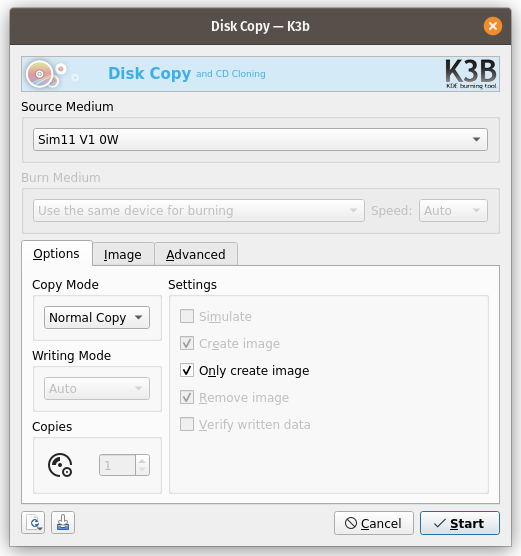
Verify the correct drive is selected in the “Source Medium” popup menu, make sure “Copy Mode” is set to “Normal Copy”, and check the “Only create image” checkbox.

Switch to the “Image” tab and enter a filename and path.

Click “Start”.

You should now have a disc image of your CD saved at the location you selected. When burning Mac HFS images from K3b it will complain that it does not recognise the format. Don’t worry, just dismiss the dialogue box and continue.

With the Command Line

To save a disc image of your CD to your desktop, first you need to work out what the Operating System calls your CD Drive. To do this, you can launch you disk management application such as gparted or “Disks”.

This will display some information about the optical drive, including the “Device” path, which on my computer is “/dev/sr0”. This varies more on linux than on other platforms, depending on the flavour of linux you run. This is your Device Name.

Alternatively, this information can be obtained by typing “df -h” (without the quotation marks) and pressing enter in a Terminal window and identifying the optical drive by its description. If there are multiple partitions mounted, what we want is the top level name. This is your Device Name.

In a Terminal window, navigate to the location you want to save your disc image. Then, very carefully (making sure that there isn’t already a file called “cdimage.iso” at the location – if there is, you can change the filename in the following command), using the Device Name obtained above in place of the text “<device>”, enter the following command :

dd if=/dev/<device> of=./cdimage.iso bs=2048

This command will copy the “if” (input file) to the “of” (output file) with a “bs” (block size) of 2048 bytes. This should give us a nice pure and unadulterated disc image of the CD.

Windows

ImgBurn

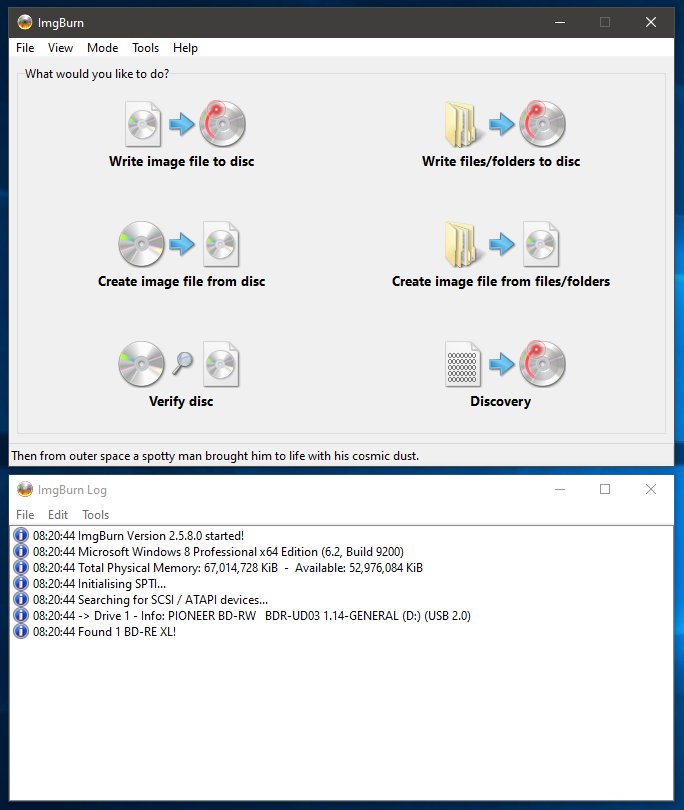
After installing ImgBurn, launch the application and select “Create Image file from Disc”.

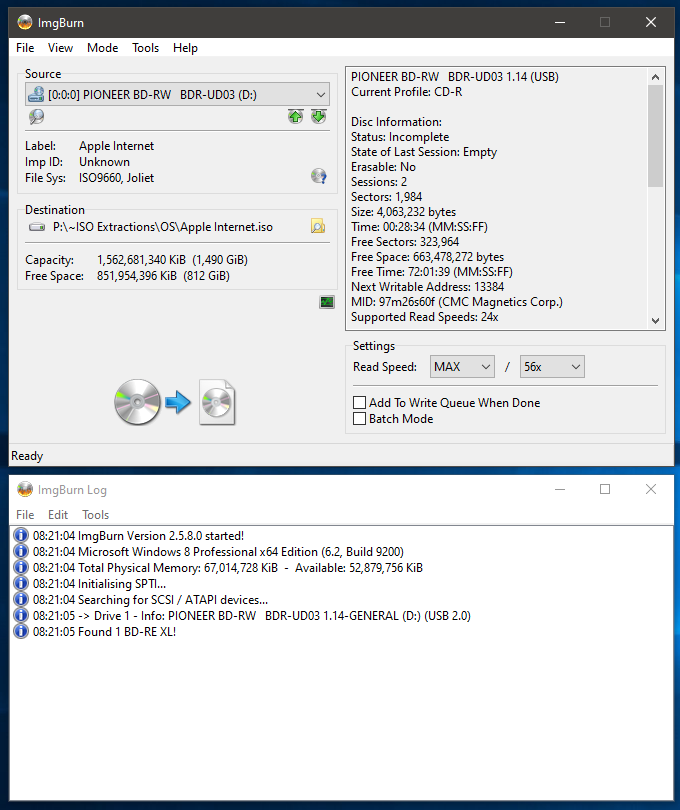
Insert the disc you want to copy and select a destination.

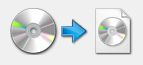
Click on the CD to file pictograph / button (that doesn’t look one bit like a button, and shown below for clarity) and ImgBurn will create your disc image.

The display will change to show progress and a message appears on screen once the process has completed.