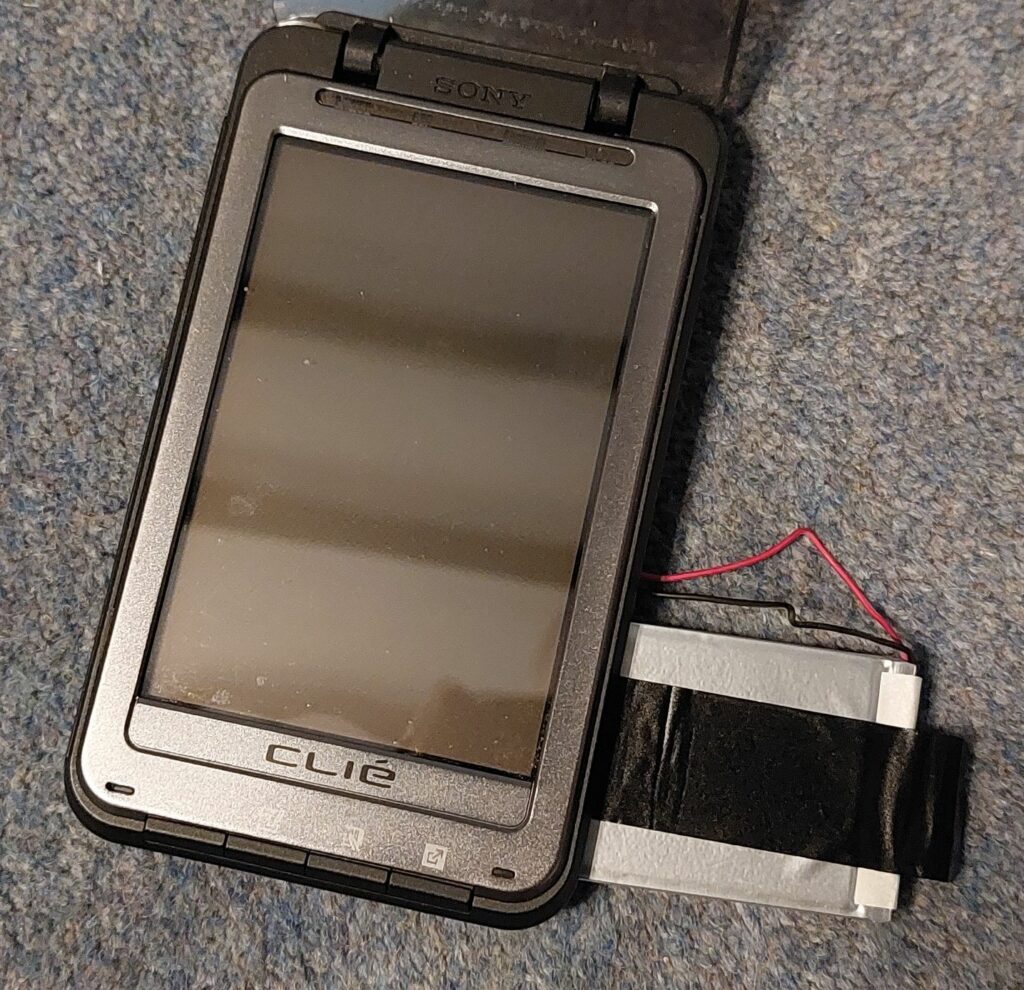
Note – This Project is ongoing, and so this page will be updated in a very untimely manner as I undertake and document additional work on my PowerTower Pro.
Background
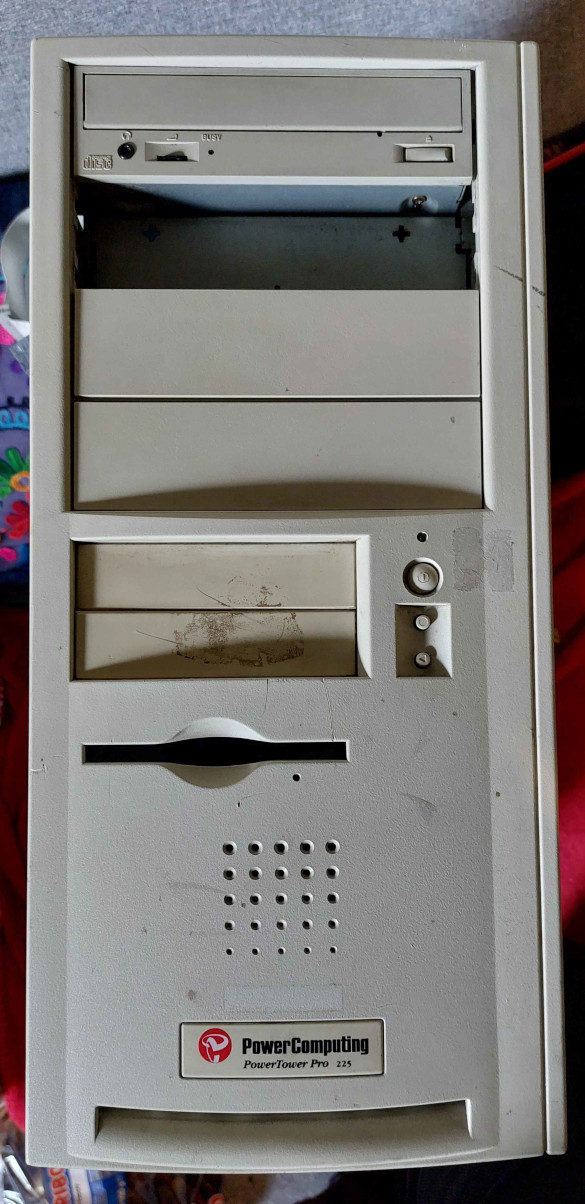
For a long time I have wanted a Macintosh Clone, basically because they came in more rugged cases and the power supplies should be easier to replace long term (which isn’t as true as I thought it was). Unfortunately, prices went up significantly and I haven’t been able to justify buying one, but recently I saw a PowerComputing PowerTower Pro 225 for sale “not working” on eBay. It was pretty rough with lots of missing parts and some dents and scrapes, but I picked it up as a project.
Condition on Arrival
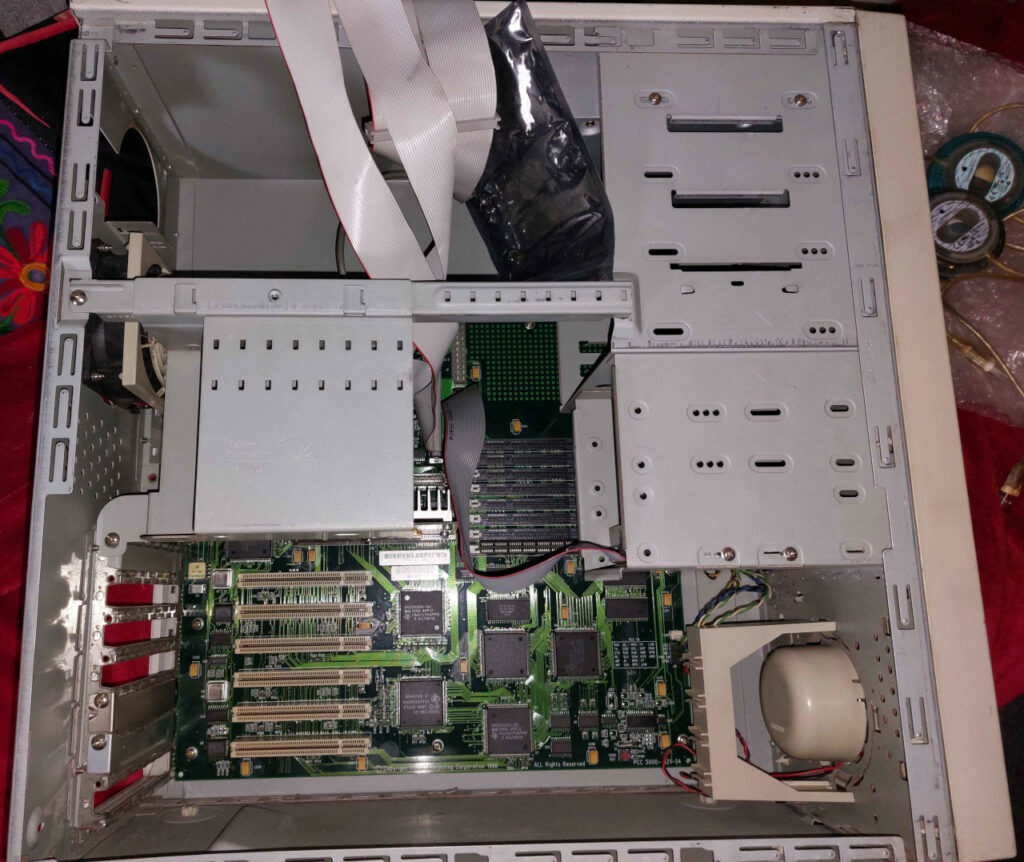
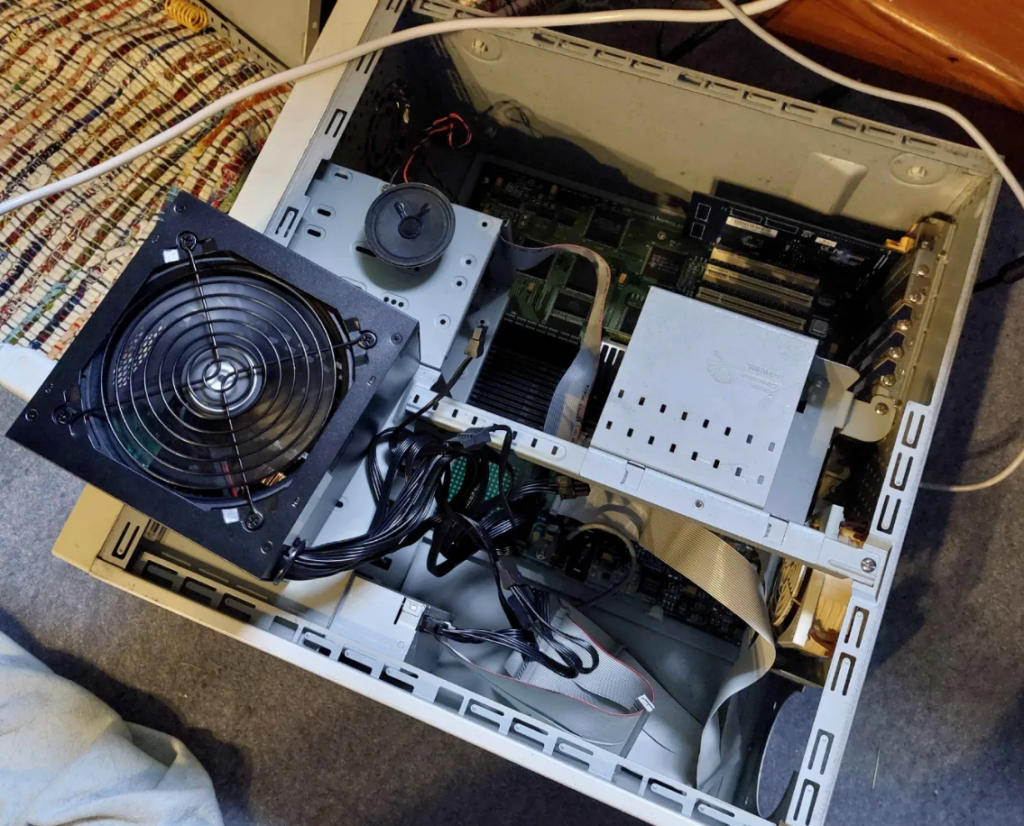
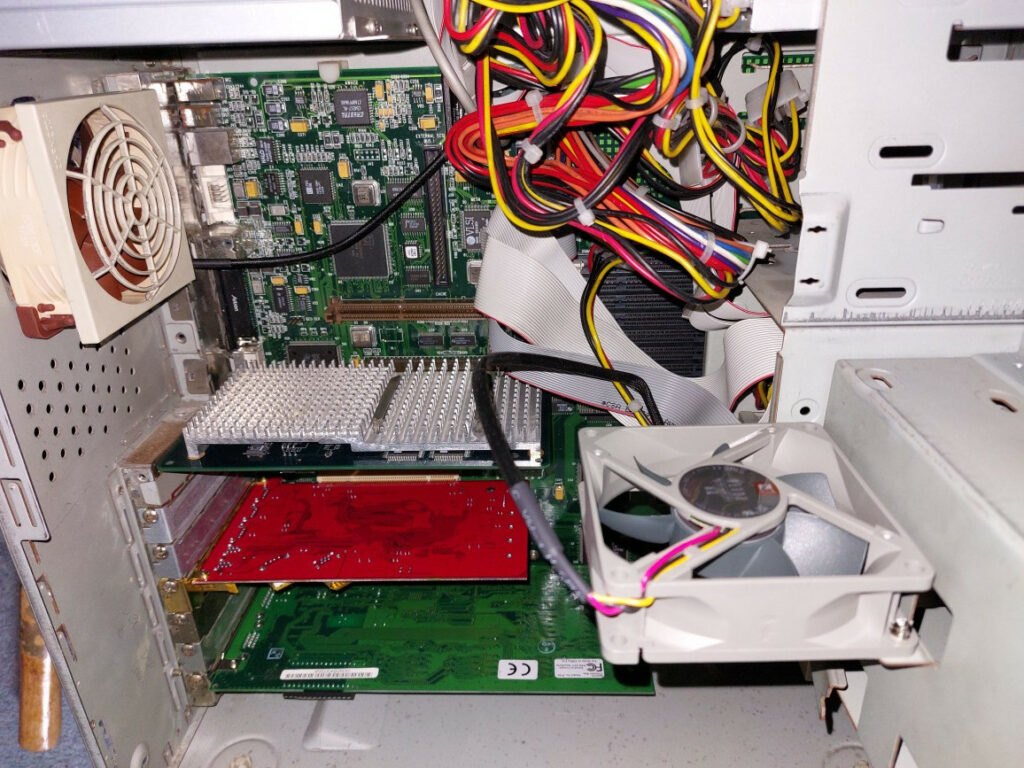
Internals of My PowerTower on Arrival
The original CPU is missing and a 9600/200 233 CPU has been fitted. The original part would have been a 225MHz PowerComputing card.
Sadly the Level 2 Cache is missing – this is really unfortunate as the original part will have been a 1MB module, which are hard to get hold of. I don’t anticipate I’ll ever be able to replace this.
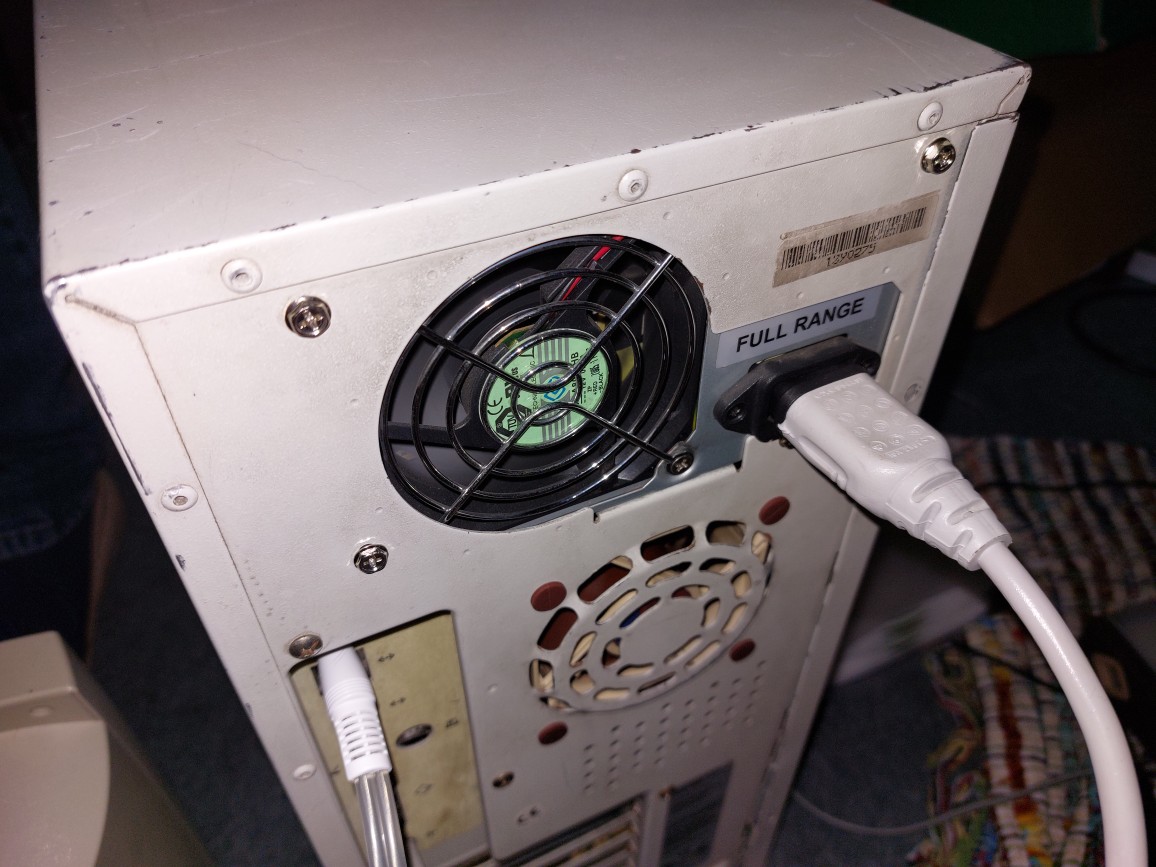
The 80mm rear case fan is failing.
The 80mm CPU fan is missing.
The CD Drive does not look like the original part, and I suspect is a slower replacement. I haven’t tested whether it works yet.
No hard disk fitted.
One 5.25″ bay plastic cover is missing.
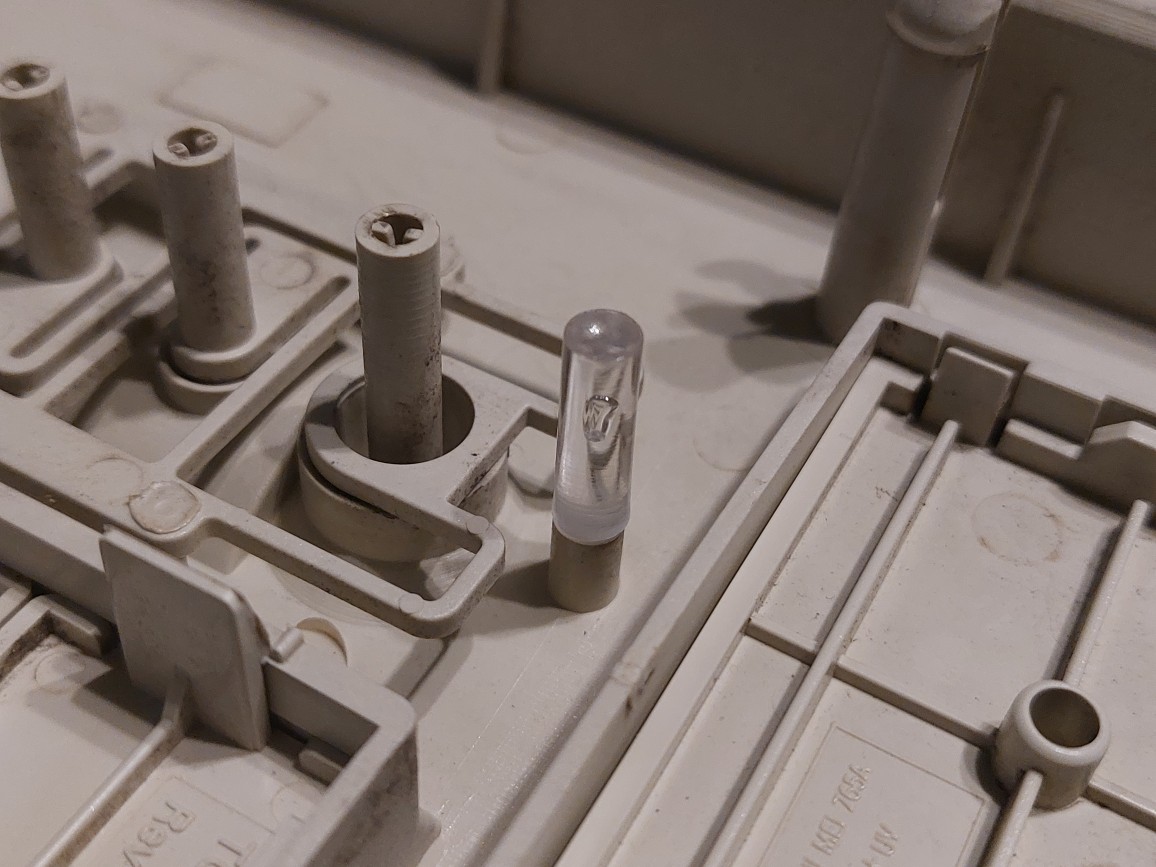
The light pipe for the power button is broken.
No video card (stock it would have been supplied with a 2MB ATi Mach64 / Rage of some description, a 4MB ixMicro TwinTurbo, or an 8MB ixMicro TwinTurbo. I’m not sure if all three options were available in this specific tier machine.
The PSU is missing.
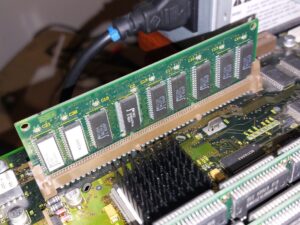
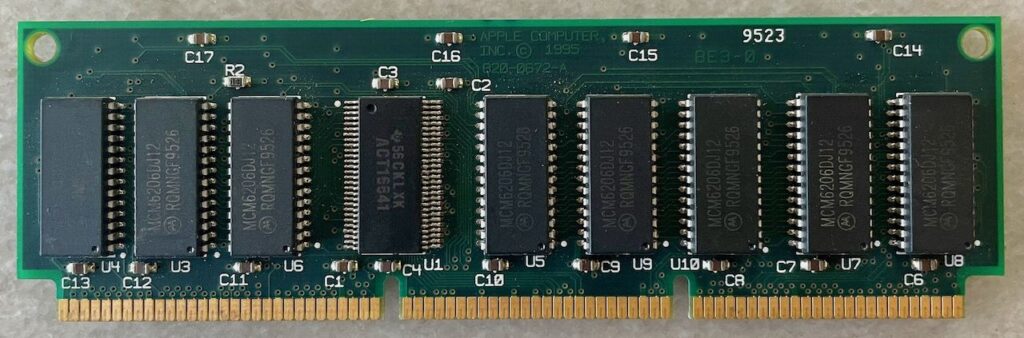
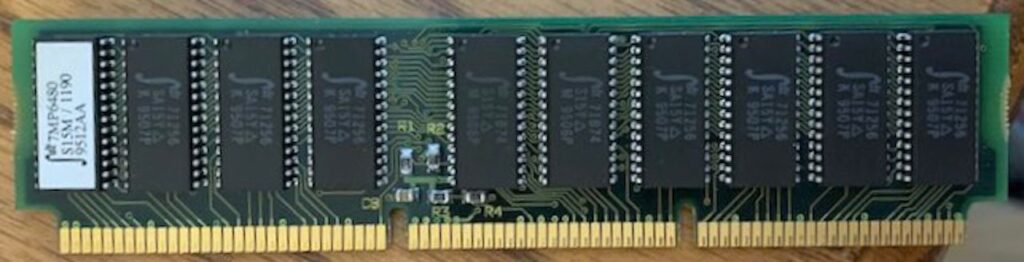
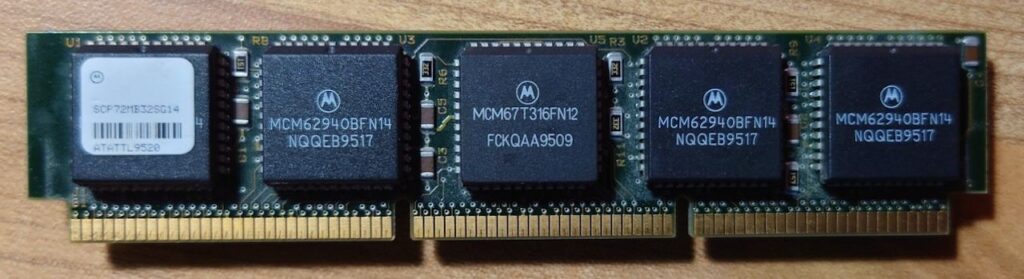
There is a single 64MB RAM module fitted. Given the computer interleaves RAM, it really should really have a matched pair, I anticipate it probably originally shipped with a pair of 16MB modules. This is more frustrating that I realised because I seem to have run out of my stockpile of 5v 168 pin RAM modules. I might have to downgrade another computer, which is always a shame.
A number of screws and PCI slot covers are missing (and the ones that are there don’t match).
The case is a bit beat up, as well as being dirty and the paint scratched, there are a few dents and panels don’t quite align properly.
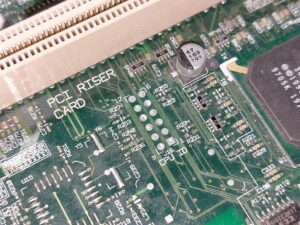
The logic board has been re-capped. They don’t appear to have cause any actual damage, but some rework might be good to tidy things up a little.
Given what is missing, I suspect this was a tricked out machine at some point – I suspect it had a number of PCI cards, much more RAM (otherwise there would be matched pairs and the original factory modules would still be there) and I suspect it had a processor upgrade.
The seller stated that they had tried powering it on and it did not chime. On arrival I sprayed contact cleaner in all the slots and undertook a general inspection.
The Plan – Subject to Change
Other than actually debugging and repairing, the following are what I plan to do with this machine to set it up as a usable and useful machine.
Short Term
Find and fit a suitable PowerSupply. – Done
Fit a period video card, or one that represents a small upgrade. I’ll either fit an ixMicro TwinTurbo or ix3D, or alternatively I might fit a Radius ThunderColor. – Done
Install a PCI SATA card. SCSI hard disks are expensive, this lets me use a SATA DOM or similar instead. – Done
Replace the loud and missing fans with quiet modern fans. – Mostly Done
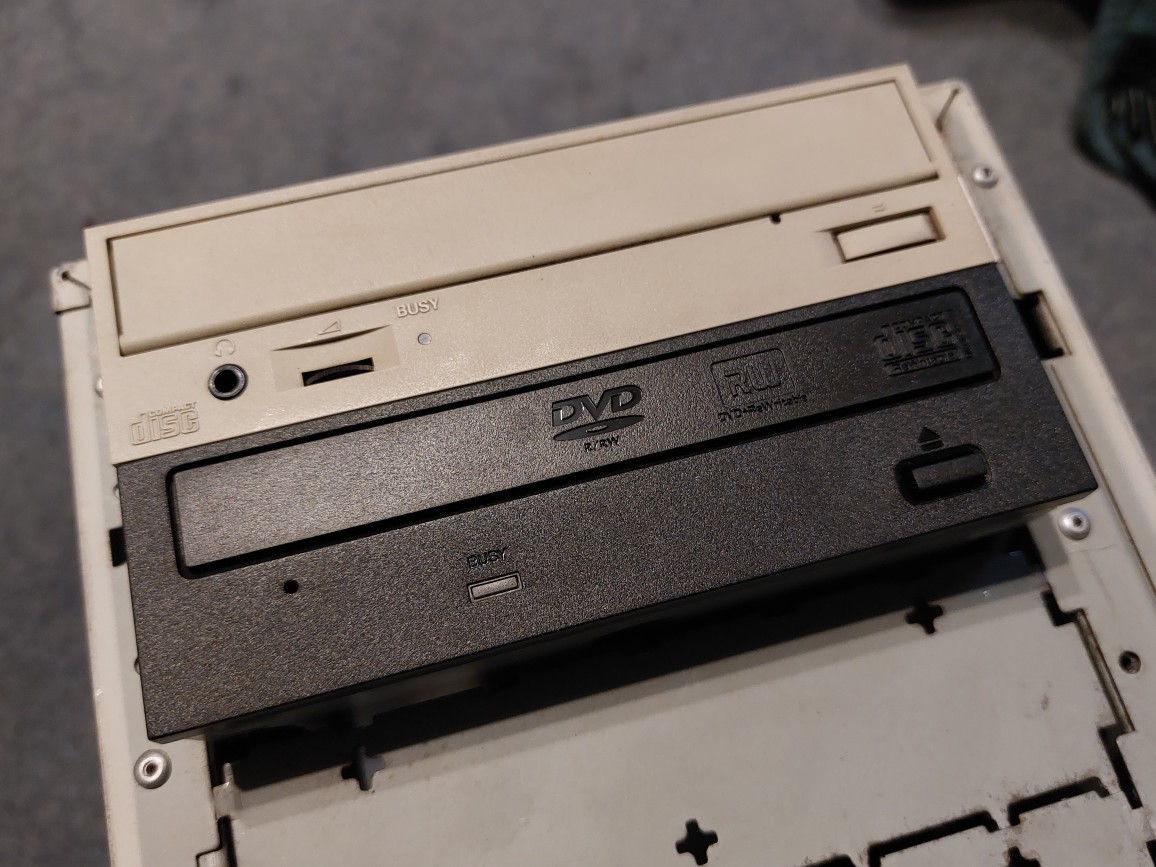
Add a second optical drive, probably SATA, to hide the missing bay cover. – Partially Done (Waiting on a beige one)
Fit a G3 upgrade card, probably something around 300MHz. I have a 300MHz green (i.e. not purple) Sonnet upgrade that might suit it. – Done
Knock some dents out and straighten the case. – Done
Clean the case. – Done
Long Term
Repaint the metalwork to solve the battered look.
Work out how to repair the deep scratches in the front plastics.
Clean up some residual flux from a previous owner’s recap and visually inspect their work just in case.
Clean up the floppy drive internals.
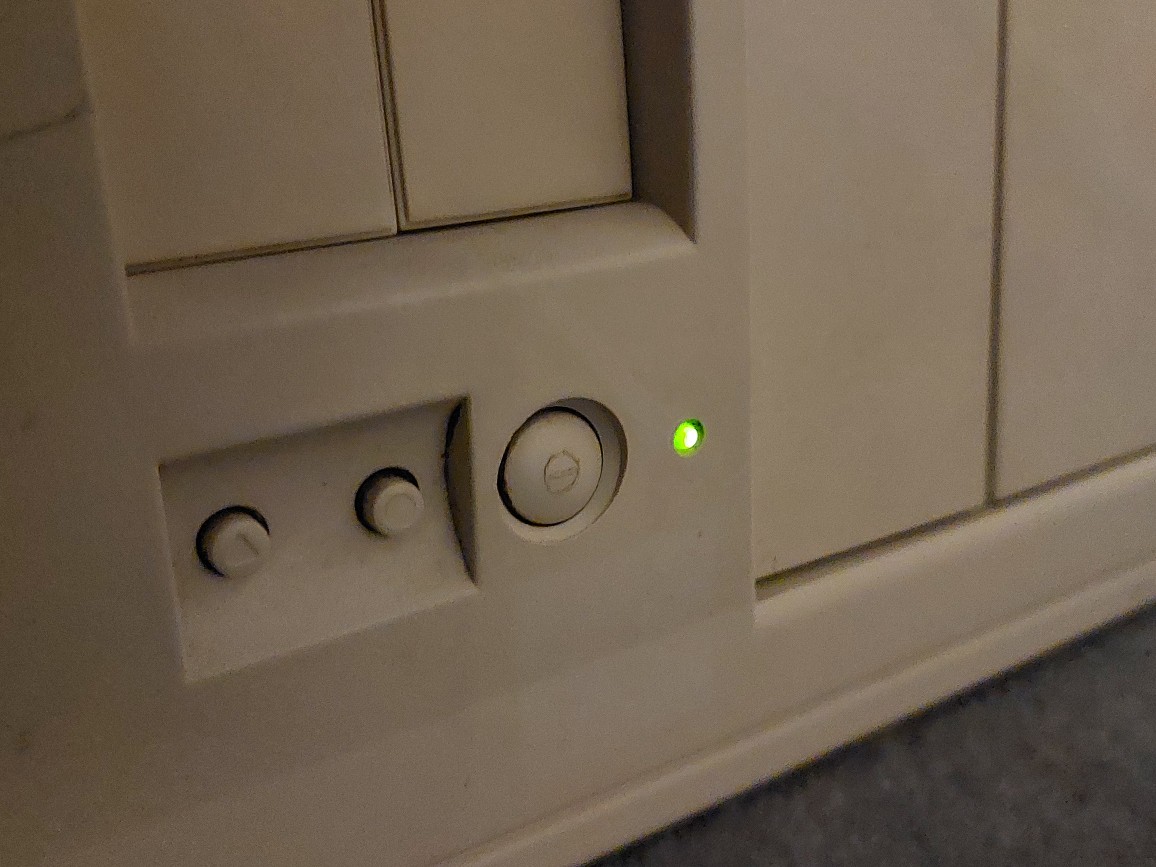
Fix the Power LED. – Done
I may put a DigiDesign AudioMedia III card in the PowerTower because I believe it was originally the property of a company that specialised in Digital Audio Recording.
Progress
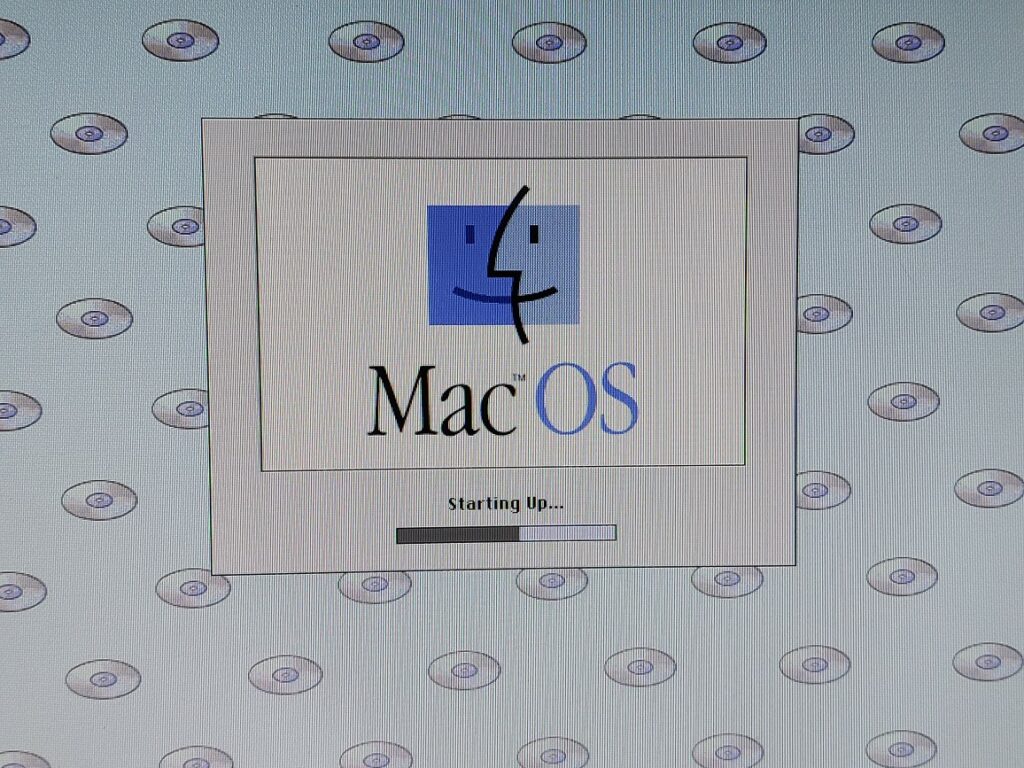
Getting it Booting
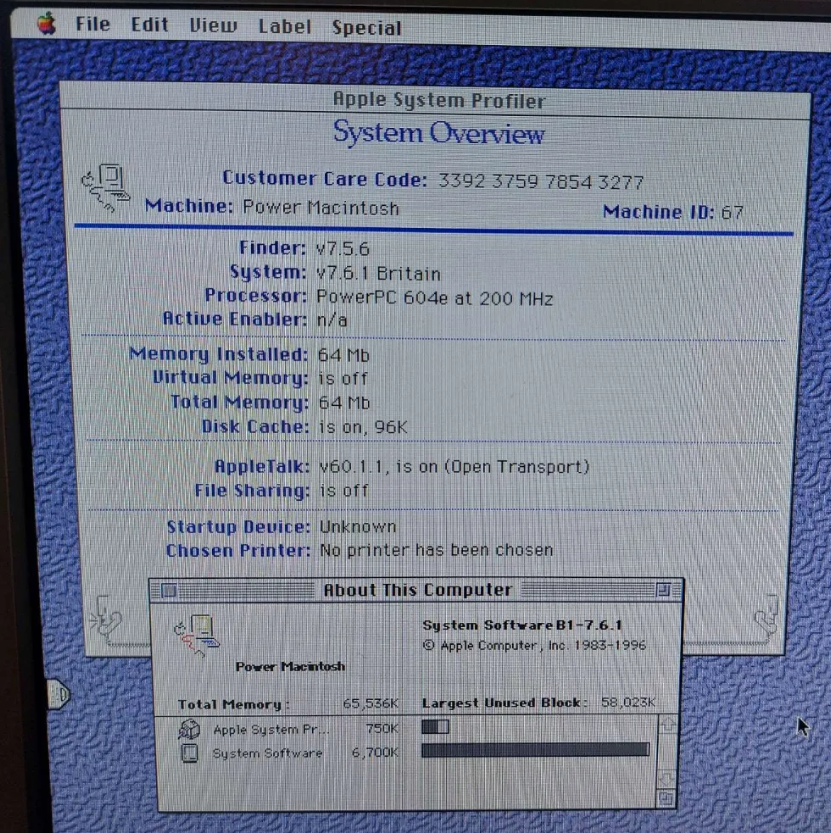
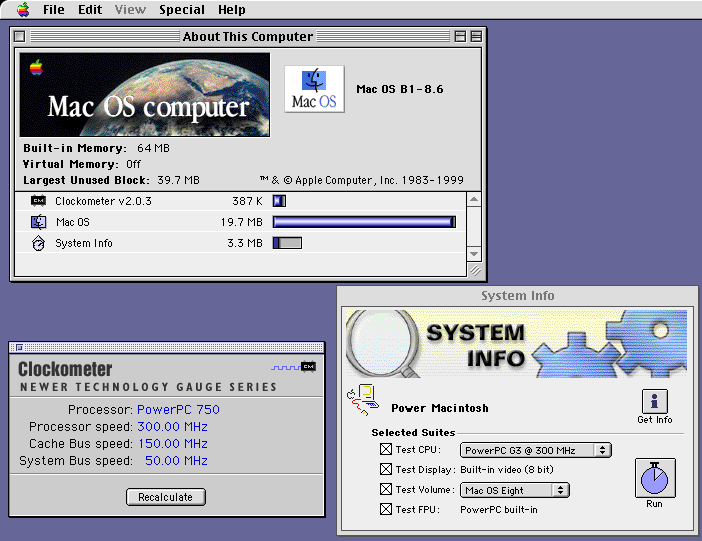
As I’d been told that it didn’t chime, but the CPU did warm up, I decided to try booting the absolute minimum. I couldn’t find a proper ATX power supply, so given I didn’t have any disks and only one RAM stick and no video card, I used my picoATX and a 5A 12V power supply – this is only 60W, but given the 233MHz 604e (System 7.6.1 reports it as a 200MHz CPU, but the part number and Clockometer agree that it is a 233MHz CPU – this is nice because it is the fastest Apple 604e, and a smidge faster than the stock CPU) fitted would only need less than 10W, I figured the remaining 50W or so was plenty for the chipset and fan.
Pressing the power button, the fan came to life, the floppy drive clicked and the CPU and things on the logic board warmed up without getting excessively hot. I powered it off and poked a non-bootable floppy disk in the drive to see what it would do… it tried to read the disk and then ejected it. This is extremely good news. It means that the computer is executing code from ROM and trying to find an OS. I powered down again and plugged in my stereo amplifier and speakers.
Yay! Seems that it does chime, just not through the internal speaker.
I grabbed a VillageTronic MPDD+ PCI video card (because I suspect it probably doesn’t use much electrical power) and popped it in the bottom most PCI slot. Plugged in a keyboard, mouse and VGA monitor and powered the computer on…
Where is My Disk?
Promising… I found my ZuluSCSI Pico and plugged it into the external SCSI port and it booted right up. I didn’t hang around long, I just booted and checked System Profiler (I wasn’t certain what speed the CPU was, or how much RAM was installed, so now I know it is a 200MHz 604e (update – I thought I did, but it is reporting incorrectly based on the multiplier and it is assuming a 40MHz bus, the CPU is actually running at 233MHz on a 46MHz bus) and 64MB). Given I didn’t have a proper power supply installed, I shut it back down.
Boot Success!
Removing Dents and Straightening the Chassis
There were two dents from point impacts in the side panel. I removed these by placing the side panel on top of a piece of wood and then hitting the inside (high spots) with a rubber mallet. This worked surprisingly well, the case is made from an extremely ductile grade of steel.
The case stands on four large feet, someone had managed to bend the case between the front and back feet so that there was an arch in the bottom of the case. I straightened this by hand, again, it bent back surprisingly easily.
Some of the side panel latches were bent out of shape. I adjusted these back closer to their original shape using a pair of small pliers. Don’t over twist them as it feels like they would break if worked too much.
I also used the mallet to adjust the overall shape of the case a little as it wasn’t quite square. If you do similar, obviously take care, perhaps remove any hard disks first.
The Next Day – Power Supplies, Fans and Sound
After getting my hands on a cheap next day delivery power supply I found that the power socket on the back wasn’t low enough to fit. I was already worrying about the fan position, as like most modern power supplies it has a large 120mm fan in the “top” as orientated in this case.
Jalopy PowerTower
For now I just used the power supply with it placed on top of the case, with the case on its side for a bit more testing. While I was at it, I replaced the rear exhaust 80mm case fan with an 80mm Noctua fan. It fits, and the provided 3 pin cable matches the logic board fan connector. The only issue is that the existing fan guard doesn’t clip into place due to the mating material being a little thicker on the Noctua. This means that it is a friction fit instead of being held fast by the clips. This will do for now, but I might come back to it later. I don’t want to glue it because I want to be able to replace the fan again in the future.
I had looked at the internal speaker and cleaned the contacts where it connected to the logic board, but it still wasn’t chiming. After removing the speaker and holding it to my ear, I could hear that it clicked when the computer powered on. Before doing anything more complicated or costly, I thought I’d check the basics…
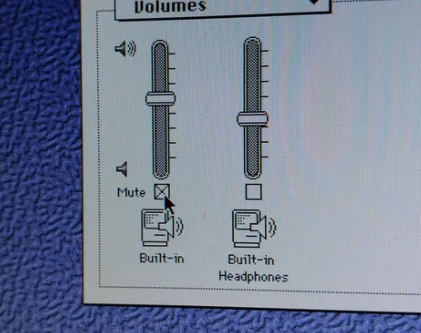
When a PowerTower in the Forrest is Muted, Does it Still Make a Sound?
So… it turns out that the PRAM on this computer defaults to the built in sound being muted (I’ve had the battery out). Either that or it is falsely detecting that something is plugged into the external port (I’ve since investigated and I believe the issue is with the rear port). I un-muted the Built-in sound and…
Bingo, turns out sound does work. Mostly.
I left the computer running for about half an hour – it is so quiet I almost can’t hear it, which is bliss compared to most of my vintage machines. I’ve decided that I want to keep it like this and so have ordered an extra quiet 80mm fan for where one is missing for the CPU, and another to fit into the power supply I will end up using.
I noticed that the computer threw an error and crashed while sat idle. I don’t know why yet, but my first suspicion is that perhaps someone has removed the heatsink from the CPU and broke the thermal paste bond between the CPU and heatsink. Hopefully it isn’t anything too difficult to fix – I’ll come back to it and do some load testing with TechTool.
Onto finding an appropriate power supply…
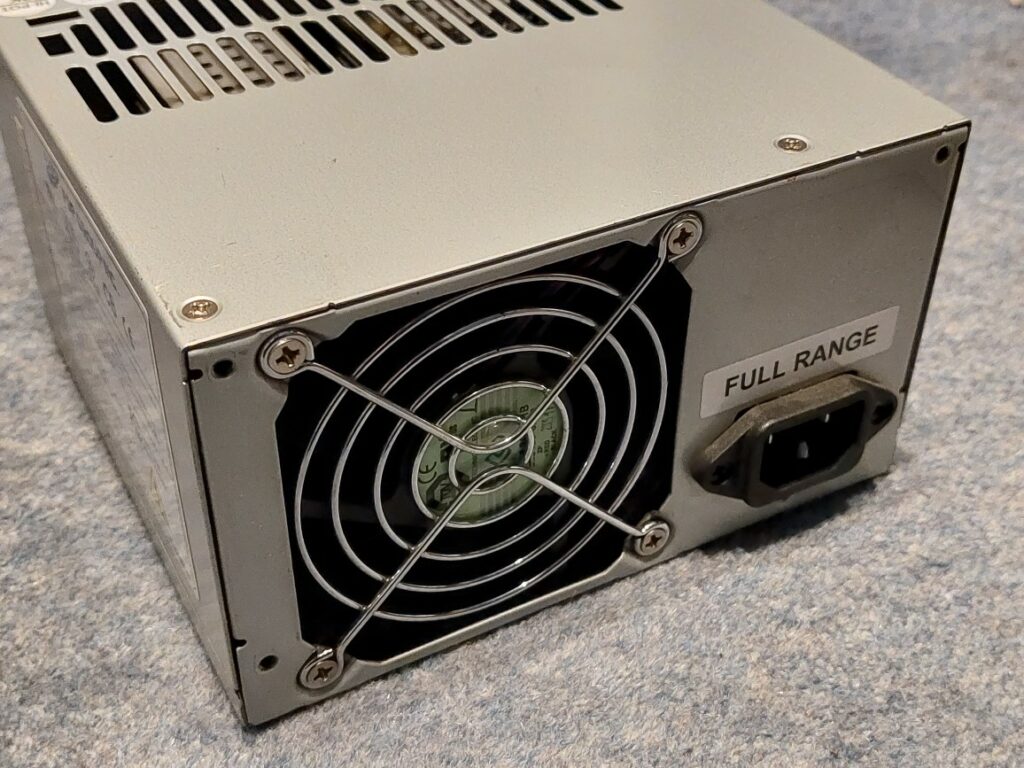
The requirements for a power supply for the PowerTower Pro are as follows as far as I can see :
The fan must be in the rear face of the power supply, and flush.
There must be no power switch or LED sticking out (looking at you HP).
The IEC power connection must be low down, and not vertically orientated.
The internal power connectors must be compatible with 20 pin ATX and preferably have several “Molex” 4 pin 12v/5v connectors for powering drives.
The power supply must provide 3.3v, 5v, 12v and -12v. I haven’t confirmed if -5v is required, but it was present on the stock power supply.
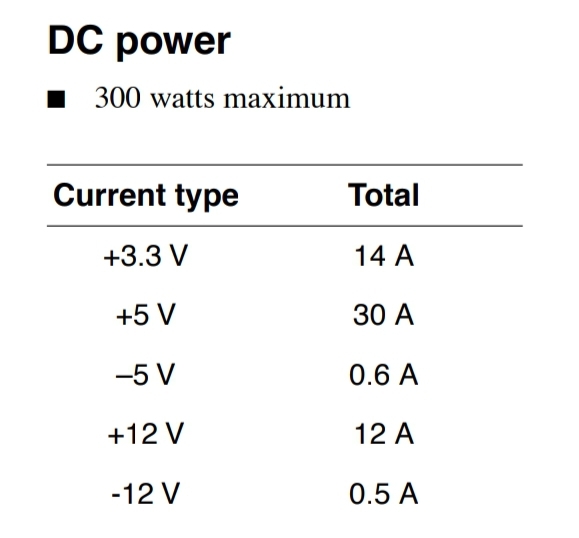
Macs and clones from this era heavily rely on 5v. This is unlike more recent power supplies which provide more 3.3v, or even 12v for the latest models. Finding something that can provide over 45A for 5v like the original 9600 ~400W power supplies is almost impossible and so some compromises need to be made. See below for an extract from the PowerTower Pro manual. If possible aim to be near or exceed these values, especially the 5v current.
Stock Power Supply Specifications
After several hours looking at power supplies on eBay, I decided that I wanted either an FSP300 or FSP350, specifically the PLT variants as these have stronger 5v rails than most power supplies. Additionally, the power connector and fan are in the right location, and I was able to find one for sale for a reasonable price. I ultimately bought an FSP350-60PLT, with a 5v rail capable of providing 32A, but the FSP300-60PLT would also be perfect. The -5v provides a small amount less current, but I doubt this is an issue.
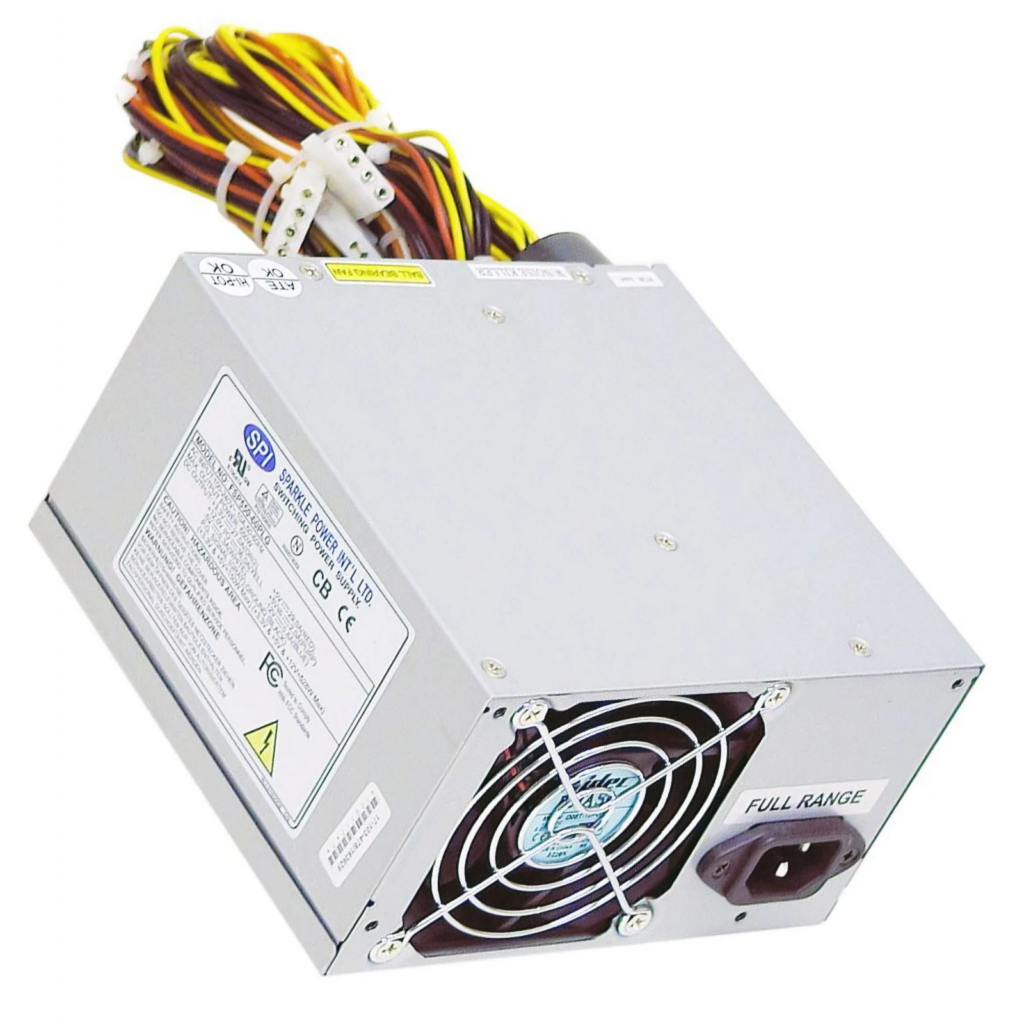
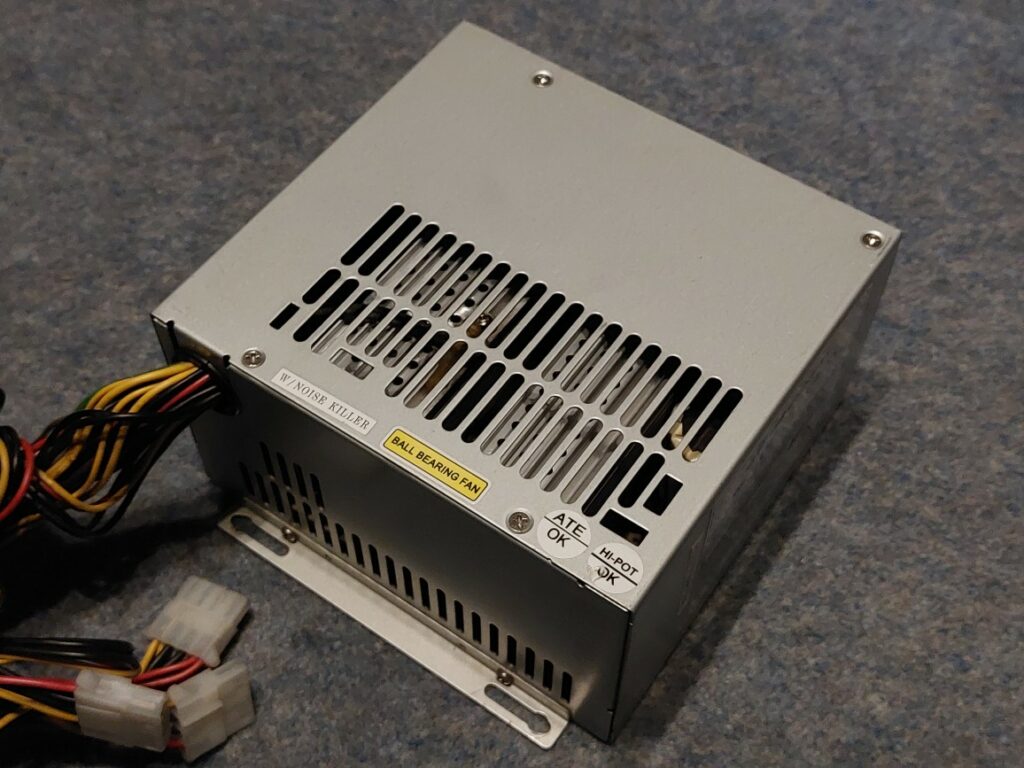
The following shows the ideal arrangement of power socket, fan and no vents on the top surface (the one I bought does have vents in the top, but I’m hoping that there are more vents elsewhere, or that it wont be enough of an issue to matter) :
A Good PSU Configuration
Fan and a Bit of TLC
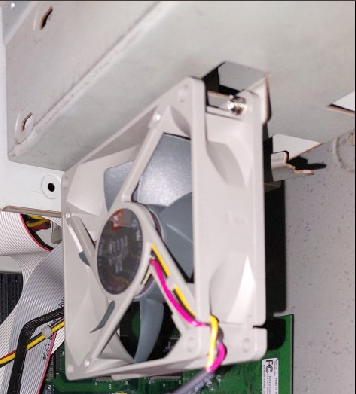
The additional fans I ordered arrived, so I mounted one on the bracket that holds the Processor card in place (and also looks to have space for two hard disks). I don’t know what direction the original fan faced, but I orientated the new one to draw air upwards away from the CPU towards the exhaust fan and PSU. The fan was an 1800 rpm Noctua and was louder than the slower version I used for the rear case fan, so I used the adapter that came with the other fan that I assume is just an inline resistor that reduces the speed of the fan. It is now basically silent again.
CPU Fan
I’ll quickly skip over a few things I did because it isn’t very interesting, but I…
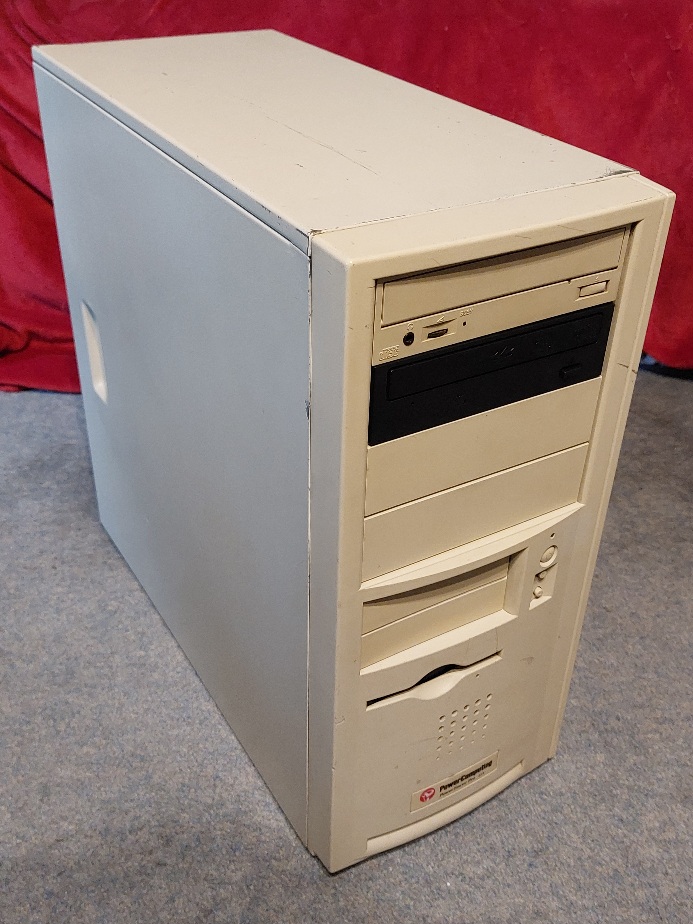
Cleaned the exterior of the case. I used IPA which was overly aggressive on the paint, so I recommend you use warm soapy water if you are doing the same (Image 1).
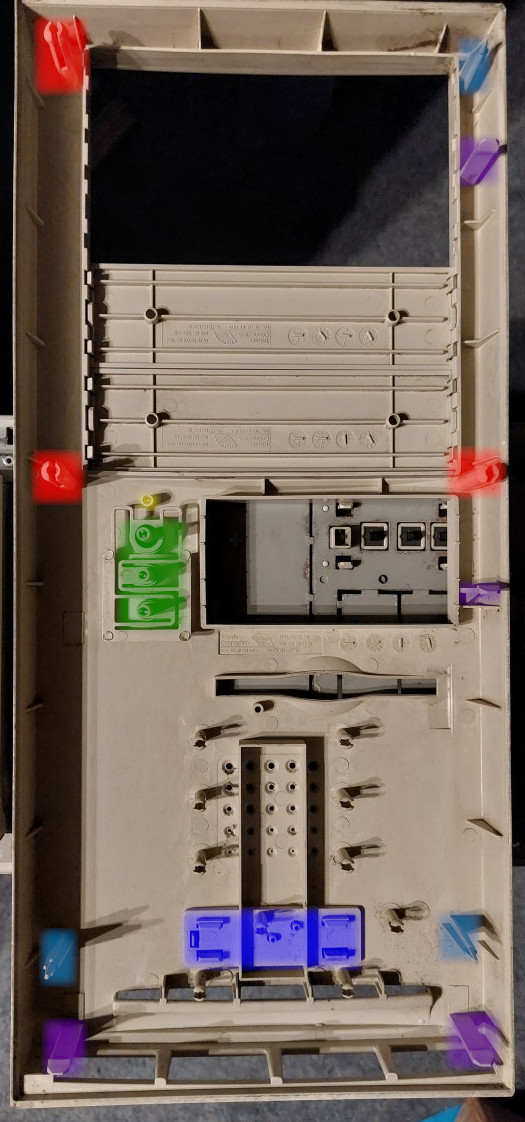
Removed the plastic front (Image 8). There are three latches down the left hand side and one more on the bottom right. Release these and the front should pull off (Image 2).
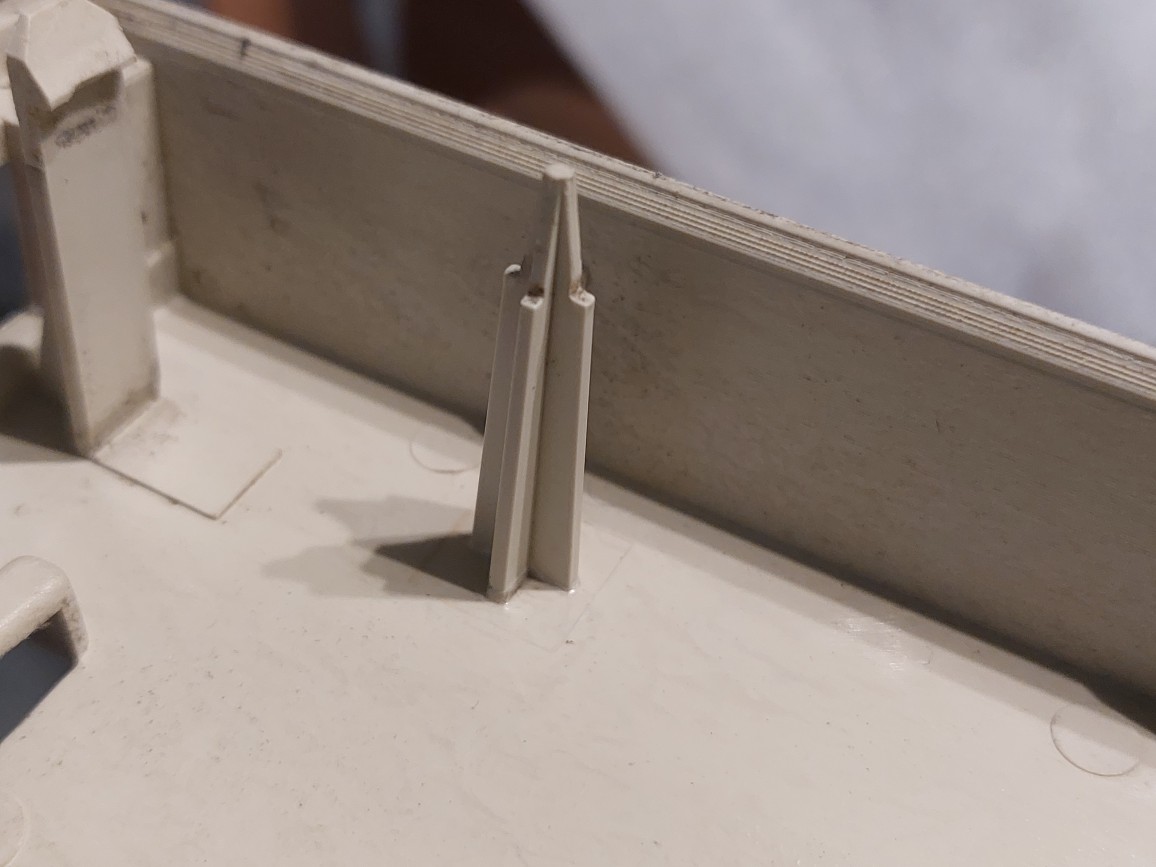
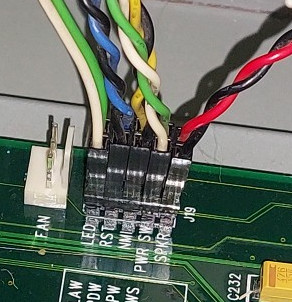
Glued a broken support back on (Image 3), and glued the power LED light pipe back together (Image 4), it had dropped out the first time I opened the case. I ended up using superglue for both, but a plastic cement or Acetone might be better for the supports. After re-assembling, I actually found that the power LED still didn’t work, but it was just that a previous owner had attached the LED wires back to front, so swapping them over fixed that issue (Image 5)(Image 7).
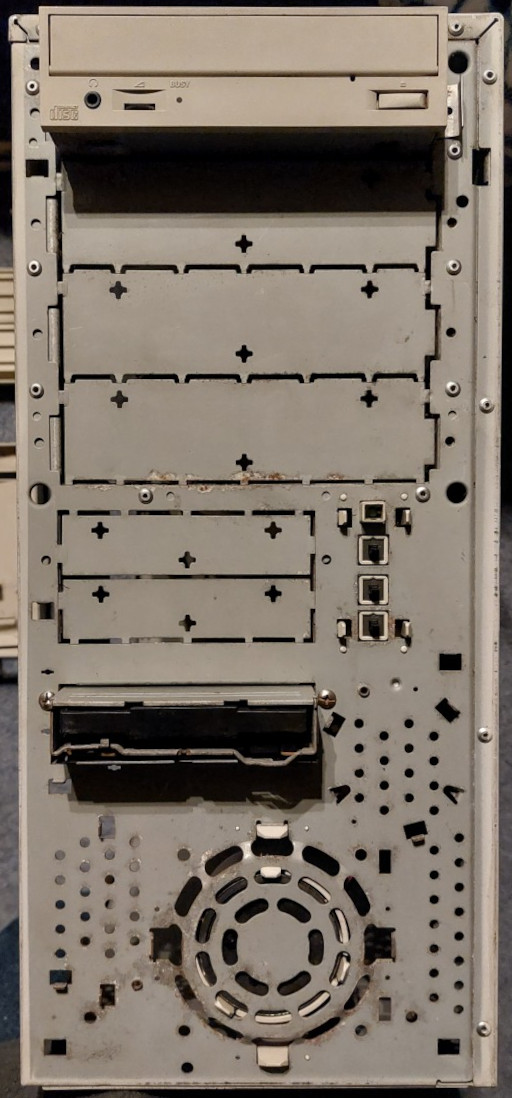
Fitted a spare, black optical drive to fill the missing opening in the front (Image 6). I had to knock out a metal blank to do this (Image 8), and am unfortunately missing a support rail that should go on the right hand side. A beige drive would look better (Image 1).
Installed PCI slot covers where they were missing.
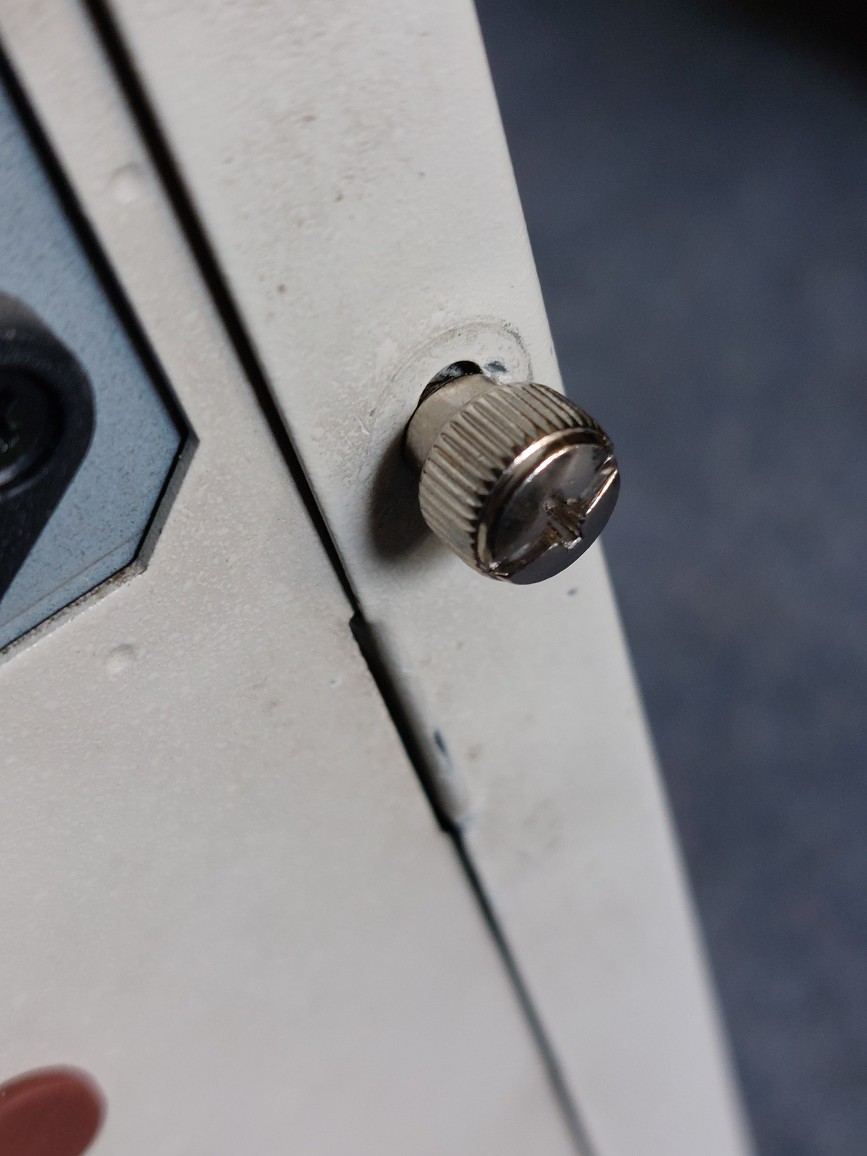
Fitted thumb screws to the rear of the case (Image 9).
In Image 2 above, red are clips, purple are latches, light blue are supports, dark blue is the removable case badge, green are the power, reset and NMI buttons. Yellow is the LED light tube.
Putting the Power in PowerTower Pro
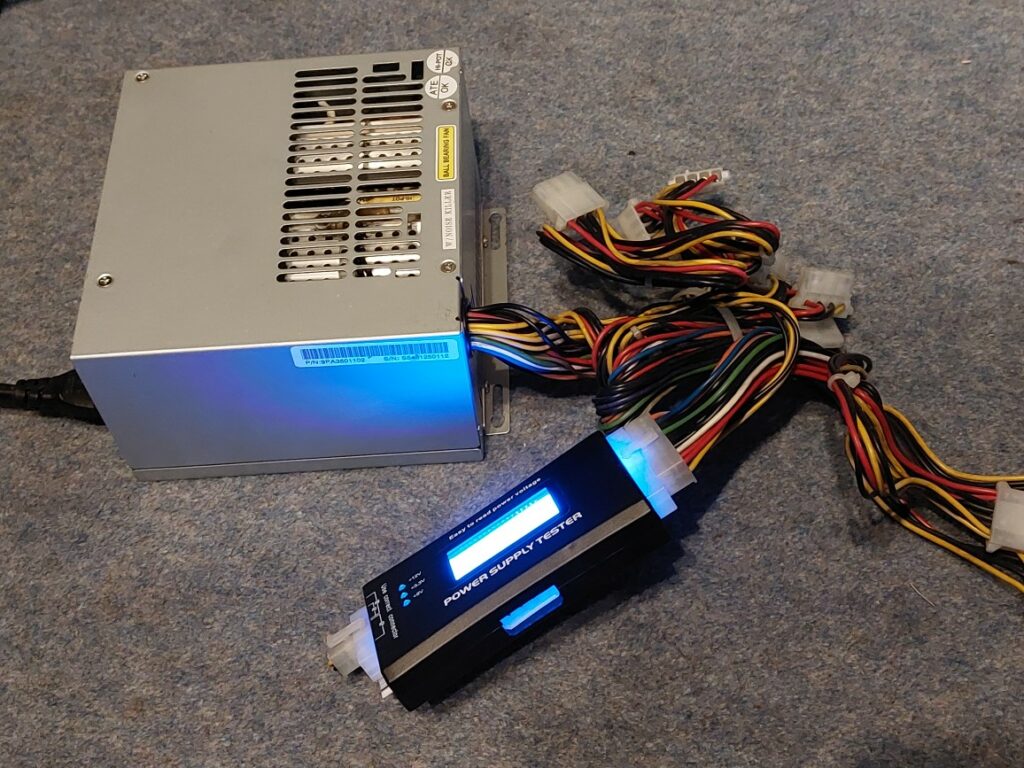
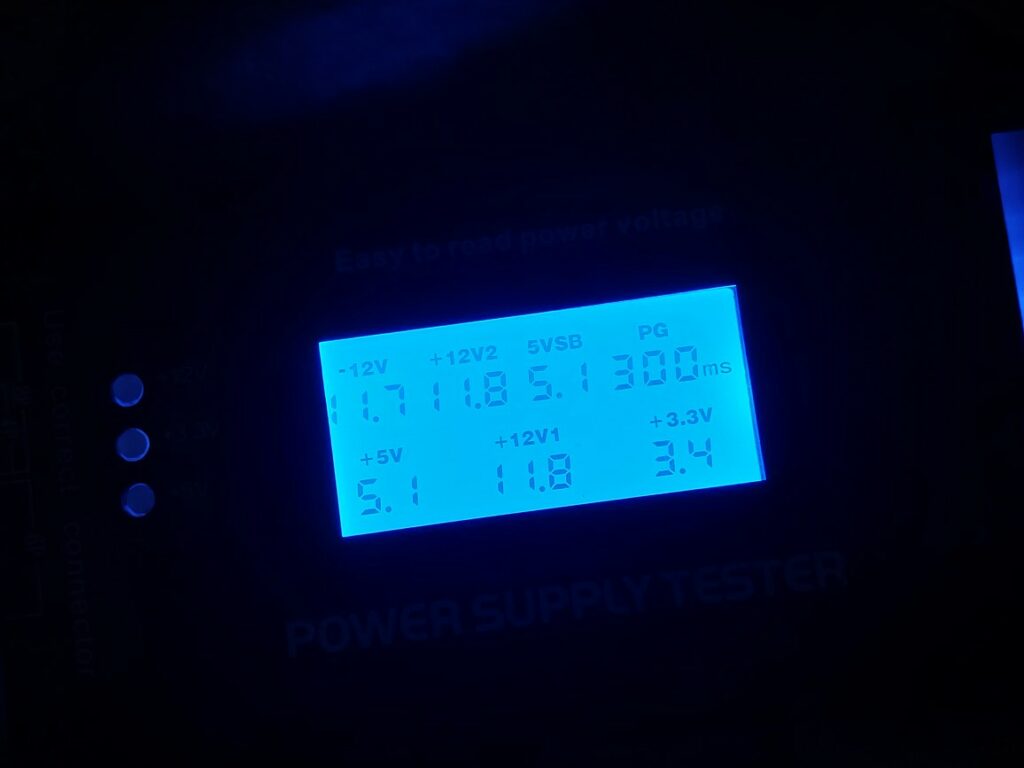
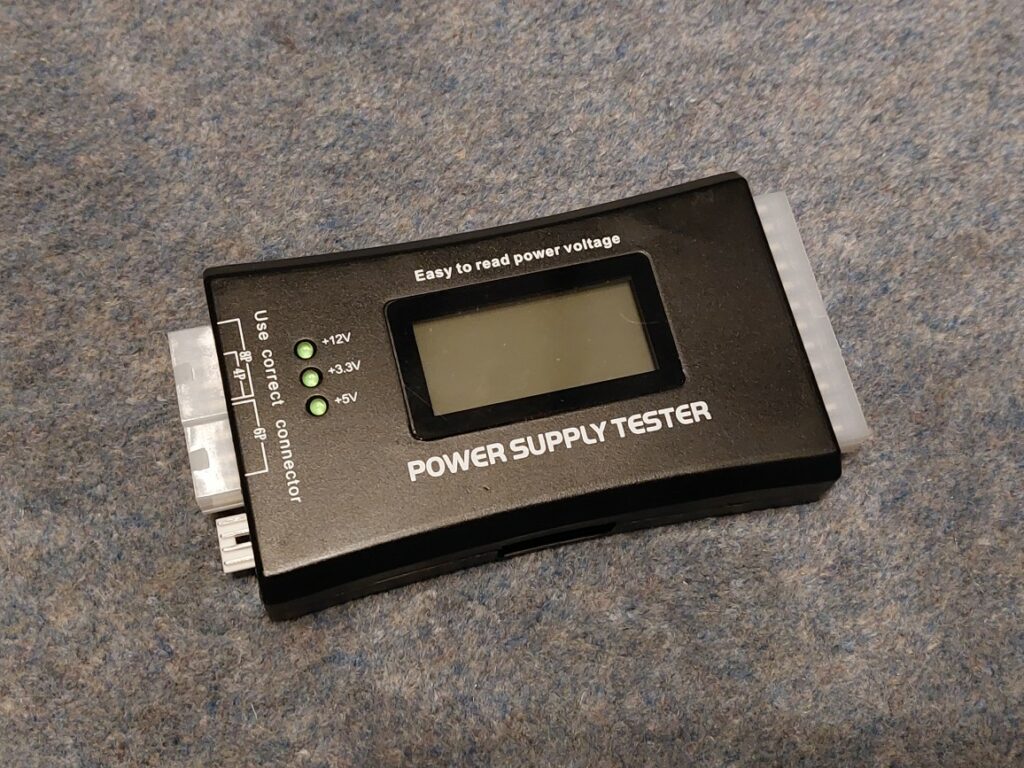
Just in time for the weekend the FSP350-60PLT power supply I ordered arrived. Given it isn’t new, before installing it in the PowerTower, I connected it to a tester I got from Amazon to verify the voltages. It would have been sensible to put an artificial load on the 5v and 12v rails by plugging resistors into a Molex at the same time, but mostly I just wanted to know that the power rails were at sensible voltages and not unstable.
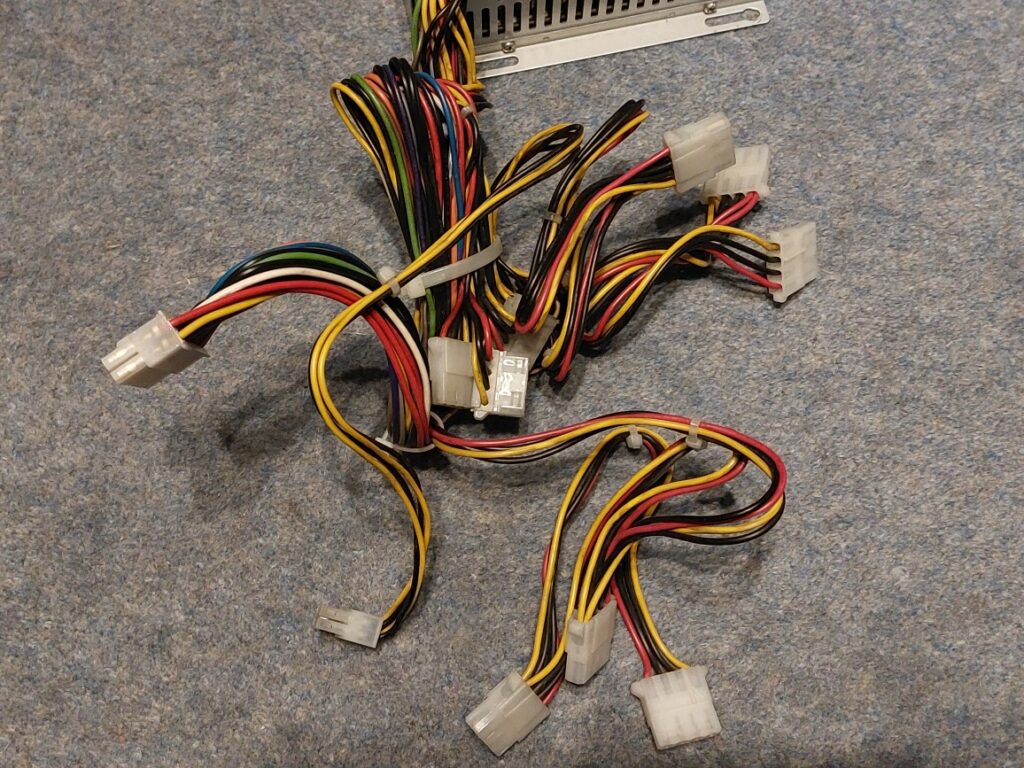
Once satisfied, I installed the power supply in the case. It really has a few too many Molex connectors and was doing a very good impression of the Flying Spaghetti Monster, but I did my best to push them out of the airflow from the CPU and PCI bay.
Spaghetti
The good news is that the power supply is a perfect fit. The fan is even fairly quiet – I’d say it is about the same volume as an 8600. I’m unsure if to try to reduce the noise with a quiet fan, but I’m reluctant as most of the noise is air noise, meaning a quieter fan would likely only make less noise by moving less air. It makes me uncomfortable when I see people replacing “loud” fans with less powerfull ones designed for lower pressure drops, based on the open air airflow rates. But that is for another day.
Power Supply In Situ
This is the first time I’ve been able to boot the computer without the side panel off or cables trailing out the rear openings. It finally feels like a real computer!
Putting the Pro in PowerTower Pro
Right, now that I have the computer a bit more complete I need to get it so that it isn’t relying on my ZuluSCSI Pico, as that is my general purpose fallback boot device and I don’t really want to install any drivers specific to this machine on it. Plus the SCSI port is a little too close to the ADB port and the ZuluSCSI and ADB cable push up against each other.
To upgrade the PowerTower Pro, and to give greater flexibility or disks, I decided to install some cards…
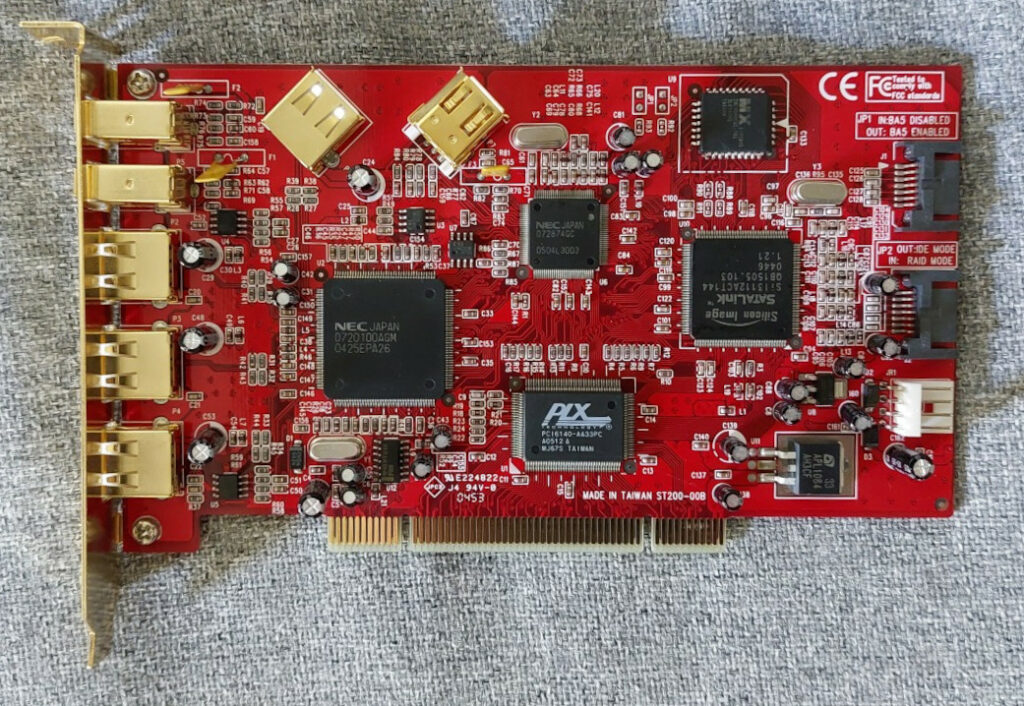
A PCI Combo Card with SATA (150), USB 2.0 and FireWire 400.
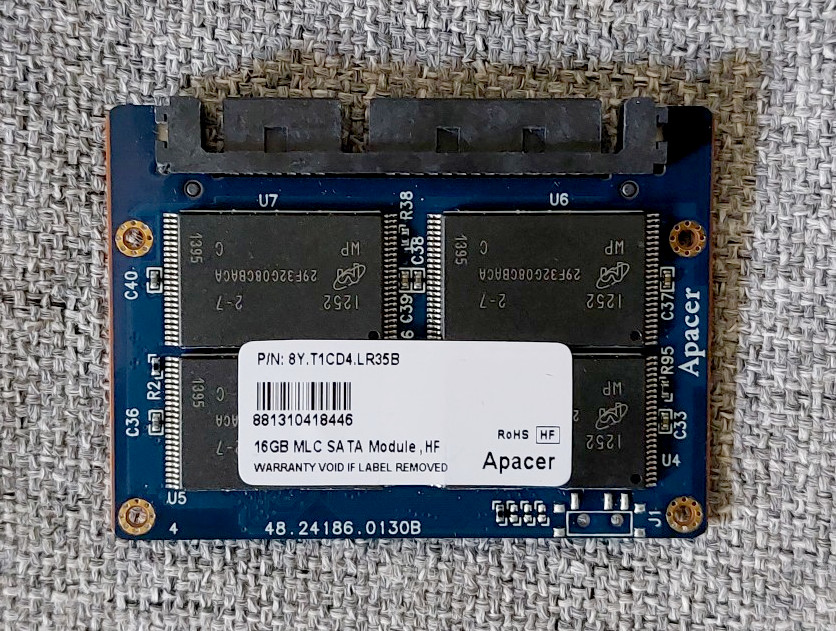
A 16GB SATA DOM (Disk on Module).
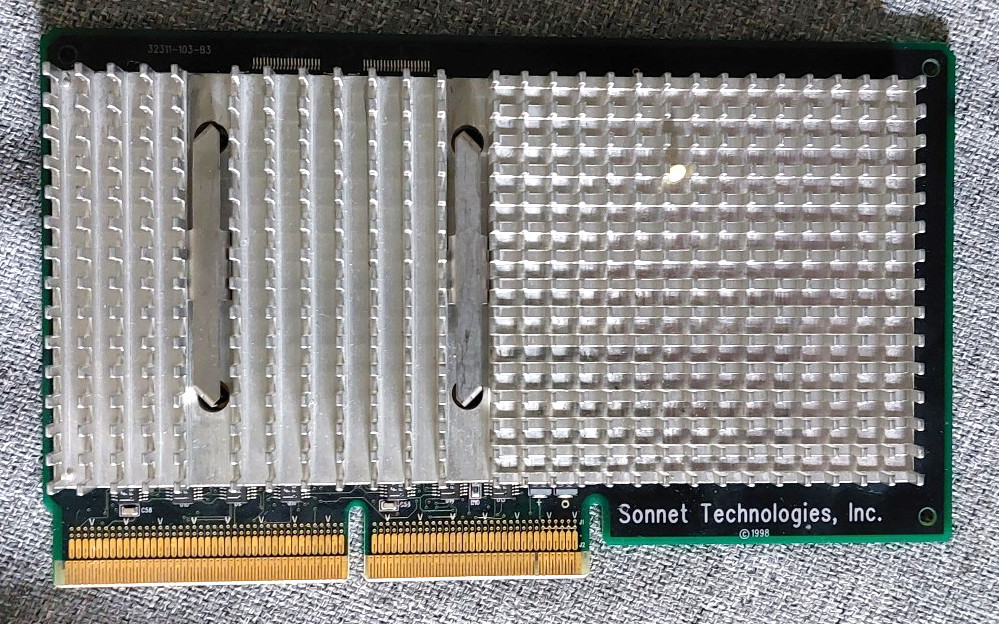
A Sonnet 300MHz G3 upgrade with 1MB of 150MHz Level 2 Cache.
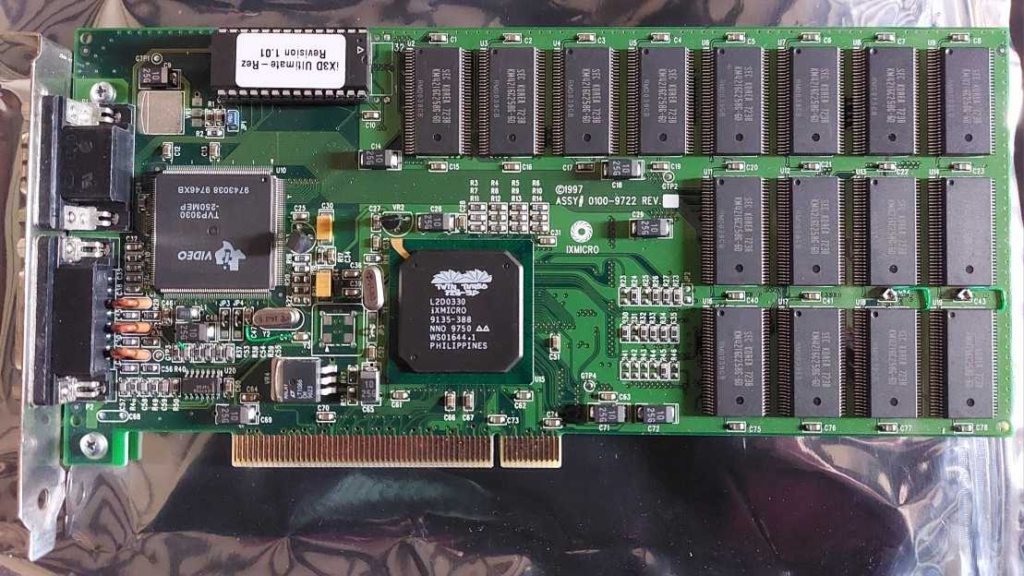
An ixMicro ix3D UltimateRez – an 8MB video card with good 2D performance and some very basic QuickDraw3D acceleration.
Sonnet G3, PCI Combo Card and an ixMicro ix3D. The grey Noctua is out of position for a clearer view.
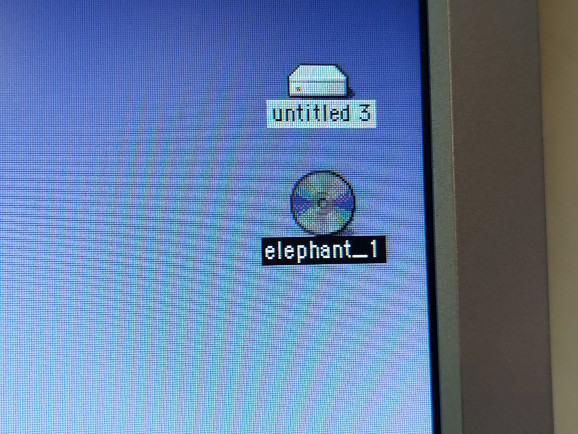
After installing the above, I also decided to install a Sonnet Tempo ATA133 card I recently got for a steal, not because I plan to use it long term in this machine, but because I found that the SCSI CD-ROM drive wasn’t working and the combination of the Sonnet Tempo and the IDE optical drive I had already installed to fill the open bay gives me a fast, bootable CD drive, that also reads DVDs and I think writes CDs. It will be a nice perk for now, until I work out what I want to do in the long term.
Installing a bootable, Mac compatible SATA card gives me the opportunity to use much cheaper but very fast drives, like this 16GB SATA DOM that I bought fairly cheaply from someone selling a number of them recovered from thin clients. While 16GB isn’t particularly large by modern standards, it is potentially eight times larger than the base 2GB configuration for the PowerTower Pro 225.
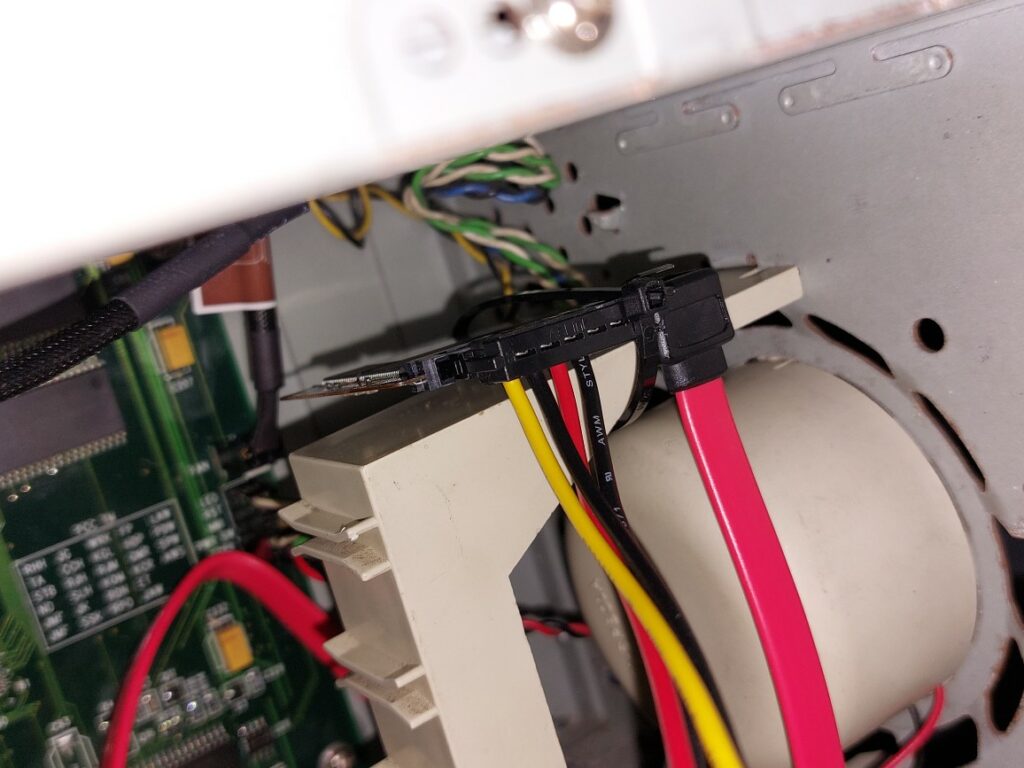
Because the DOM is an exposed circuit board, after looking around at the huge number of available drive bays (the PowerTower Pro seems to have a total of nine bays – four front 5.25″, two front 3.5″ plus the floppy drive and two internal 3.5″ bays in the cross brace / CPU bracket), I decided that the best place to mount it was with a cable tie on the long PCI card restraint bracket next to the speaker. Yes, it is probably the wrong thing to do, but it means that I don’t have to worry about electrical shorts!
The Sonnet processor upgrade solves the issue that I am missing the original Level 2 Cache. Since my had was sort of forced in this, I tried to aim for performance approximately where I thought the performance of the announced by never released PowerComputing PowerTower Pro G3, which allegedly had a 275MHz G3 with a 1:1 (275MHz) L2 backside cache. My G3 only has a 1:2 (150MHz) L2 backside cache, but it has a 300MHz CPU clock and a 50MHz host bus speed. Additionally, I believe I did see mention that PowerComputing intended to include a new, revised version of the ixMicro TwinTurbo video card, with improved performance and some 3D capabilities.
300MHz Sonnet G3 – This is an unusual card with a silver heatsink and green PCB.
While the ix3D isn’t anything to write home about – it is a fairly fast 2D card with a high quality image output, capable of driving my 1280×1024 LCD at millions of colours it is likely a good pairing with the G3 and PowerTower. The early QuickDraw3D features are quirky, and not much use. If I remember, the card doesn’t support textured 3D, so you’re not going to be playing any fancy games on it, but it might be useful for some CAD modelling. Basically, I’m trying to resist the temptation to just slap a Radeon in the computer because doing so doesn’t keep it interesting with regards to what can and can’t I do on this machine. This card is much more period appropriate, while giving a little feature boost over the stock TwinTurbo cards. It does feel likely that this was a card that PowerComputing planned to ship with their G3 PowerTower Pro. The specific card I’ve installed has both an Apple RGB port and VGA, which is helpful when connecting monitors without adapters. I don’t believe the card is capable of running two monitors, that wasn’t a common feature at the time.
ixMicro ix3D UltimateRez.
Interestingly, when I went to install PCI cards I found that their rear brackets aligned even worse than usual with the screw holes in the rear of the case. I solved this by loosening all eight logic board screws (you don’t need to remove the floppy drive bay FYI) and re-tightened them after pushing the board rearwards in the case.
So How Fast is My PowerTower Pro?
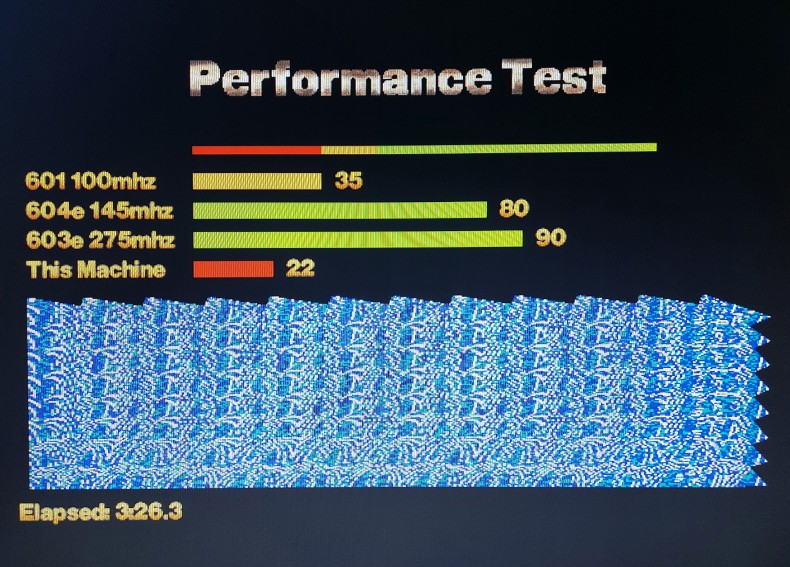
Now that we have something that resembles a computer, more than just a collection of parts, it feels like a good time to run some benchmarks. Keep in mind that at this point I only have a single 64MB RAM DIMM installed, meaning that I am not able to take advantage of memory interleaving (where the sequentially next memory address is pre-loaded ready, saving a little access time when you are accessing a block of contiguous memory). Additionally, ixMicro cards vary significantly in different aspects of performance depending on which driver version you have installed. I used the version labelled “2” during these tests, which if I remember, is a community version designed to add compatibility with later versions of classic Mac OS.
Some System Specifications / Information About My PowerTower
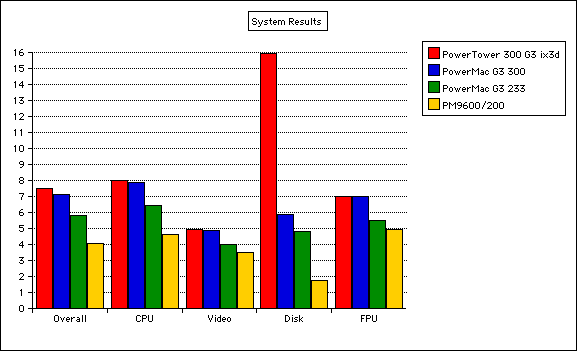
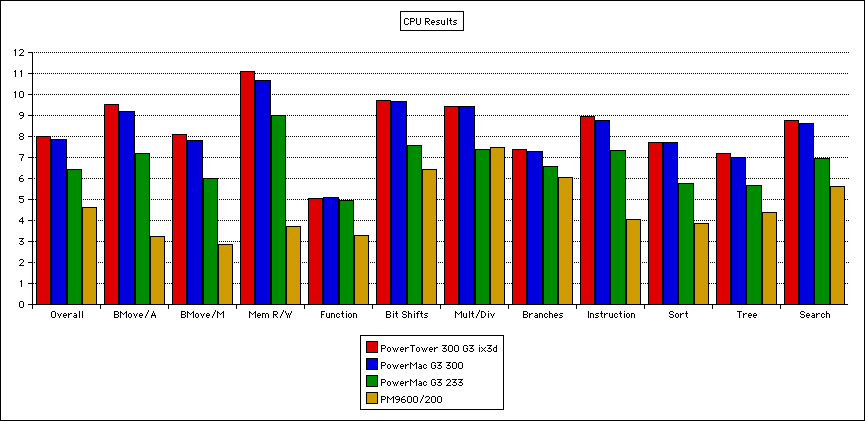
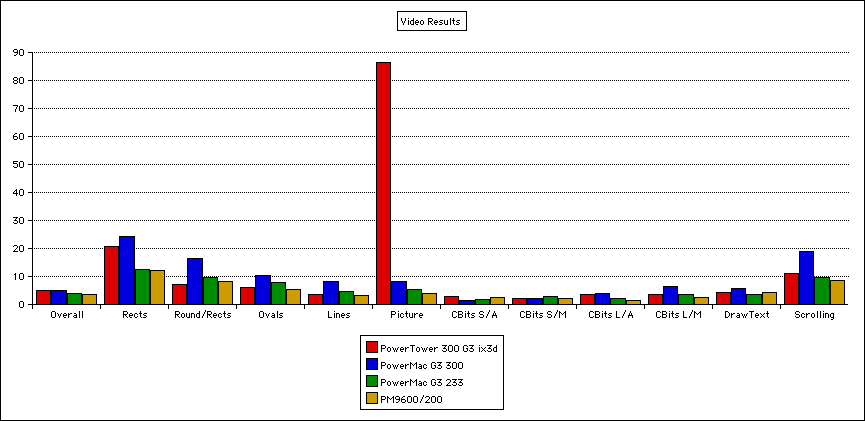
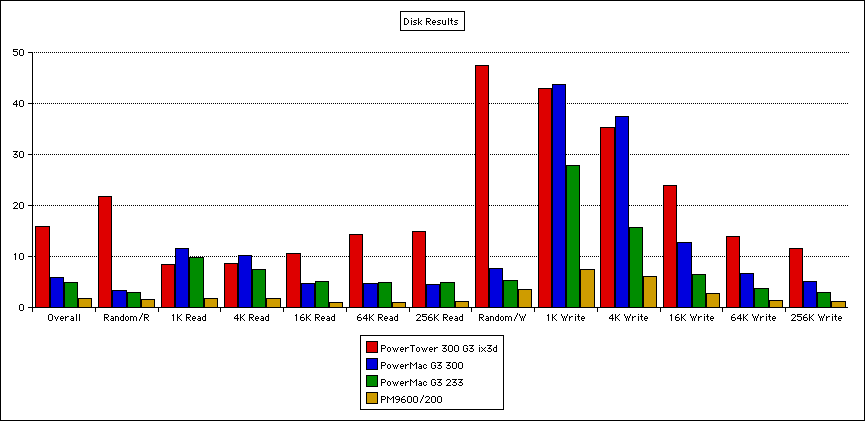
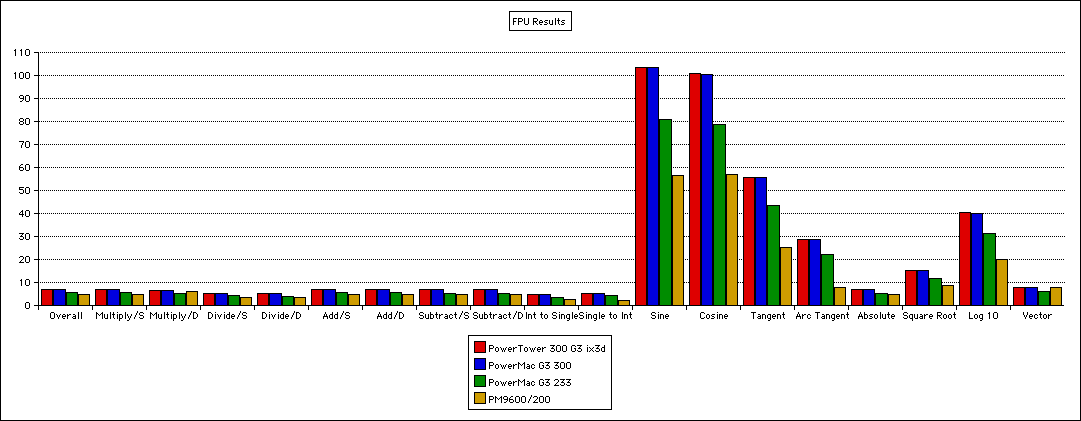
For comparison, I have also plotted results from a 300MHz Blue & White G3 (which would have 512k of 150MHz L2 Cache and a 100MHz system bus, compared to my 300MHz G3 with 1MB of 150MHz L2 Cache on a 50MHz system bus), a 233MHz Beige G3 (512k of 116MHz L2 and a 66MHz system bus) and a 200MHz 9600 (512k of 50MHz logic board cache (not backside like the G3s, or even “inline” like the later 250+ MHz 9600s). The Beige G3 has onboard ATI Rage II+ graphics, and the Blue & White has an ATI Rage 128 GL.
A large Cache always tends to disproportionately impact overall CPU performance. This is the reason for the small lead over the Blue & White. The Blue & White and the Beige will both have some advantage regarding RAM speed, which in the real world would be seen when working with large objects in RAM.
With the specific drivers I’m using for the ix3D, you can see an almost absurd level of performance for the “Picture” video test. This test draws an image to the screen, and then copies it lots of times randomly across the screen. This specific driver excels at this, possibly at the cost of performance for some of the graphics primitives compared to version 1 of the same. If I remember correctly, the Apple version of the driver has very good text rendering performance.
Disk performance of the SATA card and DOM are extremely good, especially compared to the 9600/200, and random read / write. The latter due to low seek times as there isn’t a mechanical mechanism needing to be physically moved.
FPU performance between the various G3s should basically just scale with MHz. Comparing the G3 and 604e in the 9600 is a little more tricky as they are fairly different and the 604e will perform better with code optimised for its particular characteristics. I don’t find a lot of meaning in the FPU chart.
Installed a Patched copy of iTunes 1.1. The visualiser only runs at 8fps unfortunately.
Purchased some rust converter and zinc paint for where the plating has failed and some minor corrosion is showing.
Installed 192MB of RAM.
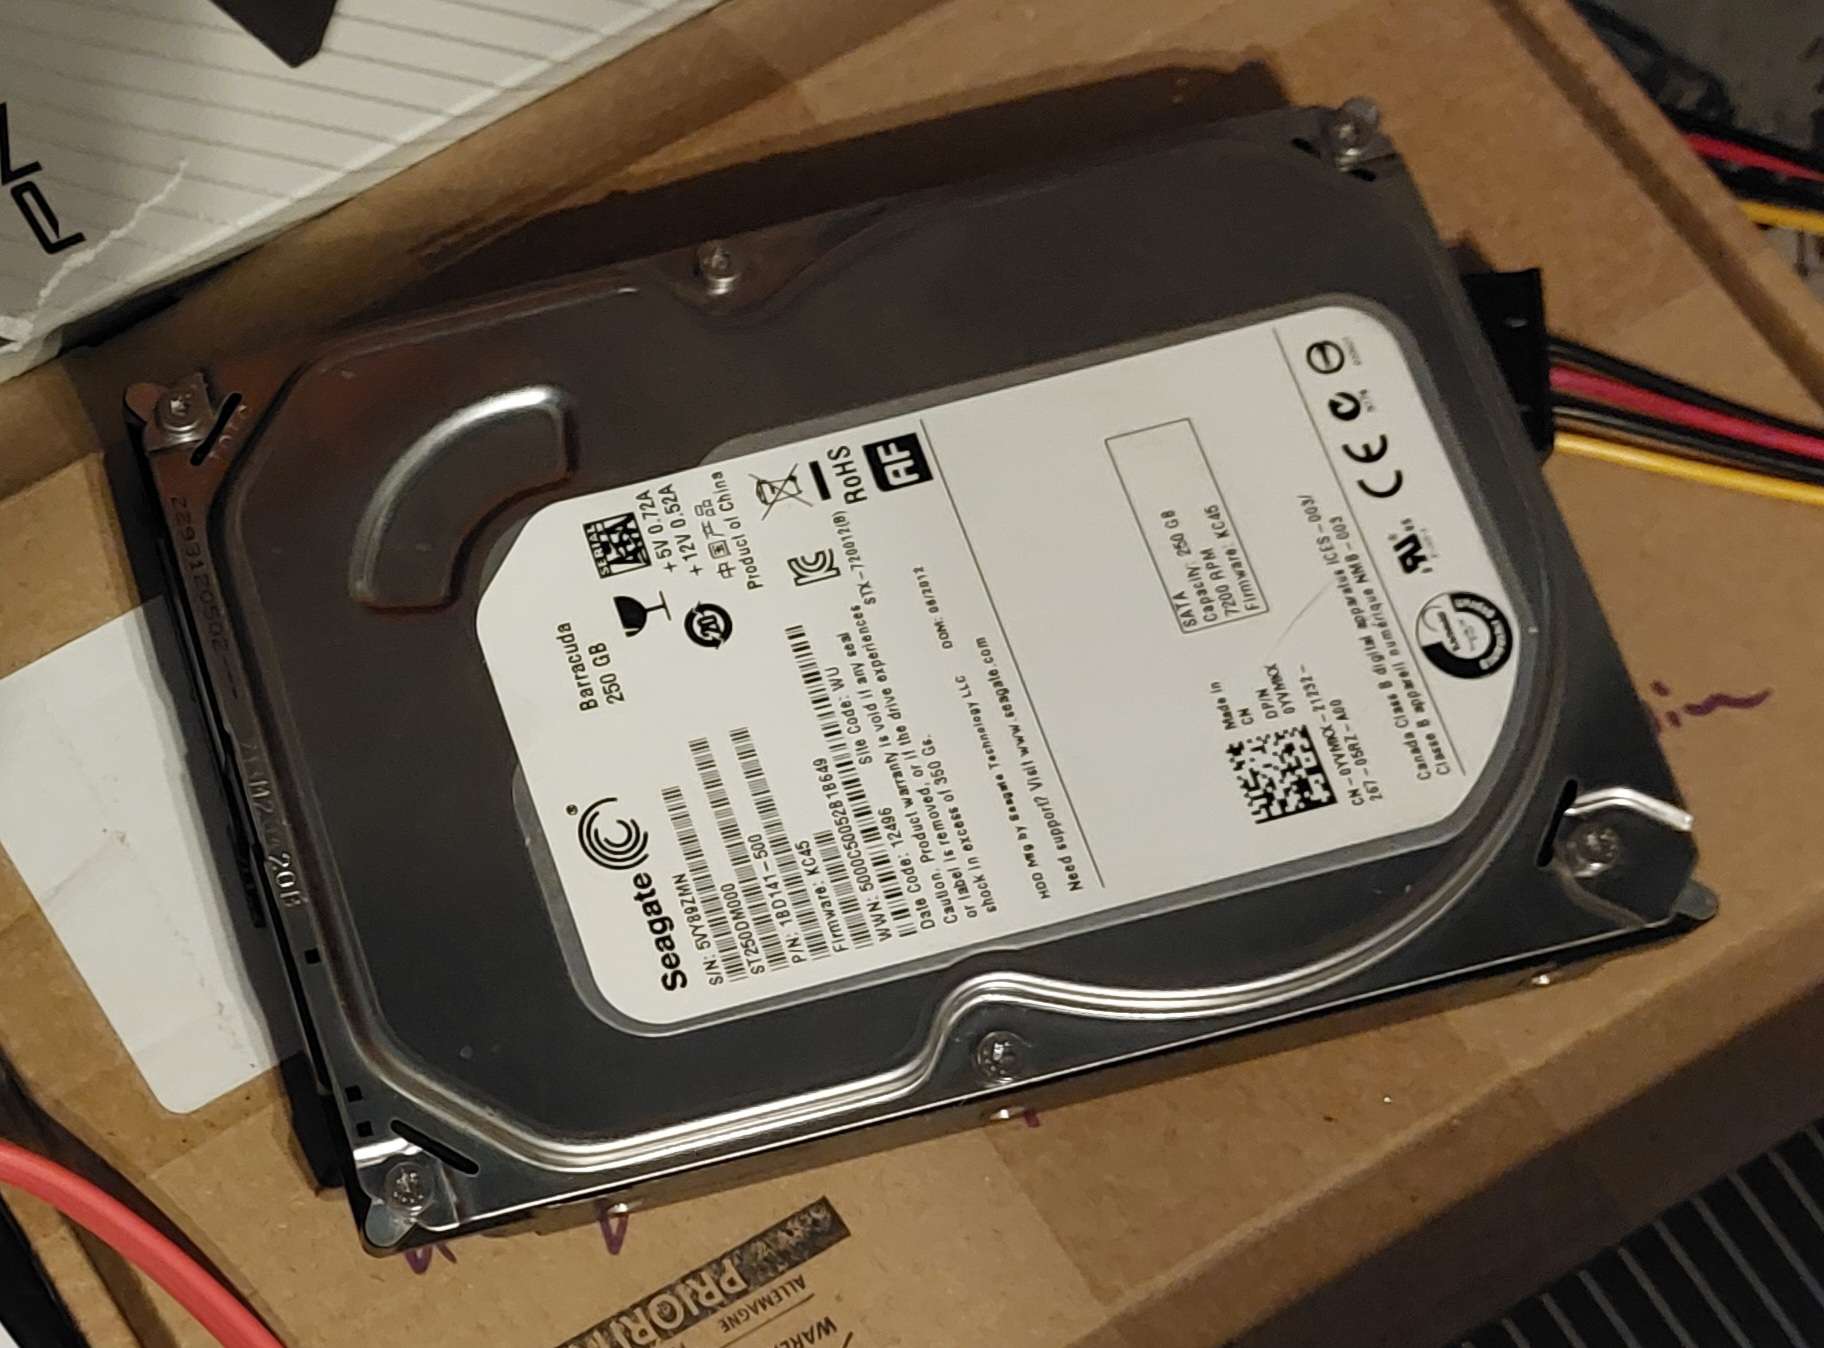
Installed a 500GB SATA 7200rpm Hard Disk.
Things I Should Look Into
I need to investigate the SCSI CD-ROM Drive to see if I can get it working. Sometimes all they need is the lens cleaning, but often the laser diodes have also gone weak. Older ROM only drives often struggle to read home-written CDs to start with, so combined with the above it is often worth installing an IDE or SATA drive, or a USB PCI card and using an external USB writer if you can (obviously this isn’t possible for computers that don’t have PCI).
I haven’t done anything much with the floppy drive yet. If nothing else, before I put any disks that I care about in it I need to take it to bits and clean the heads, although I’ve never been much of a fan of floppy drives, so “not using it” is a valid solution in my mind.
I spent some considerable time searching eBay and was finally able to find some matched pairs of suitable (5v 168 pin FPM / EDO) memory. While 64MB is a reasonable amount, especially for Mac OS 7.6, I’d like to run 8.6 as the primary OS on this computer and ideally would like to run 9.1, including some RAM hungry software for image editing, video editing and music production.
I need to fix whatever is wrong with the external sound port that means the computer always thinks a cable is plugged in. At the moment I just have a pair of Apple Design speakers plugged in.
Who made the case and what other computers shipped in the same or similar cases, possibly as a source of spare parts.
The main scenarios that have caused me issues with large hard disks in PCI era PowerPC Macs (Beige G3 through to G4 era) are…
Many IDE PowerPC Macs from the G3 to G4 era are limited to ~128GB disks.
The operating System on some early G3s needs to be in the first 8GB.
When partitioning a Terabyte scale disk in Classic Mac OS, Drive Setup fails to allow you to size partitions due to UI issues.
Lets look at each of these issue and solutions individually.
Dealing with the 128GB Limit
I believe this limitation impacts computers from the Beige G3 and original iMac through to some QuickSilver G4s. The issue is caused by the computers only supporting 28bit LBA, resulting in a 128GB limit. I usually aim for a little bit under 128GB as I believe there may be a little bit of margin needed for some reason.
The simplest solution, given disks less than 128GB are often more expensive due to so many vintage machines having the 28bit limit (not just Macs), is to get a larger disk such as a 250GB disk, and format it with a 120GB partition in a more modern computer that supports it. This has worked for me in the past, but whatever you do, do not mess with the partition table in your 28bit LBA machine.
The next easiest solution, but with a more significant cost, is to buy a PCI card that supports larger disks, such as an after market ATA card, or a SATA card. Note that most cards don’t support Macs, and even some of the ones that do, don’t support booting, only storage. A good option might be a SIL3112 based card as with the right firmware they have Classic Mac OS support (back to System 7.5) as well as some Mac OS X support.
Intech Software wrote a special hard disk driver that enabled the use of bigger disks with both Classic Mac OS and Mac OS X (10.2 and later) on the computer’s internal ATA bus. To use the driver with Classic Mac OS, format the drive using their Hard Disk SpeedTools product, but if you want to use the drive with Mac OS X, you will need to install a software driver called SpeedTools ATA Hi-Cap Driver in every OS X install. Note! There are still a number of limitations – it is likely that any computer that suffers from needing bootable OSes in the first 8GB will still need that, so create any bootable partitions you need within the first 8GB. On later machines using this disk driver to use larger disks, they will not be able to boot from beyond 128GB on the built in interface, so ensure that you put a partition divider around 120GB and only use partitions beyond 120GB for storage, and not bootable OSes. There are extensive warnings and guidance in the manuals for this software.
Please note that I’m not overly familiar with the limitations on older Performa 630 -> 6500 family IDE implementations. I have attempted to put a 120GB disk in a 630 but had odd, intermittent write errors. This is an ongoing project and I hope to find out what can and can’t be done with that family of machines.
Keeping the OS Within the First 8GB
Historic understanding of this is that the OS must be within the first 8GB of the hard disk on the Beige G3 and early iMacs, although this has been disputed at times. My personal experience of this is that I’ve had issues over time when I failed to partition a 40GB disk in a 233MHz beige G3 (with a Rev A ROM), but given this was back in something around 2003, I don’t have extensive notes! My thoughts are that more investigation is required with different hardware and ROM revisions to understand what is going on, but in the meanwhile, to be safe…
Partition your disk. I usually create a couple of small partitions and then a larger partition, using the larger if I want to run an early version of OSX. For example, I might create a 2GB partition and a 6GB partition for a Classic Mac OS install and a Mac OS X install. Alternatively, I might create two 1GB partitions, a 2GB and a 4GB if I’m experimenting with lots of OSes. I then usually create a single large partition with the remainder of the disk (assuming it is less than 128GB – see above) for applications and storage.
Use a PCI SATA or ATA card. Many cards make drives appear as SCSI drives meaning that the host’s ROM doesn’t use the code that prevents booting beyond 8GB (the bug is in the ATA code, and doesn’t apply to SCSI disks).
Using a helper partition – given the issue only exists very early in boot, it is possible to use a small helper partition and the software XPostFacto. XPostFacto is able to put a small number of files on a bootable partition, that then hooks into a larger OSX (I don’t think it supports OS9? I’m not sure, please correct me) installation on a large, unbootable partition. This trick can also be used to boot from FireWire drives on machines that don’t support booting from FireWire. Theoretically you could create 10 small partitions within the first 8GB of the hard disk and use each as a helper partition to boot huge partitions later into the disk.
Partitioning Multi-Terabyte Disks Under Classic Mac OS
Note – I believe that you are limited to 2TB disks in Classic Mac OS, but have not personally tested exceeding this limit.
When I installed a 1.5TB disk in my 9600 I found that I was able to format and use the disk using Apple’s Drive Setup, but that if I tried to partition the disk, I could not type in custom partition sizes (my usual trick with a big disk is to use the tab key to cycle through partitions that are visually too small to click on in Drive Setup). After some experimentation with various software, I found that I was able to easily set up partitions, once again using Hard Disk SpeedTools. As such, this is my recommendation for setting up a very large disk (I assume SATA) in a classic Mac OS system.
Try Compact Pro instead of Stuffit for sharing files with other users of vintage Macs – you might be surprised.
It is useful because you can create self extracting files protected from the ravages of the internet and you don’t need to worry about what compression software, or realistically, what hardware or OS version the recipient is using as the single format is extremely broadly compatible with Systems from 4.2 to Mac OS 9.2.2.
Macintosh Files
Classic Mac OS (System versions 9.2.2 and older) used a file format that is a bit different to what is used on most systems. Each file has two forks, a data fork, which contains binary data similar to any normal Windows / DOS / Linux / CP/M, and a second resource fork, that contains structured data called resources. Resources can be anything from pictures and sounds, to icons and even application code.
The Problem
A major issue with working with vintage Macs is that if you move a file with a resource fork onto a drive formatted as FAT or NTFS or most disk formats, including web servers, the resources are stripped from the file, an irrecoverable disaster as most files have all of the important information in resources.
The Solution
The common method to solve this issue is to process your files and convert them into a data fork only file, that can be later converted back to match the original files. Common formats that just do this are MacBinary (.bin), AppleSingle, and AppleDouble. BinHex (.hqx) is a format designed to allow the transmission of files through protocols that might otherwise corrupt, I think by misinterpreting parts of the file and making well meaning changes (Versions of Fetch and some web browsers cause this issue to files that aren’t converted to BinHex or MacBinary etc.). Additionally, it is possible to use compression formats such as the Stuffit (.sit / .sitx) compression format and Compact Pro format (.cpt) as these do not have any important data in the resource fork.
The Complication
Most vintage Macintosh users seem to have settled on using Stuffit Expander as their main decompression tool in recent past, and I assume Drop Stuff as their main compression utility. This is interesting as it wasn’t always the case with these tools becoming more popular in the late 90s and early 2000s, likely partly because older versions of Stuffit compatible software tended to be paid software.
My frustration with everyone using Stuffit, is that there are effectively three Stuffit formats – Versions 1 – 4 (.sit), Versions 5 – 6 (still .sit, but not fully compatible) and Version 7+ (.sitx). Version 3.5 is required to work on System 6 and Macs with a 68000 processor, but this version wont open “.sit” files made with Stuffit 5. Version 5.5 seems to be the last version to work on 68k Macs and opens most files, but requires System 7.0 or 7.1 (I forget which) and a 68020. I have had better luck opening some partially corrupted files using 5.5 over 5.0 – I suspect it does some simple repairs for common issues. “.sitx” files require Stuffit Expander 7 which does not run on 68k Macs. Further more, it is possible to set the level of compression, with higher levels of compression taking longer to expand, hugely so on older computers. Some files will crash some versions of Expander, but not others so you usually end up needing multiple versions (4.5 and 5.5 perhaps) installed.
The common mistake that people make is to compress a file, intended for use on an 8MHz computer from the 1980s and running System 6, using the high compression mode and saving in the later (requiring version 5 or later) format making the files inaccessible on original hardware.
My Preferred Solution
In my household growing up in the 90s, we tended to use the compression tool “Compact Pro”, which was ShareWare, but fully functional without registration. This worked well and let you save archives which can be moved between computers, even stored on servers and PCs, and later extracted on another Mac running Compact Pro. Compact Pro has minimum requirements of a Macintosh Plus running System 4.2 and will work just fine on a G4 running Mac OS 9.2.2.
The next huge advantage is that in the save dialogue box, there is a “Make Self Extracting” checkbox. If you check this, the saved file is an application. Running this application will extract the compressed files without even needing to have a copy of Compact Pro on the destination computer – the complication? An application needs resources… never fear – there is a menu option that allows you to convert any file, including these Self Extracting Archives (.sea) into a BinHex (.hqx) file, which is server, Windows, Linux, FTP, http etc. safe. Additionally, almost any archive software including StuffIt will convert the file back into the application from the BinHex so you’re not excluding StuffIt users (note that for many years Stuffit Expander came on Apple Mac OS installer CDs and was installed by default). An extra bonus is that some web browsers and FTP clients automatically convert BinHex files.
By processing a file like this, it will be possible for it to be worked with by the destination user, regardless of what OS they are running as long as it is newer than System 4.2, there are fewer format issues, fewer unexpected, Stuffit Expander just quitting when you drop the file on it, or throwing a mystery error, the files work on anything from a 68000 to a G4.
The only disadvantage is that there is a small overhead for the application / extraction code and so if a file barely compresses (such as sound or a JPEG image) the resulting file might end up being slightly larger than the original, or if you are trying to minimise size to the last few kB.
How To
First download Compact Pro 1.52 onto the computer running Mac OS (real or emulated) that you want to use to compress your files. It can be found here.
Compact Pro
Once installed, follow these steps to generate a self extracting archive stored as a BinHex.
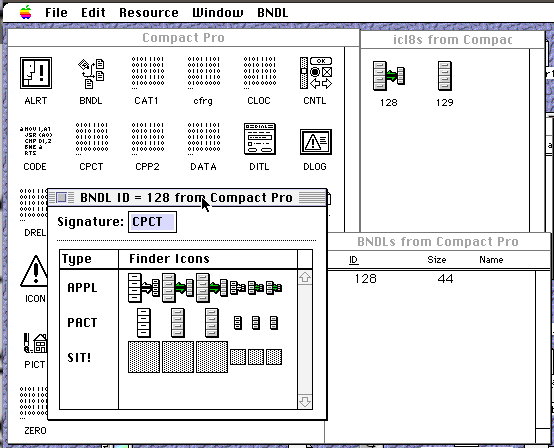
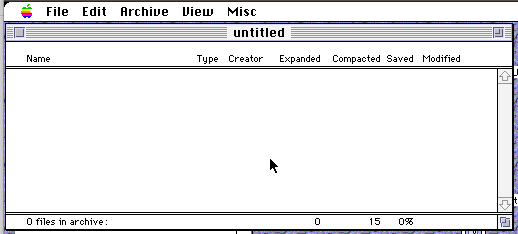
Launch Compact Pro and it will open showing a new untitled archive. You can add files and folders here.
You can go to the “Archive” menu to either create new folders (“New Folder…”), or directly “Add Files…” and folders.
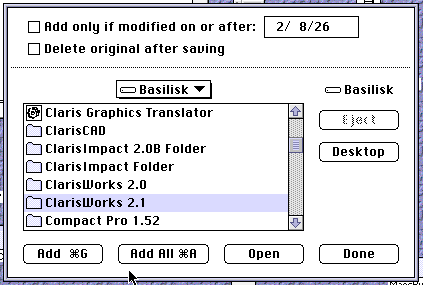
You can chose to add all files at the current location, or just what is selected. You can keep adding things until you have finished, and then click “Done”. You can also choose to “Add only if modified on or after” which is handy if you have a file full of many documents and, for example, want to add all the ones you’ve modified today.
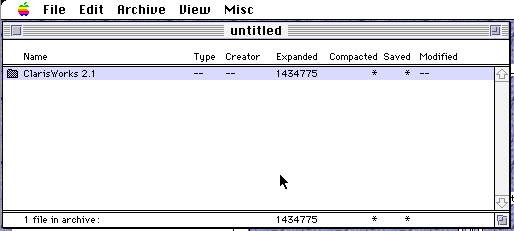
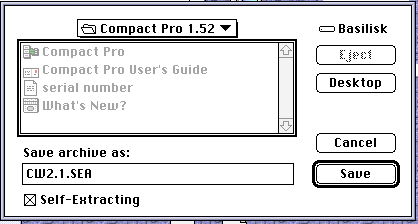
Now that we have added our files, we can navigate and modify things if we like, but I’m going straight to “Save As…” in the File menu. I have selected the “Self-Extracting” checkbox and named the file “CW2.1.SEA”. I then click “Save” as usual, after navigating to where I want to save my Self Extracting Archive.
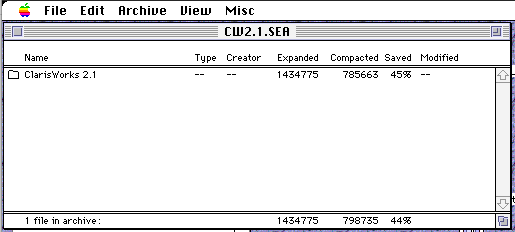
After saving, the archive window updates to show details of what filesize savings we made. In my case, I saved 45% of the original size of the files. Woo!
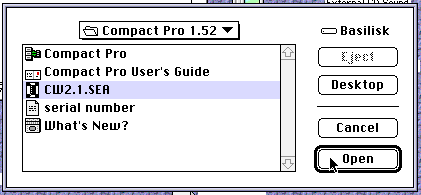
Keep in mind that at this point we can move the file between Macs on a Mac formatted disk, but, because we specifically saved as a self extracting archive, to retain that feature when moving via the internet or a PC, we need to convert the file to a BinHex. This is done with the “Convert to BinHex4…” option in the Misc menu. Select your file and click Open.
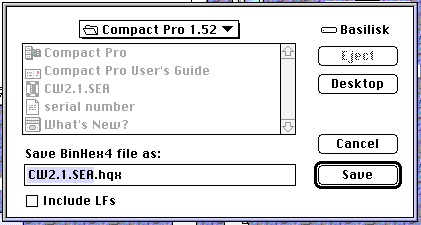
You will be asked where to save the file. I don’t tend to check “Include LFs” (Line Feeds) – Let me know if it is something that is needed in a specific situation using my contact form under the “About” menu on this page.
That’s it – you now have a .hqx file that is safe to move on to a PC floppy disk, transfer over FTP to a PC, upload to Macintosh Garden etc. The end user just needs to open the file with something that converts back from BinHex, which as mentioned could be one of many programs including Stuffit Expander, and then double click the resultant file and the contents will be extracted. One of the reasons I like this method is that the BinHex is just a plain text file but once converted back, the Self Extracting Archive retains all its file type and file creator characteristics.
NOTE – If you do make a mistake and forget to convert your Self Extracting Archive into a BinHex and the resources are removed during the transfer process, the resultant file will still be a valid Compact Pro archive! This means that at the destination, the damaged file can still be expanded by manually opening it in Compact Pro, or if I remember, a registered copy of Stuffit Expander / Stuffit Deluxe.
… or how slow is the “worst Mac” when you actually spend some time gathering primary evidence, including experimenting with various tools to improve performance over day-one reviews.
Draft Notes
I haven’t fully finished this article because my 6200 stopped working. This notes section just captures a few thoughts I was having and that I wanted to test or investigate. I’ve left it here so I can come back to it once I repair the 6200.
Impact of cache speed? None between 14 and 15ns. Suggests that both are faster than the computer. Interesting to see a) what happens with a 40MHz bus. b) what happens with a 22ns cache.
Impact of using AV card. Seems slower than built in, certainly with G3. I personally can only test without logic board cache if the G3 is installed. CPU runs faster with AV card, even without the cache, which is amazing. Suspect AV + Cache (I can’t test because I don’t have a basic riser) would be pretty good.
Availability of processor upgrades.
Current prices.
Why is quickdraw so slow on the 6200. Confirmed that video is faster on 630. 56.6 vs. 43.8 best case 8.6, or 42.9 for Mac OS 7.6.1.
MDK isn’t that different.
While 68k emulated FP isn’t great, remember this is a replacement 630… Most of which didn’t have a hardware FPU. Performance is ~2.4 times better without tweaks in 7.6.1.
What is the measured difference in performance running different ROM versions?
Forward
Before continuing, please realise that the topic covered on this page is strangely contentious within the retro Mac community and I am very aware of this, to the degree that I have at times hesitated working on and publishing this analysis.
Please understand that I have done my absolute best to approach this as scientifically as possible. I’m not pro or anti Performa 6200, but please, when providing any input or discussion, be mindful a small number of points…
Please be kind in your criticism. I’m only human.
I have spent literal weeks undertaking benchmarks of dozens of configurations as well as reviewing technical documentation – if you don’t agree with something, please explain the whys and the hows. To meet the required level of rigor to update this page, I will need you to provide reproducible hard data that I can run on my own machine.
Any contradiction of previous publications is not intended as a personal slight.
Summary
When executing PowerPC code, the Performa 6200 is 21.1% slower than the Power Macintosh 6100/66 in terms of CPU performance, and about 66.8% slower in graphics performance. Memory throughput is likely the main CPU bottleneck with PM 6100/66 RAM being 52.6% faster. The IDE hard disk performance is good, achieving sustained reads and writes of up to 2.19MB/s and 2.66MB/s respectively, with a fresh Mac OS 7.6.1 install and a slightly newer than stock IDE disk, possibly from a Performa 6300 based on the size and age. The best disk speeds achieved by the Performa 6200 were 2.42 MB/s read and 2.77 MB/s write, surprisingly in emulated 68k mode with SpeedDoubler enabled. The SCSI disk in the PM 6100 SCSI did outperform the IDE disk with 3.68 MB/s read and 3.64 MB/s write with a fresh Mac OS 7.6.1 install, but the disk was borrowed from a newer, high-end system. The best (non-G3 accelerated) PM 6100 disk scores seen were 3.76 MB/s read and 3.82 MB/s write. The Performa 6200’s FPU performance is impressively good, scoring about 30% faster than the PM 6100/66 overall.
There is little difference in emulated 68k performance between the Performa 6200 and the PM 6100/66, with the former scoring 12.5% and the latter 15%, both relative to the benchmark tool’s baseline system (a PM 6100/60) running PowerPC code. While this shows the Performa 6200 is 16.7% slower than the 6100/66, in reality both are only the speed of a 68030 processor + 68882 and the gap is small in absolute terms. More interestingly the gap in performance of emulated 68k mode closes compared to the gap in performance while running PowerPC native code (21.1% for PPC, vs 16.7% for Emulated 68k as indicated above). This suggests that the impact of the smaller Level 1 cache in the PowerPC 603 is not as significant for emulated 68k performance in Mac OS 7.6.1 as has previously been stated. This is an extremely interesting result.
With the exception of graphics performance, the Performa 6200 is faster than any 68k Mac when running PPC code, and by using SpeedDoubler, can be made to be faster than any 68k Mac when running 68k code in emulation, again, excluding graphics performance.
Overall, the biggest issue with the Performa 6200 is the graphics performance and not the 68k emulator performance.
The performance benefits of MathLibMoto and PowerFPU are small, with PowerFPU causing a small reduction in performance in some scenarios.
Background
Apple released the Performa 6200 family as a PowerPC based replacement for the Performa 630 family. I’m going to ignore all the various versions they released as they’re all basically the same machine other than the 6290, which had a better (603e @ 100MHz) CPU.
The Performa 6200 shares it’s chipset with the Performa 630 so completely, that the sound, memory controller, video chip, I/O chip, and more are all identical parts. Technically, the Performa 6200 could be thought of as a Performa 630 with a PowerPC 603 upgrade card soldered to the logic board. So much so that a clue in plain “view” is the startup sound – it matches the one used on the DayStar and Apple PowerPC upgrade cards for various 68k Macs.
While a bottom-end machine at the time, the Performa 630 is an excellent 68k Mac. They are fast, even for a 33MHz 68040, they can be upgraded to have an FPU if you don’t already have the Quadra variant (which came with one), and can be easily overclocked to 40MHz. The various upgrade slots and hardware video scaling make it a fun consumer AV machine, especially if you can find the AV card and the less common hardware MPEG decoding card. An Infra-Red remote, UHF module, and a UHF + FM module were also available. Note that all of these various add-ons work with the Performa 6200, and all parts other than the logic board are functionally identical (case, PSU, etc). Swapping 630 and 6200 boards (as well as 6300 family boards other than the 6360) is trivial.
Apple also released Performa 580, Performa 5200, Performa 5300 machines and equivalents, which are effectively the same computers, but with a built in monitor. Anything on this page discussing the 630, 6200 or 6300 families equally applies to the 580, 5200 and 5300 families respectively.
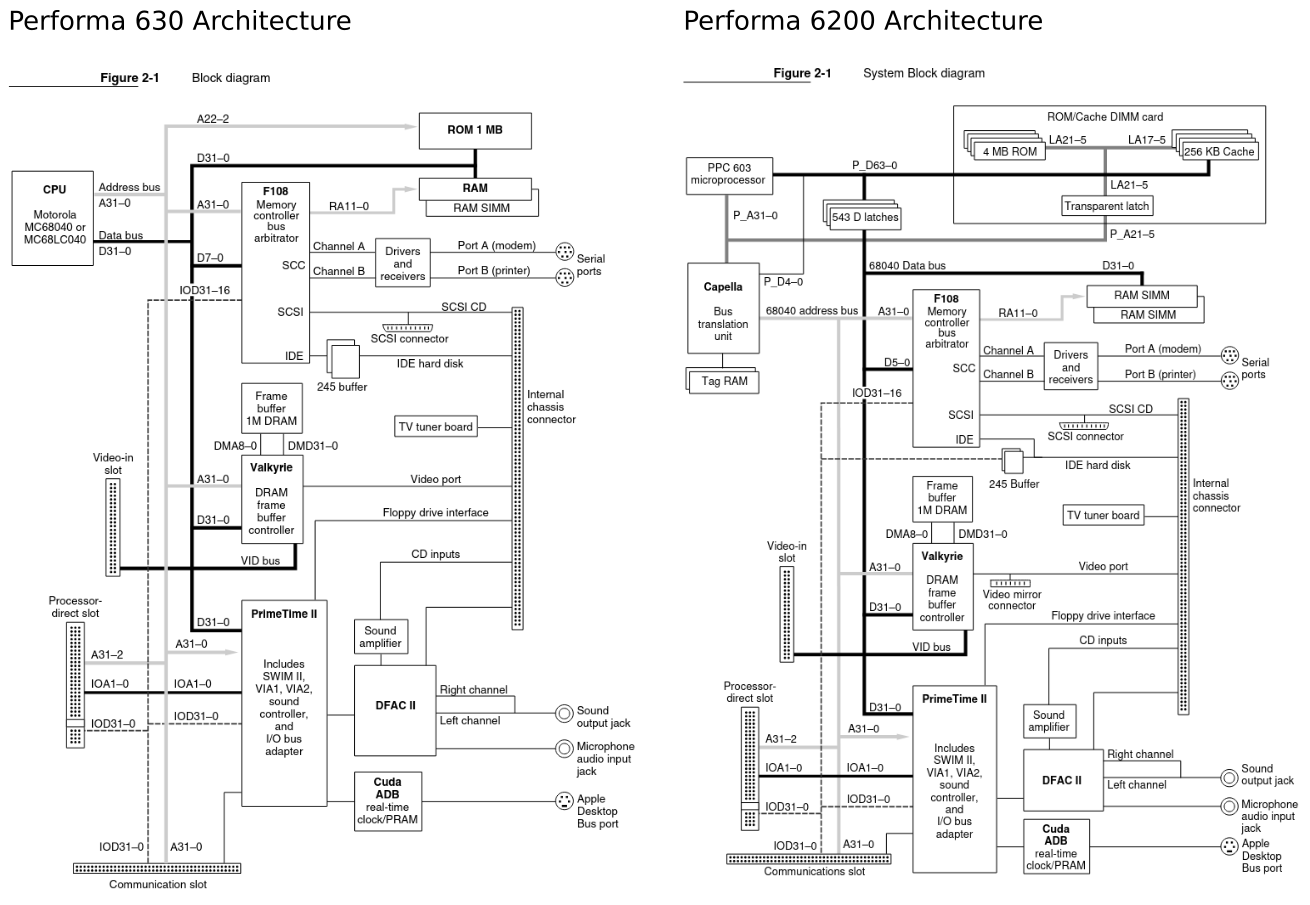
The Performa 6200 shipped with a 75MHz PowerPC 603 processor. The ROM and L2 cache are connected directly to the processor by a high speed 64bit bus. A bridge chip named “Capella” then connects this PPC 64bit bus to a Performa 630 style 32bit 68040 bus at 37.5MHz. The 040 bus connects to the RAM, the video chip, serial, SCSI and IDE, while the sound, ADB, RTC and floppy are attached to a slower 68030 style bus (16MHz, 32bit) from the “PrimeTime II” I/O controller.
When released, the Performa 6200 received scathing reviews, with particular attention paid to its poor performance when running emulated 68k software. The opinion of these machines has been cemented by a number of online articles describing them as the worst Mac ever, which sadly contain a number of factual inaccuracies. The often stated primary issue when emulating 68k code relates to how the 603 processor uses a separate 8k each for Level 1 data and instruction cache, which was apparently insufficiently large to run the 68k emulator efficiently. This begs the question, given as time went on more and more code was released for PPC and the OS itself was heavily optimised for PPC (speed critical 68k code was replaced to improve performance), does the machine retrospectively deserve its reputation?
One factor that likely caused the poor reaction to the Performa 6200’s performance is the processor speed in MHz. While the Performa 6200 has a numerically superior “speed” compared to the 6100/60 and 6100/66, benchmark scores were lower even for PowerPC native code. I suspect this was the first time a higher clock speed Mac performed worse than an older machine with a lower clock speed (although the IIvx comes close, perhaps that deserves a similar retrospective). Obviously this isn’t an issue in reality, but could cause false expectations. Considering this, it is worth keeping in mind that I think the Performa 6200 cost less in real terms than the 6100. The Performa 6200 was $2300 with a monitor, keyboard and software, while the 6100 was $1700 without either a keyboard or monitor. Although more analysis of prices is required.
I got curious and have been watching for a Performa 6200 of my own. I recently found one at a bargain price and so this post is my investigation and findings. My aim is to provide an unbiased opinion on the performance, but also, to find how the most can be achieved with the machine, and what benefits can be found from various mitigation tools such as…
Newer OS versions
SpeedDoubler
PowerFPU
MathLibMoto
Comparison will be primarily made with the Power Macintosh 6100/66, as this is a machine that the 6200 is commonly compared with and I have one for collecting my own benchmarks.
Test Machine Specifications
Performa 6200 Specification
The Performa 6200 in Question
The following specification describes my individual Performa. It is pretty much stock, other than the RAM, hard disk, OS versions and ethernet card.
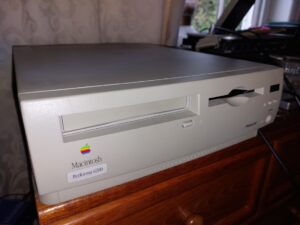
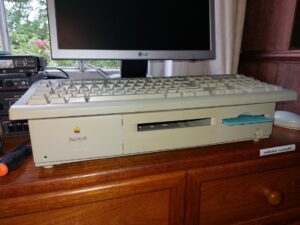
Bezel label says “Performa 6200”.
British sold machine from the Cork, Ireland factory, built in the 15th week of 1995.
Doesn’t have the bad “not a recall” ROM, or the bad video chip (early machines had stability issues).
75MHz PPC 603 CPU with 8k data and 8k instruction L1 cache.
256k L2 on 64bit bus (I assume at 37.5MHz, but see “Cache Speed”).
64MB of RAM, operated with 80ns timings (regardless of speed fitted) and 32bit.
A 1.2GB IDE “spinning rust” Quantum brand hard disk. Apple marked, but from 1996, so likely taken from a 6300 or similar.
CD-ROM Drive (4x Matshita CR-8005 drive, original Apple supplied).
Apple 10baseT CommSlot Ethernet card (thank you Sophie Rose!).
Stock “manual inject” “SuperDrive” floppy drive. Not sure what brand as I haven’t removed it (it is working well).
Dual booting Mac OS 7.6.1 and Mac OS 8.6.
The power supply needs recapping, it is a little noisy and turns the computer on by itself.
Power Macintosh 6100/66 Specification
The Scruffy PM 6100 in Question
For reference in the context of benchmarks, the following specifications describe my specific PM 6100/66. I did my best to revert it to stock, other than the RAM, OS versions and hard disk.
Bezel label missing, should say “Power Macintosh 6100/66. I suspect the lid is from a Quadra 610 as it has “Macintosh” silkscreened on it, instead of “Power Macintosh”.
Weird Frankenstein’s monster of a machine, logic board from the 49th week of 1995, blatant Centris case from 1993 and a logic board serial number factory of “GY” which apparently isn’t a valid factory code.
66MHz PPC 601 CPU with 32k combined instruction and data cache.
256k 64bit L2 cache fitted, 15ns part on a 33MHz bus.
264MB of RAM on 64bit bus. Operated with 80ns timings.
A 4GB SCSI hard disk, originally shipped with a 9600. Not stock speed.
No CD-ROM fitted (it stopped working).
Stock “manual inject” “SuperDrive” floppy drive.
Booting 7.6.1 only for comparison.
Advantages / Disadvantages
The following is a list of features of each computer that aren’t purely architectural.
Performa 6200
+ Three expansion slots, Comm Slot, LC “PDS”, and the video slot for the video input card.
+ Support for UHF / FM.
+ Infrared receiver.
+ Case volume buttons
+ IDE for cheaper modern CF, SD and M.2 hard disk solutions.
– Only 8bit, 22kHz sound.
– RAM capped at 64MB
Power Macintosh 6100/66
+ Ability to fit 7″ NuBus card.
+ Ability to fit AV Card.
+ 16bit 44kHz sound.
+ Ability to upgrade L2 Cache.
+ Up to 264MB of RAM.
+ Ability to fit DOS Compatibility Card
– Replacement SCSI hard disks are expensive.
– Onboard HDI-45 requires ungainly adapter.
– Large desktop footprint.
Performa 6200 Performance Considerations
Processor
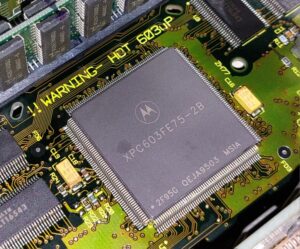
A “HOT” 603 Micro Processor
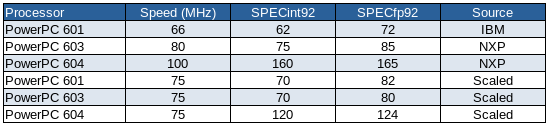
Interestingly, manufacturer data suggests that a PowerPC 603 in a similar logic board implementation to a PowerPC 601 Mac should in fact perform comparably. This is based on quoted SPECint92 and SPECfp92 scores. This implies a 75MHz 603 would out perform a 66MHz 601, if they both had 64bit memory, approximately proportionally to the difference in clock speed.
CPU Manufacturer Performance Data
These numbers don’t appear to explain why in benchmarks, the Performa 6200 scores higher than the Power Macintosh 6100/66 in floating point, even after accounting for clock speed.
Cache and CPU Bus Speed
First and foremost, I don’t have a deep understanding of how L2 cache is implemented on early PowerPC Macs. I don’t know anything about the cache timings, so all I have done here is look at the cache chip rated speeds and compared them between different model Macs. This does not represent how quickly the cache is actually running in a machine, but assuming appropriate parts were specified, it should give a good estimate of how different machines’ cache performance compares. This is a fair assumption because SRAM for cache is expensive and so there is a strong motivation not to over-spec cache.
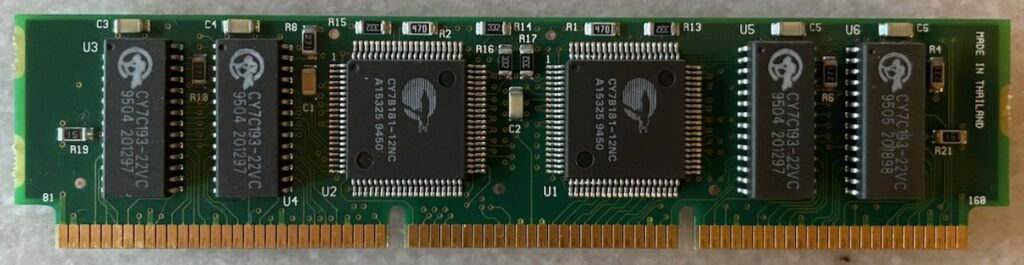
My Performa 6200 Cache (256k, 15ns – the ROM is affixed to the reverse of this PCB)
The Performa 6200 is fitted with 256k of Level 2 (L2) cache, on a SIMM shared with the ROM. This cache is on the PPC 603 bus, which is 64bits wide. Some sources state that the L2 cache is at the full CPU speed of 75MHz, but I doubt this. The Developer Note says that “The 603 bus is connected directly to the main processor and runs at the same clock rate. An external 256 KB second-level cache and 4 MB of ROM attach directly to the 603 data bus and help to optimize system performance”. This could be read to be saying that the L2 Cache and ROM are 75MHz, but Newer’s Gauge Pro software indicates that the L2 is just 37.5MHz. By extrapolating from factors such as cache spec, I believe that the Developer Note is referring to the CPU bus speed of 37.5MHz, rather than CPU core clock, but unfortunately chose slightly ambiguous language. The 603 processor is capable of using an internal bus multiplier which can be set to 1x, 2x, 3x or 4x and so in this case, would be set to 2x. Looking at the Performa 6200 cache chips themselves, they are 15ns parts, which would imply a peak speed of 66MHz (converting 15ns into a frequency by calculating the reciprocal).
Using the linked summary of L2 Cache SIMMs for various PPC Macs posted by Fizzbinn I have reviewed what speed L2 cache Apple is believed to have fitted to various Macs during the timeframe. For Power Macintosh caches, which seem to use 14, 15 and 22ns parts, my theory is that each machine has a cache that corresponds to approximately double the bus speed. With 15ns = 66.67MHz commonly fitted to the 6100 and 14ns = 71.4MHz fitted to faster machines including the PM 8100/110 (with a 36MHz bus). The 22ns cache, identified as being from a 6100/66 is surprisingly slow, equating to 45MHz, no where near double the bus speed of any Power Macintosh. Perhaps Apple was fitting slower caches to early PM 6100s. It would be interesting to see if this makes a difference to performance, especially between 15ns and 22ns. My personal PM 6100/66 appears to have come with a 15ns L2 cache. As a quick aside, I did a quick comparison of my PM 6100/66 with 14 and 15ns cache fitted and got identical CPU benchmark scores. This suggests that both 14 and 15ns cache are “fast enough” and there is no gain in using faster chips, at least at this speed granularity.
The Performa 6200 cache with its 15ns chips does not quite meet the nominal “double the bus speed” as double would be 75MHz, and the reciprocal of 15ns is 66.67MHz. The Performa 6300, which is a minor upgrade to the 6200 fitted with a 100MHz 603e processor, was shipped with 12ns cache. This faster cache, on the computer’s 40MHz bus (using a 2.5x multiplier, as 1.5x, 2.5x and 3.5x bus multipliers were added to the 603e variant) is back in line with performance being double the bus plus a small overhead. This suggests that… perhaps Apple specified the L2 cache in the original PM 6100/60 and Performa 6200 a little below what they were willing to in other period machines.
In conclusion, I suspect that the PM 6100, 7100 and 8100 caches were specified at speeds relative to the bus speed, i.e. 30, 33.3, 36.7 and 40MHz, depending on configuration, but with some variation based on desired cache performance. I also believe the Performa 6200 cache is rated based on PPC bus speed and not CPU core clock. Ultimately, the cache chips appear to be of pretty similar speed between various machines from this era, with the exception of the 22ns PM 6100 SIMM, and so cache performance is more generally expected to be similar between the Power Macintosh 6100/66 and Performa 6200. Note that, if I remember correctly, the PM 6100/60 did not always originally ship with a L2 cache.
ROM Speed
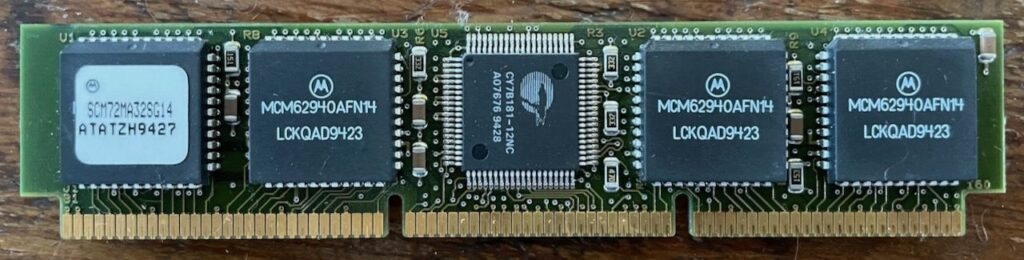
Unusually, the ROM and Cache are both on the same SIMM for the Performa 6200 and similar machines, with TAG RAM for the cache located on the logic board itself. This presumably means these SIMMs can not be used as Cache, or ROMs in other Mac models.
Performa 6200 ROM – Interestingly this is a Flash ROM
Fast ROM access is a significant advantage for “Old World” Macs as many frequently used Macintosh Toolbox functions are held in the ROM. The ROM in this Performa 6200 is built using 120ns chips. While being 64bit wide provides an advantage, presumably meaning that twice as much data is read into the CPU in a single go, 120ns in itself is not faster than late model 68k Macs, but does seem to be inline with other Power Macintosh computers from the era, such as the 6100, 7100 and 8100. This means that in terms of the performance of the connection to the CPU and the ROM chips themselves, the Performa 6200 ROM is not a bottleneck when compared to other Power Macs.
RAM Speed
RAM is on the 37.5MHz, 68040 style bus, which is only 32bits wide, unlike the Power Macintosh 6100, which implements RAM on a 64bit bus. Newer Gauge Pro reports a RAM speed of 15.2MB/s, but mis-reports it as 64bit. For reference, Gauge Pro reports a speed of 23.2MB/s for the Power Macintosh 6100/66.
Do not use virtual memory on this machine in speed critical applications (although turning it on, set to only 1MB is sometimes feasible as it allows more advanced memory management, actually freeing up more RAM, without a significant speed penalty).
While the F108 Memory Controller is known to support 128MB SIMMs (the same chip is used on the Performa 630 where it can recognise a 128MB SIMM), there appears to be an artificial limit applied to the 6200, as when I inserted 256MB of RAM, it reported only 64MB.
The 6200 does not support memory interleaving, so there is no speed benefit in using two identical SIMMs, although maximising the RAM to 64MB is sensible. Strangely, boot times give the impression that this computer may not undertake a full memory test during startup, or the memory test is somehow shorter than usual. It may be my imagination, but the computer turns the screen on (usually only done after the memory test) quite quickly after power on and the chime, regardless of how much RAM is installed.
Out of curiosity, I timed that the PM 6100 took 37 seconds to initialise video (after completing the memory test) with 264MB of RAM. Scaling for RAM speed and quantity, I would expect my Performa 6200 to take about 13.5 seconds, but it only takes 9 seconds.
It should be noted that PowerPC processors expect data to be aligned at 32bit boundaries, while 16bit alignment was the norm for 68k Macs. When data is aligned to 16bit boundaries on the Performa 6200, there will be a performance penalty as additional operations will be undertaken by the computer to manage the situation.
Graphics Performance
For a not fully understood reason, it is suspected that the graphics performance of the Performa 6200 is not only slow for a PowerPC based Mac, but is actually slower than the Performa 630 which the Performa 6200 is based on, even using the same video chip (the Valkyrie). The main exception is that the Performa 6200 is able to draw images to the screen faster, but this is countered by image translation operations being unusually slow. I don’t have an easy way of working out the cause of this discrepancy, especially considering how similar the hardware is, but given that, it would suggest that perhaps it is either to do with the Capella bridge chip, data alignment, a software reason or some other consequence of fitting a PowerPC chip into the Performa 630. An interesting comparison would be to compare Performa 6200 graphics performance with a Performa 630 fitted with a 66MHz PowerPC 601 upgrade card to see if the graphics performance is common to both, or just specific to the Performa 6200.
Another possibility might be that when increasing the bus to 37.5MHz, Apple had some unreliability with the video chip and so had to add wait states. This is vaguely possible as some people overclocking their Performa 630s to 40MHz used to have issues with their video, and have to add a heatsink to the Valkyrie chip. In some cases this apparently still wasn’t enough. See the table at the bottom of this page.
There are a couple of mentions on the internet of Apple having to update the ROM to reduce video performance of the Performa 6200, but I can find no primary evidence of this. The Service Source document mentions replacing the ROM+Cache SIMM, but in the context of a cache related issue. There is a possibility that the cache issue was fixed with a ROM update, but this is not clear in the descriptions. Additionally, there are mentions of colour tint issues on the video and random video related crashes requiring returning the computer to Apple, but the cause and fix for this are not covered in detail. I would be interested to know if anyone has first hand information regarding these issues and their fixes.
A good start might be a ROM dump from one of the “bad” ROMs that escaped the “absolutely not a recall”. If you have a ROM that matches the following description, please get in touch.
Performa 6200 Family Bad ROM – Let Me Know if You Have One
Pixel Doubling
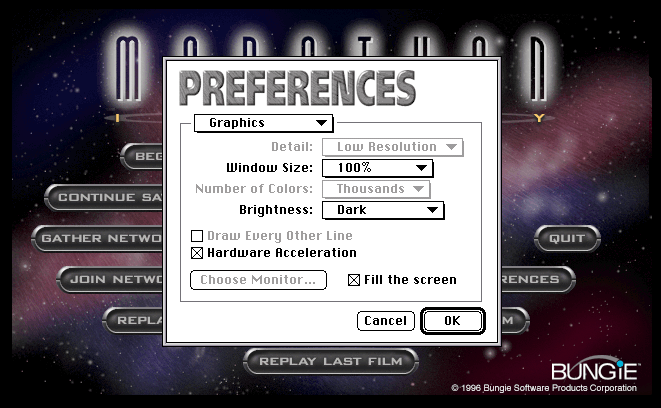
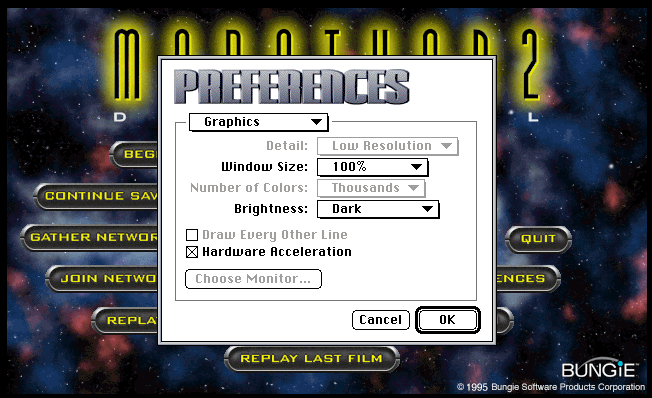
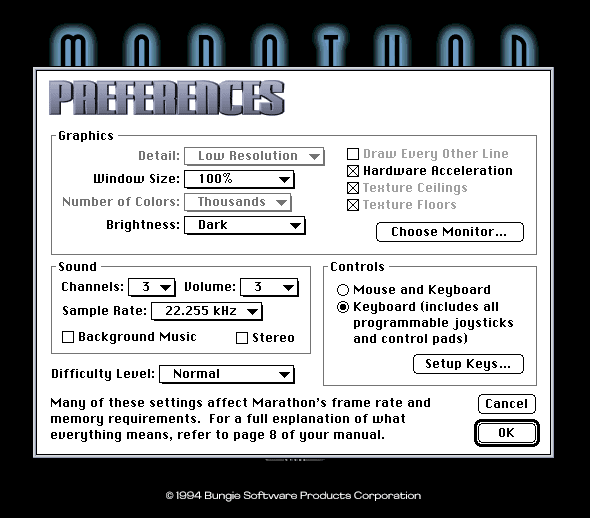
The Performa 6200 video chip supports hardware pixel doubling in a manner that allows the 6200 to draw a 320×240 pixel image, and it be shown full screen at 640×480 with little to no CPU overhead for the scaling. Very little software took advantage of this. Known examples are, Apple’s “Apple Video Player” software, Bungie’s Marathon (by switching on “Hardware Acceleration” in Preferences) and the demo “Some Years Ago” by Noglin, which was written specifically for the 5200/6200. The functionality may also be available in QuickTime, but I haven’t investigated.
Marathon Preferences, showing the “Hardware Acceleration” Feature Enabled.
Note in early versions of the original Marathon, the option was named differently, and is only available on a reduced selection of Performa 630 or similar computers.
IDE Hard Disk
While the Performa 6200 has a very early IDE implementation for Apple, and was much maligned at the time, read and write speeds are good. I suspect the disk in this machine may have been swapped from a Performa 6300 as it is 1.2GB instead of 500MB or 1GB, and dated approximately a year after the computer was built, but even if this is part of the reason for the good performance, it shows that the IDE interface is capable of reasonable speeds. I haven’t tried a fast drive to test the limits of the interface, but am happy with the performance I’m seeing.
This said, hard disk benchmark speeds show some curious behaviour, with MacBench suggesting that the Performa 6200 hard disk performance is slower than the Performa 630 in some (but not all) tests, but also both MacBench and Norton System Info show that in some cases, hard disk performance is better when running in 68k emulation mode. This latter point suggests that the hard disk driver contains a lot of 68k code and when PPC software is running, is causing a lot of context (PPC->68k and back) switching. Context switching has a time penalty and can cause a reduction in performance. There are situations in which even though PPC code executes faster, the time cost of switching to PPC mode can outweigh the benefit.
I have not undertaken tests to verify this, but if this is the case, it may be worth identifying an alternative IDE driver that contains more, or entirely PPC code. I believe some 3rd party drivers advertised this as a feature, and also suspect that with time Apple will have optimised their newer drivers for PPC. FWBs HDT version 4.5.x might be a good solution to try.
Because I’m used to it, the numbers are more meaningful to me.
The individual tests are clear in what they do, and are usually specific toolbox, or hardware operations.
It allows you to run benchmarks both natively as PowerPC, or as emulated 68k. It has cats.
I did the bulk of my benchmarking for this investigation using System Info 6.0.3 from 2001. This said, when I ran two benchmarks using version 3.1.3 from 1994 (before the Performa 6200 was released) I found something curious. In version 3.1.3, the Performa 6200 scored noticeable worse than in version 6.0.3. I have no way of knowing exactly why this is. At the time version 3.1.3 the only PowerPC Macs all had PPC 601 processors, so possibly…
Norton may have later changed weightings to better represent real world performance of the Performa 6200.
Compilers were not optimised for the PowerPC 603 processor and so benchmarks ran less well in 3.1.3.
Something else.
The most significant reduction in performance is when you compare with the 6100/60 between the two benchmark versions. System Info 3.1.3 was likely the release that was in the hands of journalists when they originally reviewed the Performa 6200.
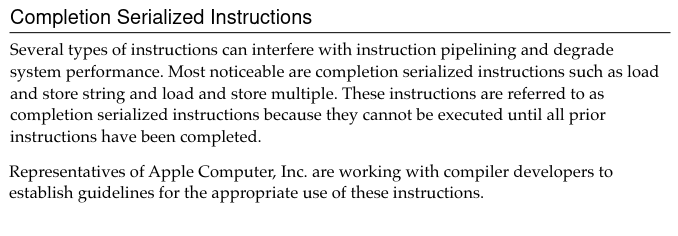
With this in mind, I was looking in the Performa 6200 Developer Note and I found the linked section, and found the following extract. It seems that there were sufficient compiler optimisations required initially that Apple was directly working with the producers of development software to improve performance. The two primary issues appear to be that code which called POWER specific instructions would suffer a performance penalty as the instructions would need to be emulated (in practice this should be a rare issue, given that even though the PowerPC 601 supported the POWER instruction set, developers weren’t meant to be targeting it on the Mac), and the second issue is that certain instructions can interfere with instruction pipelining.
Extract from Performa 6200 Developer Note
I can only assume benchmarks made with the newer version of System Info are “more accurate”, on grounds that you should be improving your product with time, but this is an interesting observation, and shows that the only real speed test is whether you are happy with performance or not.
Baseline Overall
The following shows a comparison of Norton System Info’s weighted scoring for each machine overall while running clean installs of Mac OS 7.6.1, as well as the overall scores for CPU, Video (effectively QuickDraw performance), Disk and FPU. The computers are in the recommended configuration for System Info benchmarking, with AppleTalk off, the disk cache set to 128k and the screen set to 8bit colour and 640×480 resolution. Tests were performed with the benchmark tool running both natively in PowerPC mode, as well as with 68k versions of the benchmarks running in the built in emulator.
Scores in these and following benchmarks, unless otherwise noted, are given as a percentage relative to Norton’s included score for a Power Macintosh 6100/60. For the most part I am not paying attention to the baseline 6100/60 score itself as it represents a snapshot in time with an older operating system and so is not a direct comparison with these new benchmark scores.
Baseline Overall Benchmark Scores
The last row in the table above is the PM 6100/66’s score crudely scaled from 66MHz down to the 60MHz of the inbuilt baseline. This shows that even accounting for the difference in MHz, the PM 6100/66 is disproportionately outperforming Norton’s original PM 6100/60. This is anticipated to be a mixture of the inclusion of a 256k L2 Cache, plus software optimisations resulting from a newer operating system (7.6.1 vs 7.1.2).
Baseline Scores Scaled to Percent of PM 6100/66 (PowerPC and 68k)
For clarity, the above shows the results scaled to be a percentage of the PM 6100/66 scores – for PPC and separately for emulated 68k performance. This makes it easier to compare the two systems.
Performa 6200/75 CPU, Video and Disk performance is all behind Power Macintosh 6100/66 performance. Floating Point performance is significantly ahead of the PM 6100/66 which is very interesting because that doesn’t align with expectations based on the SPECfp92 results for the two processors above in the “CPU Manufacturer Performance Data” table. As previously mentioned, the performance of a PowerPC 601 and 603 should actually be pretty close on a per-MHz basis, and so it is likely that the lower performance of the Performa is a result of the logic board design, most likely, specifically the RAM speed.
Baseline CPU
Performa 6200/75 vs. Power Macintosh 6100/66 Baseline CPU Performance
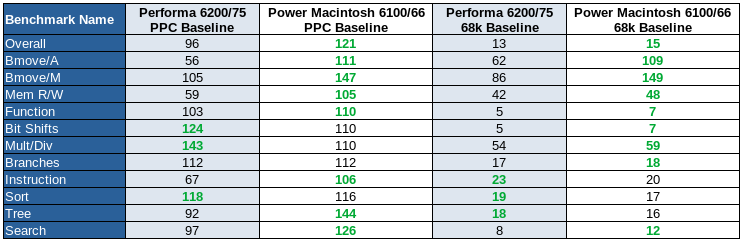
Based on in which benchmarks the Performa 6200/75 performs least well compared to the PM 6100/66, it can be seen that memory bandwidth appears to be the primary bottleneck. In particular, we can see that aligned block move performance is falling behind. On the other hand, the PPC 603 performs well when undertaking bit shifts and multiply / divide operations. The implications of this mean that it would be very interesting to compare performance with a 603 based machine utilising 64bit RAM.
Baseline Video
Performa 6200/75 vs. Power Macintosh 6100/66 Baseline Video Performance
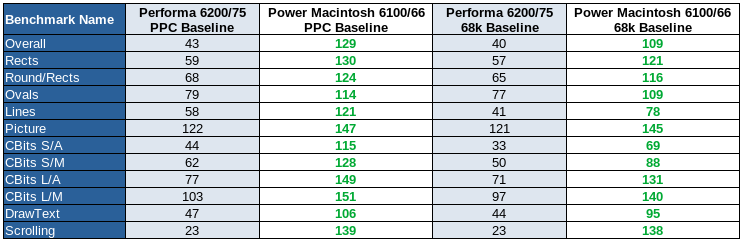
Across the board, graphics performance on my Performa 6200/75 is considerably worse than my PM 6100/66, but also many, if not all, 68040 based Macintosh computers.
This is confusing as the video chip, the Valkyrie, actually performs better when fitted to the Performa 630, even though it is connected to a slower 33MHz bus in that system. I do not have sufficient information to explain this, but would be interested in performing side by side comparisons of performance with all available Performa 6200 ROM variants, and potentially a 6300 ROM if it is capable of booting a 6200.
If anybody has any behind the scenes knowledge regarding this oddity, I’d love to know, especially if there is any way to speed up performance.
Note – I tested video performance using a PPC benchmark, but with SpeedDoubler enabled with the intent that it would give a performance improvement to any 68k code running in QuickDraw or the graphics drivers. It did not improve performance and so I can safely conclude that speed issues are unlikely to be due to emulated68k code.
Baseline Disk
Performa 6200/75 vs. Power Macintosh 6100/66 Baseline Disk Performance
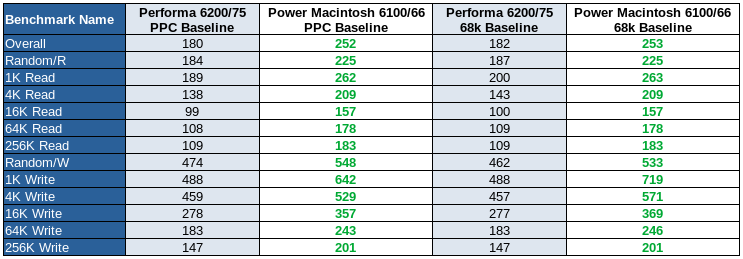
Norton System Info hard disk benchmarks showed read spreads of up to 2.5MB/s and write speeds of 2.8MB/s for 256k sequential access. These speeds are actually similar to the best speeds you tend to get with spinning hard disks of the era, and the random, 1k and other short reads and writes are faster than many similar era disks. In medium and low end SCSI Macs of the time, the SCSI bus generally has a maximum speed of 5MB/s and it is not usually possible to achieve the full 5MB/s speed.
Norton System Info shows the hard disk significantly outperforming the baseline Power Macintosh 6100, but it is likely that the PM 6100/60 Norton used was underperforming due to early disk drivers with little to no PPC optimisation.
Baseline FPU
Performa 6200/75 vs. Power Macintosh 6100/66 Baseline FPU Performance
In FPU tests, the Performa 6200 is seen to be faster overall, and in the majority of individual tests, when compared to the PM 6100/66 when running PPC native code. When running emulated 68k code, the PM 6100/66 does better and achieves better scores overall and in the majority of benchmarks. Keep in mind that the 68k emulator does not emulate a 68k FPU, so this code will be emulated as if it was running on a 68k CPU.
It is not entirely applicable here, but it is interesting to note the very high scores achieved by both machines for Sine and Cosine functions. I believe this is because when the original PM 6100/60 was benchmarked by Norton for their baseline machine, the operating system (likely System 7.1.2) did not have optimisations which were later added for these functions.
These results seem to suggest that the floating point performance of the PowerPC 603 is strong compared to the PowerPC 601, which is a surprise given this is not shown in the manufacturer SpecFP92 scores in the Performance Considerations section above.
Boot Time
A basic test of the two machines booting Mac OS 7.6.1 resulted in the Performa 6200/75 taking 62 seconds to reach the desktop, while the Power Macintosh 6100/66 took 95 seconds. This includes 9 seconds (about 8.5 seconds from the chime) for the 64MB self test on the 6200 and 37 (31 seconds from the chime) seconds for the 264MB self test on the 6100.
This test isn’t very scientific and is less informative, but is included for completeness. There are a large number of variables that can influence boot time and they were not controlled in this test. The PM 6100/66 did not have a cache fitted during the test and while both operating system version numbers were the same, they were not identical installs. What this test does show is that the Performa is not unreasonably slow booting and in an arbitrary real world example, boots faster than a fairly representative PM 6100 setup.
If we discount the RAM test time, the times the two machines are 53 and 58 seconds for the Performa and the PM 6100 respectively.
Boot time will be influences by factors including installed RAM, compute speed, disk performance and what software is installed. Even how many files are on the desktop and how many Finder windows were left open. As an aside, the same test performed with a 266MHz G3 upgrade in the PM 6100 resulted in a total boot time of 87 seconds (50 seconds excluding the memory test). The G3 upgrades used in the “NuBus” PPC machines such as the PM 6100 do not take over until the processor upgrade’s extension loads, meaning the first portion of the boot process does not change.
Hardware Tweaks
Cache
I’m not aware of any larger caches available for the Performa 6200 and I don’t own any of the larger caches compatible with the PM 6100 so all tests have been undertaken using a 256k L2 cache for both machines, with the exception of a test without L2 cache undertaken on the PM 6100/66. Because the Performa’s L2 cache is on the ROM SIMM, it was not possible to remove the cache from the Performa, although given they all sold with a L2 cache fitted (unlike some PM 6100s), it wouldn’t be a reasonable test scenario anyway.
Comparison of the Power Macintosh 6100/66 With and Without L2 Cache
In the table above, the values have been normalised based on a score of 100 for the machines with no L2 cache fitted, independently for the PPC and emulated 68k benchmark pairs. This makes it easy to see the performance uplift from the 256k L2 cache.
It can be seen that the L2 cache has no impact on FPU performance. CPU performance when running native code increases by 7%, and by 15% for emulated 68k code. This disk performance uplift is each side of 13% which is good, but the biggest impact is an over 100% uplift in QuickDraw graphics performance.
Note that an AV card was fitted, although not in use, during the “No Cache” tests above. When an AV card is fitted it appears as an additional display regardless. I set it to the smallest resolution and black and white in an attempt to minimise the impact, but really, I would prefer to undertake some back to back tests.
Video Considerations
Impact of Changing Resolution
It should be noted that the higher resolution test performed on the PM 6100 was done with the computer booted into Mac OS 8.1, rather than 7.6.1 which was used for most tests undertaken for this analysis. Additionally, as this benchmark was undertaken for another purpose originally, I didn’t run the Disk benchmark, although comparison with other benchmarks suggest we would expect a very small reduction in disk performance, less than 1% and within the magnitude of random variation between tests.
The PM 6100 is more sensitive to resolution on built in video than the Performa 6200. Of note is the larger impact on CPU performance, although 4% isn’t in itself a large drop. It seems likely that the dedicated VRAM used by the Performa 6200 is a benefit here. The increased resolution has a more significant impact on the PM 6100/66’s graphics performance, showing a 14% reduction.
Experimentation suggests that the built-in PM 6100/66 video subsystem’s performance is actually faster than either the (“High Performance Video”) PDS card (scoring 110 for graphics, vs. 129 for built in), or the PDS AV card. The HPV cards have a 64bit bus to their video RAM, while the AV card uses a 040 style bridge chip and 32bit VRAM and so it is expected that the HPV cards would out perform the AV card. The AV card is effectively a re-implementation of the Quadra 840av video circuitry.
The AV card is technically a similar arrangement to the Performa 6200’s video system, given they are both 68040 bus connected through a bridge chip, and use dedicated VRAM. Despite this, the AV PDS card seems to demonstrates faster performance than the Peforma 6200’s graphics.
Due to what riser cards I have and the location of the connectors on the AV card, I wasn’t able to do a full comparison with the L2 cache fitted because I needed to have a G3 upgrade fitted as a riser. The G3 upgrade is not compatible with the L2 cache, even when the G3 is disabled. I was able to fit a HPV card alongside L2 by running the computer with the lid removed and the card stood vertically in the PDS slot. When I tried to do this with the AV card, the video output connector clashed with the rear case and I was unable to connect a monitor.
Software Mods
I’ve experimented with several Apple and 3rd party software packages to improve benchmark scores on the Performa 6200, both in PPC native benchmarks and in emulated 68k benchmarks.
No Extensions
Firstly, while doing my “no cache” tests, I tried booting with Extensions disable as an easy way to disable my G3 upgrade. I then re-ran the same tests having disabled the Sonnet Extension, and was surprised to find that I got different results. Apparently some of the functions that were disabled by me holding shift during startup speed up the Power Macintosh 6100, while others slow down parts of the machine. If you’re benchmarking or trying to run software as fast as possible, don’t assume disabling all Extensions is the best answer. Your exact results will depend on what software you have installed, as different installed packages consume different amounts of CPU resources in the background.
Impact of Booting with Shift Held Down
SpeedDoubler 8.1.2
SpeedDoubler from Connectix is the most critical bit of software, not just for your Performa 6200, but for any beige PowerPC Mac you plan to run 68k code on. Installing SpeedDoubler on my 6200 resulted in a 518% increase in emulated 68k CPU benchmark scores. That is not a typo. That is the difference between running 68k programs at the speed of a IIci with a 33MHz DayStar 68030 upgrade, vs. outperforming a Quadra 840av by 48%.
PowerFPU 1.3
PowerFPU is intended to both fool 68k software that requires an FPU into thinking there is one available like SoftFPU (which improves software compatibility, in particular with 3D graphics, audio and scientific software), but also map the routines to PowerPC FPU functions.
In my experiments, I found there was no significant speed gains (and in some instances, a small reduction in floating point performance), but this may be in part because I already had SpeedDoubler installed.
I would only install and use this software if I needed it for compatibility with 68k software that required a FPU.
MathLibMoto
This software library replaces Apple’s PowerPC floating point routines with equivalents from Motorola, potentially at a small sacrifice in consistency with normal Apple SANE results. I found that in Mac OS 8.6, this library made no significant difference to floating point performance, in Mac OS 7.6.1 the floating point performance was boosted to match performance under Mac OS 8.6. Additionally, I would extrapolate that if you were running even older versions of Mac OS, in particular 7.1.2 (which isn’t compatible with the Performa 6200), you would see big floating point performance speed improvements.
I recommend installing this if you are running Mac OS 8.1 or older.
Newer IDE Hard Disk Drivers
Using the hard disk driver from newer OS versions, such as the Mac OS 8.6 era, seems to improve hard disk speeds, although strangely, the best disk benchmark scores I got were while running emulated 68k benchmarks. The difference wasn’t significant so I wouldn’t be concerned about this and have just put it down to reduced context switching an 68k heavy drivers.
There may be faster, 3rd party IDE hard disk drivers available, such as those from FWB’s HDT. I have not done any testing to compare performance of alternatives. I generally prefer to keep Apple drivers when I can for compatibility.
Alternative Benchmarks
MacBench
MacBench is another benchmarking tool for classic Macs. MacBench appears to be designed to give scores more representative of real world use by using tests which run the type of operations performed in workloads such as publishing. This said, I still prefer to use System Info, because it gives a test by test breakdown of what each sub-element of the benchmark is actually doing, and how it scored (for example aligned and non-aligned memory operations), while MacBench seems to give a single overall score for each test. If I was just sharing overall scores, I would likely use MacBench, but for myself, wanting to see what a computer or CPU is good at, and what it is bad at, I prefer System Info (plus, as previously mentioned, it has cats).
I need to fetch the benchmark scores for MacBench from the Performa 6200’s hard disk.
Comparison with CPU Upgraded 68k Macs
In terms of CPU performance, the Performa 6200 is approximately (I used System Info 3.1.3 for this comparison as I had saved scores from my IIci) 25% faster than a IIci with a 66MHz DayStar Turbo 601, but is 14% slower than a Quadra 650 with a 66MHz PowerPC 601 processor upgrade (System Info 6.0.3). I’ve never fully understood why, but somehow the upgraded Quadra 650 almost matches the performance of a 6100/66 in terms of CPU benchmarks. Perhaps the benchmark is entirely contained within the upgrade card’s cache, or the performance of the interleaved 32bit RAM is close to the 6100’s 64bit RAM.
If anybody has a Performa 630 and a 66 or 100MHz PowerPC upgrade, I would be interested in seeing the results of a few specific benchmark configurations, please get in touch!
With regards to graphics performance, and specifically the raw ability of the Performa 6200 to push pixels, I decided to install the game MDK. MDK is extremely well optimised for Mac, and I have previously run it on my 66MHz PowerPC upgraded IIci. While the Performa 6200 is beneath the minimum recommended specification for the game (it recommends an 8100), it is broadly playable on a 66MHz 6100, so I have to admit what I found surprised me. As a baseline, the first two of the following images are of my IIci, running MDK on Mac OS 8.5.3. This setup is heavily bottlenecked by slow memory on a 25MHz system bus, slightly recovered by a 256k L2 cache (so the same as the Performa 6200). Performance of the upgraded IIci is significantly worse than a similar upgrade card in a Quadra 650. The second two images are of the Performa 6200. Note the frame counter (‘current(average)’) under the health HUD.
MDK IIci In GameMDK IIci BenchmarkMDK 6200 In GameMDK 6200 BenchmarkComparison of MDK Performance on a PowerPC Upgraded IIci, with a Performa 6200
We can see that in the benchmark, the IIci was able to achieve “27”, while the Performa 6200 only achieved “22”, and frankly, this is pretty poor on the part of the Performa 6200. The video subsystem on the IIci is un-accelerated, uses main system RAM for the framebuffer and is on a 25MHz bus. This said, in the Performa’s defence, the calculated numbers don’t show the whole picture, and the user interface and load times were better / more responsive on the Performa 6200 – I suspect this is due to better CPU and hard disk performance.
Processor Upgrades
The only way, other than overclocking, of upgrading the processor on a Performa 6200 is by replacing the logic board with one from either a Performa 6300 (a straight swap, other than the 6360, which is effectively a 6400) to gain a 100 or 120MHz PowerPC 603e processor, or to fit a Performa 6400 / PM 6500 board, which requires modifications because these boards need 3.3v for PCI. Once you fitted a 6400 or 6500 board, you could fit a fairly rare Sonnet “L2” CPU upgrade into the cache slot to get PowerPC G3 performance.
By comparison, G3 processor upgrades for the Power Macintosh 6100 are fairly common in their 233 and 266MHz forms, and can be obtained for reasonable prices still, even in 2024.
A G3 upgrade gives a huge performance boost, with my PM 6100 scoring 5.6x faster in CPU benchmarks, as well as improvements in graphics (1.7x faster), disk (1.14x) and huge gains in FPU (5.21x). Additionally, measured RAM speed in my PM 6100/66 increased to 30MB/s with the G3 running, from 23.2MB/s as reported by Gague Pro previously.
Conclusions
The PowerPC 603 processor seems fine, with good CPU speed and excellent FPU performance.
RAM performance is poor compared to the PM 6100, as is expected considering the design of the computer, in particular the use of a 32bit RAM subsystem. This results in reduced overall performance compared to the PM 6100 resulting in a machine with approximately 80% of the compute power. If you use PPC native software, this is a fair performance improvement from any 68k Mac in non-graphic intensive tasks.
68k emulation is not as bad as implied by previous articles and anecdotal reports, and can additionally be vastly improved using SpeedDoubler. SpeedDoubler should be considered mandatory software for these and other PowerPC based Macintoshes running System 7.1.2 through to Mac OS 9.2.2.
IDE bus performance is appropriate for the era and hard disk performance is not significantly different to a similar age SCSI disk.
There is no significant benefit in running Mac OS 8.6, PowerFPU and MathLibMoto in terms of speed gains, although there are some benefits in specific situations. Personally I would chose 7.6.1 in most cases due to the faster boot times and smaller memory footprint.
Graphics performance on the Performa 6200 is abysmal. It is so poor, especially considering that the Performa 630 is slightly faster in many instances even though it uses the same chip, that this may be the consequence of a bug or flaw of some description. I would be interested in finding out more about why this is the case. The one area in which graphics performance is good appears to be drawing an image directly to the screen, but on the flip side, it is then particularly bad at translating an image already on the screen.
Measure Quadra 650 RAM performance at 66MHz with a PPC upgrade.
Investigate IIvx performance compared to a IIci, with and without upgrades.
Get benchmarks for a PPC upgraded Performa 630.
Definitively work out Performa 6200 cache speed and timings.
PowerPC Performance from 7.1.2 to 9.1.
Investigate whether the Performa 6200 performs a memory test.
Is the Performa 630 really faster than the 6200 in hard disk and video tests?
Does L2 cache chip speed rating influence benchmark scores? I.e, what happens if you benchmark a 6100 with a 22ns cache, and then again with a 14ns cache?
Overclock the Performa 6200 to see how fast it can go.
Compare the VRAM on a 6200 and 630 to see if they are the same speed.
Get results for 6100/66 + AV Card + 256k Cache.
Thank you to archive.org for saving a copy of this page after WordPress randomly deleted all of the bullet lists and galleries at some point this year. Sorry I didn’t notice sooner.
I’m not sure if it is just my specific installation, but I’ve noticed an issue in Basilisk II regarding floating point values, where the value displayed is incorrect. This has caused me problems a few times, but this evening, I worked out a partial solution.
The issue seems to be in the FPU emulation itself. I use a IIci ROM in my installation. I found that if I set the CPU to either a full 68040 or a 68030 + FPU, floating point values were wildly wrong. I then found that the vanilla “SANE” routines work, so if you set the emulator to 68030 (without an FPU) everything works just fine.
This will slightly reduce software compatibility (although I doubt software that required the FPU would function correctly with the completely incorrect values I was getting), but will mean that software that doesn’t require a hardware FPU will run correctly.
Update – dougg3 has noticed that the issue happens when he uses the IIci ROM, but not if he uses a later (LC 630) ROM.
I have made a small testing tool, which is available for download here :
If you’re looking for a new battery for your TH55, the size you’re after is a 503759. These are available as 1300mAh batteries from AliExpress. I specifically got this one, if the listing is still available, making sure you pick the right option from the listing as it is for multiple sizes. They can be bought elsewhere as singles, but I bought 10 because I’ll need them eventually and they’re cheaper in bulk.
Perfectly Fitting Battery
To get into the battery compartment you’ll need a tri-wing security bit (basically like a Philips bit, but with only three corners). I have a 2.0mm size one that works well.
Tri-wing Screw
You’ll likely need to transfer the connector from the old battery to the new, which should be done by soldering, ideally replacing the cable where it is connected to the protection circuit board on the battery as the fit is tight. If you splice the cable, make sure you cover the joins with heatshrink (remember to put it on the wires before you solder them). Ensure the wires are at least 60mm long.
The Old Battery Being Removed
When fitting the new battery, they tend to catch on ribbon cables in the battery bay, so push a bit of thin paper, such as a receipt, into the opening between the rear case and ribbon cables so that it covers them, and then slide the battery in between the paper and rear case. Then pull the paper out.
Using a Receipt to Hold Ribbon Cables out of the Way
It is also advisable to loop some tape around the battery as a tab to pull it out as it is a tight fit.
The ESP32 S2 Mini i s a small development board based on the ESP32-S2FN4R2 chip. The ESP32-S2 Mini by Wemos can be used as an Arduino, which is what this post covers. It can also be programmed in other ways, including with MicroPython, CircuitPython and with the chip manufacturer’s (Espressif) own software development kit.
Capabilities
The board can be used as an Arduino, although as with all different Arduino boards, it will have quirks that will mean some libraries will need special versions. This is the same as different boards within the Arduino family to a degree, and is often due to a mixture of hardware features being on different pins, or software maturity. It is worth pushing through these issues for the benefits the chip brings over a standard Arudino Uno or similar.
Processor Speed – 240MHz (32bit)
3.3V Power and digital outputs, but 5v tolerant digital input pins (you can send it 5V signals without harm)
USB-C Connector
Wifi capable (can be turned off if not needed)
4MB Flash (for programs, and for storing resources such as images, html files or sounds)
2MB of RAM
27 I/O pins
12 Digital I/O pins
18 Analogue Input Pins
2 Proper Analogue Output Pins (not PWM)
27 PWM Capable Pins
27 Pins Serial Capable
Multiple I2C and SPI Busses
Note this specific chip doesn’t support Bluetooth (unlike other related products which sometimes do).
Adding the Board to the Arduino IDE and First Test
Launch the Arduino IDE (I’m using version 1.8.9 on Linux).
Go to Tools>Boards>Board Manager, and type in “ESP32”.
Select and install Version 3.1 (3.1 is the newest at the time of writing – version 3.0.5 didn’t work properly for me) “esp32 by Espressif Systems” (not “Arduino ESP32 Boards”).
If “esp32 by Espressif Systems” doesn’t show up in the list when you search, go to File>Preferences and add the following text to the “Additional Boards Manager URLs” text box. If there is already text in there, you need to add it to the end, after a comma and a space.
The text to add : https://raw.githubusercontent.com/espressif/arduino-esp32/gh-pages/package_esp32_index.json
Returning to the Boards Manager as above, you should now be able to see the “esp32 by Espressif Systems” option when you search.
From the Tools>Boards sub menu, pick the option LOLIN S2 MINI.
Open the Blink example from File>Examples>01.Basics>Blink.
Plug in the board using a USB-C cable.
Press and hold the button on the board labelled “0”, and briefly press the “Reset” button, wait another two seconds and then release the “0” button.
Select the board in the Tools>Port menu.
Click the “Upload” arrow.
Once the upload has finished, it might show an error, but regardless, press the “Reset” button on the board. The onboard LED should start blinking.
If you’re on Linux, you may need to set up USB permissions as per the instructions here.
If you have any issues, try a different USB cable. The first one I tried didn’t work properly (some don’t have all of the wires inside them).
A More Interesting Example
The most useful starting point is the provided example found at File>Examples>WiFi>WiFiAccessPoint. This example turns the board into its own WiFi network (separate to the house network). You can use your phone or laptop to connect to this network, and then load one or more web pages served up by a mini web server on the board. I often use this to provide an easy control interface (buttons and feedback). It is also possible to do firmware updates over WiFi, which can be very useful when the controller is buried deep in a machine. Obviously, make sure you use a password on the WiFi to stop other people messing with things.
Upload the WiFiAccessPoint example onto the S2 Mini board. I’m not certain why, but I had to completely power cycle my S2 Mini before the WiFi appeared.
Plug the S2 Mini into a USB port on your computer and open the serial monitor. Using your phone or laptop, connect to the WiFi access point that has the name yourAP. The default password is yourPassword. You should see information appear in the Serial Monitor, including the “host” IP. This is probably 192.168.4.1. Go to this address in your browser by entering http://192.168.4.1 or just click that link if you have this page open on the computer you connected to the S2 Mini with.
You should be presented with a simple webpage that has two lines of text, each with a link in it. The two links turn the LED on the board On or Off. Clicking them causes more activity in the serial monitor.
Recently I had to get a replacement power switch for a LifeDrive repair. A friend identified that the part number was JSM07011SAQNL, but we could only find fairly expensive parts for sale on the far side of the world. While rummaging around, I saw a picture of the power switch used on the Sony PSP (variously 1000, 2000 & 3000) and it looked suspiciously similar and I could get it on local eBay, for much less money. I decided to take the chance.
This post is basically to confirm that yes, the power switch is the same so if you need a replacement for your LifeDrive, you can source the part for the PSP, but also that the part number for the PSP item is JSM07011SAQNL.
eBay Listing for PSP Power Switch
Removing the existing part is tricky – I removed the foam pad next to the switch and then used 300°C hot air to desolder the existing part. Low temperature desoldering solder would be risky because of the proximity of other SMD parts, snipping off the pins would be tricky because they seem to go under the switch, and the 4 pins mean it isn’t easy to get heat to all of them at the same time with a normal iron. I thankfully didn’t have any issues taking care with hot air.
Old Switch and New Switch
Replacement Drive
While the palm drive was apart, I also fit a 16GB Compact Flash card (the failed microdrive had already been temporarily replaced with a 512MB CF card). Note that not all cards are compatible, generally you have better luck with older or “Industrial” cards. I have two 8GB cards that will not work in older machines. Before fitting, you need to flash a baseline disk image to the card, which can be found here at palmdb.net. Note the instructions to run the following command line instructions to write the two images to the disk (written for Linux / Unix). Take care to make sure you replace the drive in the example with the one you need! The following need to be run from the directory the two image files are in…
If you do not understand the above, seek out guidance on using the Linux command line tool “dd”. If possible from a real human who will explain the risks and difficulties and make sure you don’t accidentally overwrite your main hard disk instead.
Case Screw
This LifeDrive is missing a screw (one of two outermost screws). Careful measurement suggests it is a torx M1.5x10mm screw. These are… Non-standard as M1.5 isn’t really a thing. I ended up fitting an M1.6x10mm screw and it works well. The part I ordered is a conventional Philips head screw, I’ll likely replace both for the look of the thing.
Batteries
I haven’t replaced the batteries in this LifeDrive because it seems to hold a reasonable charge, but for reference, it uses two standard lithium cells. If you replace them, you’ll need to save the connector from the existing pack as it has four wires, two for each cell, although they are apparently wired in parallel so you can use one big cell if you want. Ensure that your replacement batteries have a BMS integrated.
Sorry, but I forgot to measure the dimensions before reassembly. They looked to be approximately 30x45x8 combined together? This is from day old memory and shouldn’t be used for purchasing parts. Measure what you have.
Reassembly Warnings
Note when putting the Life drive back together there are a couple of gottchas. Firstly, when putting the main board back in the housing, switch the power switch into the latched position, and then use a finger to hold the sliding element on the case side over on the same side, otherwise it drifts around and can, cough, be damaged.
Secondly, the speaker connector is a little bit of a faff to reach to plug in. I suggest doing this before the battery power if possible, and using tweezers in through the opening in the back chassis.
Looking for Performa / LC / Quadra 630 Technical Information
One of the Macs I’m most nostalgic about is the Performa 630 (and it’s many badge engineered siblings). It is a strange derivative of the LC 475, with many similarities, but with a large number of unusual and very specific expansion slots. As well as the LC 475’s LC PDS slot (the 32 bit version), it also adds… An AV slot, a UHF and FM module, a hardware MPEG decoder, a DOS card, a GIMO port and an IR port. It also has SCSI and IDE which can be useful, and a video chip that supports hardware scaling.
Some 630s were fitted with a very similar board also used in the Performa 580. The design is pretty similar, but helpfully provides a second RAM slot.
Technical Info Wanted
I like doing hardware and software projects with old macs but sadly, haven’t been able to find anything much beyond the Developer Note for the Performa 630.
In order of priority, if you happen to have…
An ERS for the F108 Memory Controller chip used in the 630 and similar machines…
An ERS for the Valkyrie video chip used in the 630…
A schematic for the 630 logic board…
Anything else similar, the general machine ERS, or technical documentation for other critical chips…
… I would be super interested in hearing. Please let me know. There is a contact form under “About” at the top of this page.
The Tanzania and Tanzania II logic boards were designed by Apple and mainly used by clone makers in machines such as Motorola’s StarMax series of computers. Apple released their own budget “clone” style computer in the form of the Power Macintosh 4400 (the 7220 in some markets).
My Power Macintosh 4400/200
Tanzania based machines came in a verity of configurations with various speeds and a mixture of 603 and 604 family CPUs. What is interesting though is that Motorola variants have the PLL strap settings detailed on the silkscreen! The PLL strap options are what sets the multiplier for the CPU clock speed.
Silkscreen CPU Speed Table (thankyou to the unknown source, friend of a friend of a friend)
Note that the speeds shown in the “Mode” column are from a 40MHz bus machine. If you have a Tanzania II with a 50MHz bus, scale all of those speeds by multiplying them by 1.25 to get the equivalent speed for a 50MHz bus computer.
The numbers correspond to the pin numbers on the 12 pin header labelled “CPU Option” in the corner of the board closest to the CPU. By default the header is unpopulated and the clock speed is set by four pull up / pull down resistors on four of eight available positions around the header.
CPU Option Header Showing Default Resistors for 200MHz (Click to View)
The pin numbering can be see around the footprint, and then populating R24 and not R23 is the equivalent of jumpering pins 1+2, while populating R23 and not R24 is equivalent to jumpering pins 2+3. This pattern repeats for pins 4 to 6 with resistors R21 & R22, 7 to 9 with R8 & R9, and lastly 10 to 12 with R1 & R2.
Each set of three pins can be thought of as a toggle switch, for example if you jumper 1+2 together you get one setting, and if you jumper 2+3 together, you get the other.
The resistors set the default and should be removed before jumpering or bridging the corresponding appropriate pairs in the 12 pin header (especially in the case of 51 ohm resistors). Never bridge all three pins in a set of three within the header or you will cause a short and possibly cause damage. Ideally, fit a pin header and use jumpers to change settings. You could even wire in a single pole double throw switch to each set of pins.
Target Speeds
Generally, I’ve found that most processors in various computers (but not all) overclock happily by 20% (I’m not specifically talking about Tanzania based computers, but vintage computers in general). Higher speeds might be achievable, but this is my personal rule of thumb for a ‘more likely than not’ stable overclock. This means that if you have a 160MHz machine, you can likely achieve the 180MHz setting. If you have a 200MHz machine, 240MHz is likely possible.
I haven’t worked out what the best way might be to do it, but given the CPU heatsink on the PM4400 is a little small, some additional cooling may be beneficial – either a larger heatsink similar to the one used on higher end Tanzania based clones, or a fan pointed at the CPU and powered from a spare molex (my PM4400 has several spare molex connectors, but you could always use a ‘Y’ splitter).
If your 160MHz can cope with 200MHz, a simple upgrade would be to remove resistor R1, and then bridge pins 10+11 on the CPU Option header, perhaps with a blob of solder. Removing the bridge and refitting the resistor would set it back to 160MHz.
Changing Resistors
The following table shows what resistors to put where to set the speed of your Tanzania. You should never fit more than four resistors, but if you misplace one of the resistors, they look to be 0603 size, 4.7 kilo-ohm and 51 ohm resistors.
Resistor Settings for Various Speeds
Fitting a Header
If you instead choose to fit a pin header and use jumpers to set the speed, you will first need to remove the resistors and then the existing solder from the footprint. To remove the resistors, I put a large blob of solder on the tip of my iron and used it to heat both sides of the resistor at once and brush them off the pads one at a time. To clear the solder filled through holes, I’d recommend using flux and solder wick (aka solder braid). I’d set my soldering iron to about 350°C, paint on some liquid flux, wick out some solder while not keeping the iron on a pin hole for more than about eight seconds at once, and always lift the iron and wick off at the same time to avoid the wick sticking and potentially causing damage.
If the solder doesn’t clear, try again from the other side. If it still doesn’t, add a little fresh solder and try again.
That is the tricky bit. Once cleared, solder in a 6×2 2.54mm pitch header, or two 6×1 headers.
Jumper Settings for Various Speeds
The following representations show how jumpers should be fitted for a few common speeds.
Note that the difference between 160MHz and 200MHz is only a single change, which is why, as mentioned previously, if you remove resistor R1 and then bridge pins 10 and 11 (for example with a blob of solder), your machine will be speed bumped to 200MHz from 160MHz, as long as it is able to run at 200MHz (the increase is 25%, which in general terms is quite a big speed increase for an overclock, especially without extra cooling).
Results
I removed the four resistors and cleared out the solder from the holes.
Then I soldered in a header, and fitted some green jumpers in the arrangement required for 240MHz. Reassembled my computer and powered it on.
It booted happily and Apple System Profiler (in Mac OS 8.6) reports the CPU as a 240MHz 603ev, which is what was expected.
I ran some CPU benchmarks with the computer set to 240MHz and 200MHz (in that order, by powering down and swapping the jumpers around – I’d forgotten to get the “before” benchmarks) with Norton System Info from Norton Utilities 6 and got an 11% increase in the overall CPU score from the 20% overclock.
Looking at the detailed breakdown, we can see that tests that heavily use the RAM scored less well, with very RAM intensive tests seeing almost no change, moderately RAM intensive tests showing intermediate improvements and things like multiply and divide showing the full 20% uplift.
(Click to View)
I checked through the other benchmark categories (Video, Disk and FPU), Video saw almost no change, likely because most actions are been undertaken by the built in ATI mach64 video chip, with the exception of Ovals and drawing images, which I assume are both dependant on the CPU. Disk saw no significant change (except for random write, which I don’t fully believe and so am going to assume was due to a hiccup during the 200MHz benchmark).
FPU scales almost exactly with clock speed as usual, so we basically see a 20% uplift across the board.
In my specific machine, the CPU heatsink is cool enough to comfortable touch (indefinitely) while overclocked to 240MHz, even with the stock heatsink. Interestingly at 200MHz the heatsink is actually cool to touch, it cant be much different in temperature to my hand. I feel like with a bigger heatsink this computer would have a lot of overclocking potential, although I’m already at the maximum speed in the table.
Upgrading to a 604e
The board is technically able to use either a 603e (/ 603ev) or a 604e BGA chip. To do this, you would have to at least adjust the CPU core voltage by changing components in the voltage regulation circuit near the speaker connector. You almost certainly would also have to change some other resistors on the board as this is usually the case. Unfortunately as I don’t have the schematics, I don’t know what or where these would be.
It may be possible to meticulously compare a 604 based board with a 603 board to document the differences, but I don’t envy the individual that does that. A good place to start is probably at the “CPU ID” header, which also seems to be surrounded by four strap resistors.
CPU ID Header
If I remember correctly, the Performa 6400 schematics are available, and this is a sort of similar machine in some ways, so probably contains some clues regarding changes needed to fit a 604 to a machine that shipped with a 603. The Beige G3 schematics might also help as the design includes allowances for the 603 and 604.
Bus Speed
I’ve not done any investigation, but glancing at the board, it looks like the chips “U10” and “U11” are clock sources. The “U10” style of clock is usually set to one of several speeds based on resistors on some of the pins, but given its location, it might be controlling something in the chipset as “U11” has a 40MHz clock and is closer to the CPU. U11 looks like a shift register – I’m not sure what the circuit is doing exactly. I’d have to look into it, but hopefully these comments are a helpful starting point for someone else.
An old 68kmla post with a dead link mentions a need to move a resistor from R29 to R28 (next to the VRAM slot). But I don’t know anything about that. Well, it actually says the reverse, but mine is already like that, so I’m assuming they got it backwards, or perhaps my machine is already set like that. Sadly the website they’re referencing didn’t get archived by the wayback machine.