Tag Archives: Formatting

Large Disks in Vintage PowerPC Macs

Large Disks in Vintage PowerPC Macs

The main scenarios that have caused me issues with large hard disks in PCI era PowerPC Macs (Beige G3 through to G4 era) are…

  1. Many IDE PowerPC Macs from the G3 to G4 era are limited to ~128GB disks.
  2. The operating System on some early G3s needs to be in the first 8GB.
  3. When partitioning a Terabyte scale disk in Classic Mac OS, Drive Setup fails to allow you to size partitions due to UI issues.

Lets look at each of these issue and solutions individually.

Dealing with the 128GB Limit

I believe this limitation impacts computers from the Beige G3 and original iMac through to some QuickSilver G4s. The issue is caused by the computers only supporting 28bit LBA, resulting in a 128GB limit. I usually aim for a little bit under 128GB as I believe there may be a little bit of margin needed for some reason.

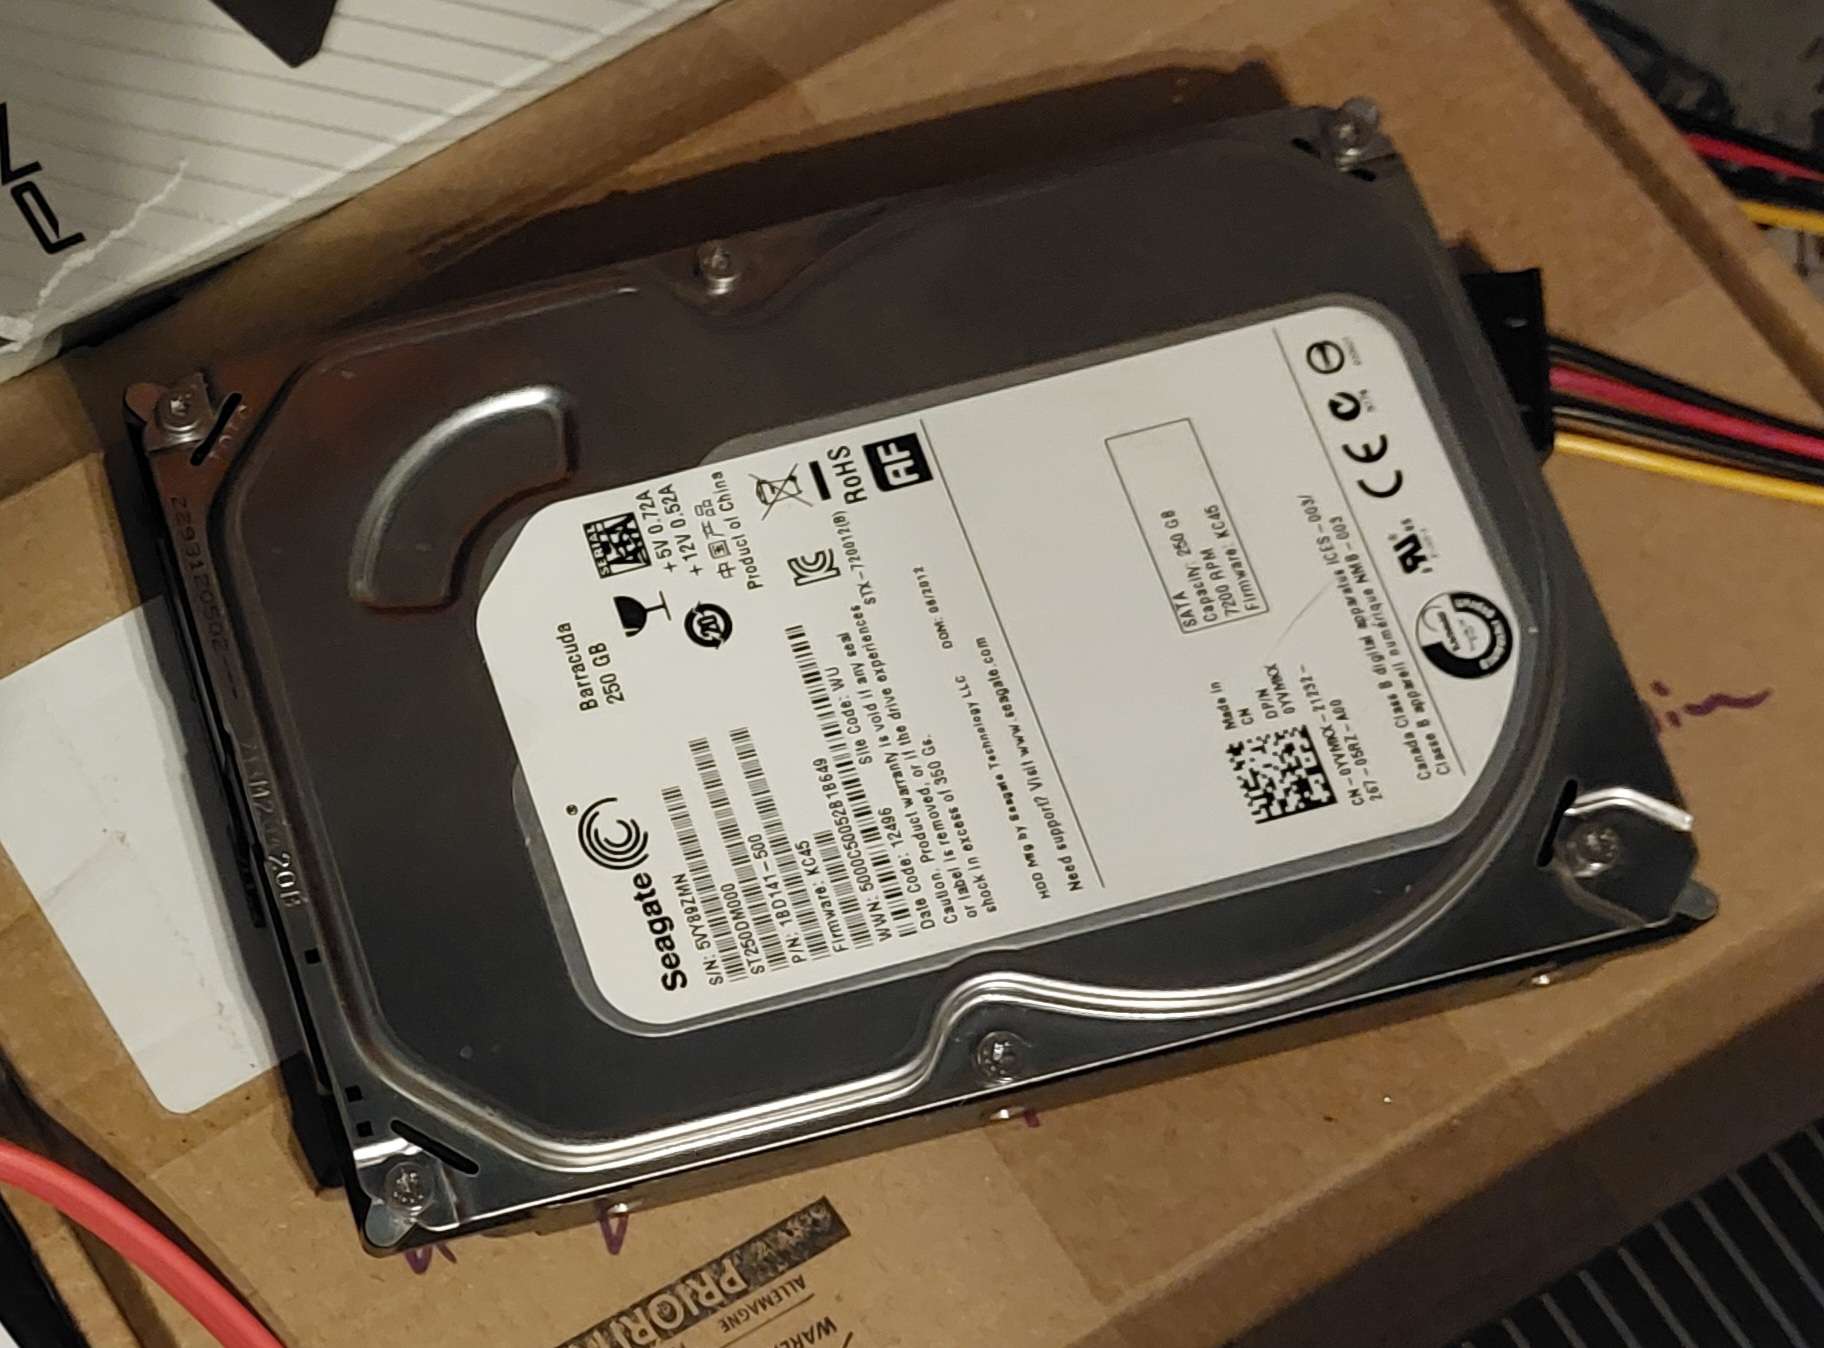
  1. The simplest solution, given disks less than 128GB are often more expensive due to so many vintage machines having the 28bit limit (not just Macs), is to get a larger disk such as a 250GB disk, and format it with a 120GB partition in a more modern computer that supports it. This has worked for me in the past, but whatever you do, do not mess with the partition table in your 28bit LBA machine.
  2. The next easiest solution, but with a more significant cost, is to buy a PCI card that supports larger disks, such as an after market ATA card, or a SATA card. Note that most cards don’t support Macs, and even some of the ones that do, don’t support booting, only storage. A good option might be a SIL3112 based card as with the right firmware they have Classic Mac OS support (back to System 7.5) as well as some Mac OS X support.
  3. Intech Software wrote a special hard disk driver that enabled the use of bigger disks with both Classic Mac OS and Mac OS X (10.2 and later) on the computer’s internal ATA bus. To use the driver with Classic Mac OS, format the drive using their Hard Disk SpeedTools product, but if you want to use the drive with Mac OS X, you will need to install a software driver called SpeedTools ATA Hi-Cap Driver in every OS X install. Note! There are still a number of limitations – it is likely that any computer that suffers from needing bootable OSes in the first 8GB will still need that, so create any bootable partitions you need within the first 8GB. On later machines using this disk driver to use larger disks, they will not be able to boot from beyond 128GB on the built in interface, so ensure that you put a partition divider around 120GB and only use partitions beyond 120GB for storage, and not bootable OSes. There are extensive warnings and guidance in the manuals for this software.

Please note that I’m not overly familiar with the limitations on older Performa 630 -> 6500 family IDE implementations. I have attempted to put a 120GB disk in a 630 but had odd, intermittent write errors. This is an ongoing project and I hope to find out what can and can’t be done with that family of machines.

Keeping the OS Within the First 8GB

Historic understanding of this is that the OS must be within the first 8GB of the hard disk on the Beige G3 and early iMacs, although this has been disputed at times. My personal experience of this is that I’ve had issues over time when I failed to partition a 40GB disk in a 233MHz beige G3 (with a Rev A ROM), but given this was back in something around 2003, I don’t have extensive notes! My thoughts are that more investigation is required with different hardware and ROM revisions to understand what is going on, but in the meanwhile, to be safe…

  1. Partition your disk. I usually create a couple of small partitions and then a larger partition, using the larger if I want to run an early version of OSX. For example, I might create a 2GB partition and a 6GB partition for a Classic Mac OS install and a Mac OS X install. Alternatively, I might create two 1GB partitions, a 2GB and a 4GB if I’m experimenting with lots of OSes. I then usually create a single large partition with the remainder of the disk (assuming it is less than 128GB – see above) for applications and storage.
  2. Use a PCI SATA or ATA card. Many cards make drives appear as SCSI drives meaning that the host’s ROM doesn’t use the code that prevents booting beyond 8GB (the bug is in the ATA code, and doesn’t apply to SCSI disks).
  3. Using a helper partition – given the issue only exists very early in boot, it is possible to use a small helper partition and the software XPostFacto. XPostFacto is able to put a small number of files on a bootable partition, that then hooks into a larger OSX (I don’t think it supports OS9? I’m not sure, please correct me) installation on a large, unbootable partition. This trick can also be used to boot from FireWire drives on machines that don’t support booting from FireWire. Theoretically you could create 10 small partitions within the first 8GB of the hard disk and use each as a helper partition to boot huge partitions later into the disk.

Partitioning Multi-Terabyte Disks Under Classic Mac OS

Note – I believe that you are limited to 2TB disks in Classic Mac OS, but have not personally tested exceeding this limit.

When I installed a 1.5TB disk in my 9600 I found that I was able to format and use the disk using Apple’s Drive Setup, but that if I tried to partition the disk, I could not type in custom partition sizes (my usual trick with a big disk is to use the tab key to cycle through partitions that are visually too small to click on in Drive Setup). After some experimentation with various software, I found that I was able to easily set up partitions, once again using Hard Disk SpeedTools. As such, this is my recommendation for setting up a very large disk (I assume SATA) in a classic Mac OS system.
SCSI Hard Disks

SCSI Hard Disks

I recently picked up a non-functioning Macintosh IIx which appeared to have suffered from battery and capacitor corrosion damage. After recapping it and some trace repair, I found the hard disk was in the process of failing, although I was able to boot it from the SCSI2SD from my Macintosh SE (4MB, 40MB, 800k). This wasn’t a long term solution as the SCSI2SD really belongs with the SE!

I decided to find a second hand SCSI hard disk and started searching eBay. Following a discussion with a seller (conistonmal) who was selling a bunch of SCSI 3, 68 pin drives and me asking them would they sell the disks in smaller quantities, I discovered that they were actually also looking to clear out a stock of 50pin SCSI 2 style drives. These drives fit straight into most traditional (pre G3) Apple Macs. Given the collection of machines that my family has, I took the opportunity and bought a load, especially as the seller was fully testing each disk before selling them.

Connecting the Drives

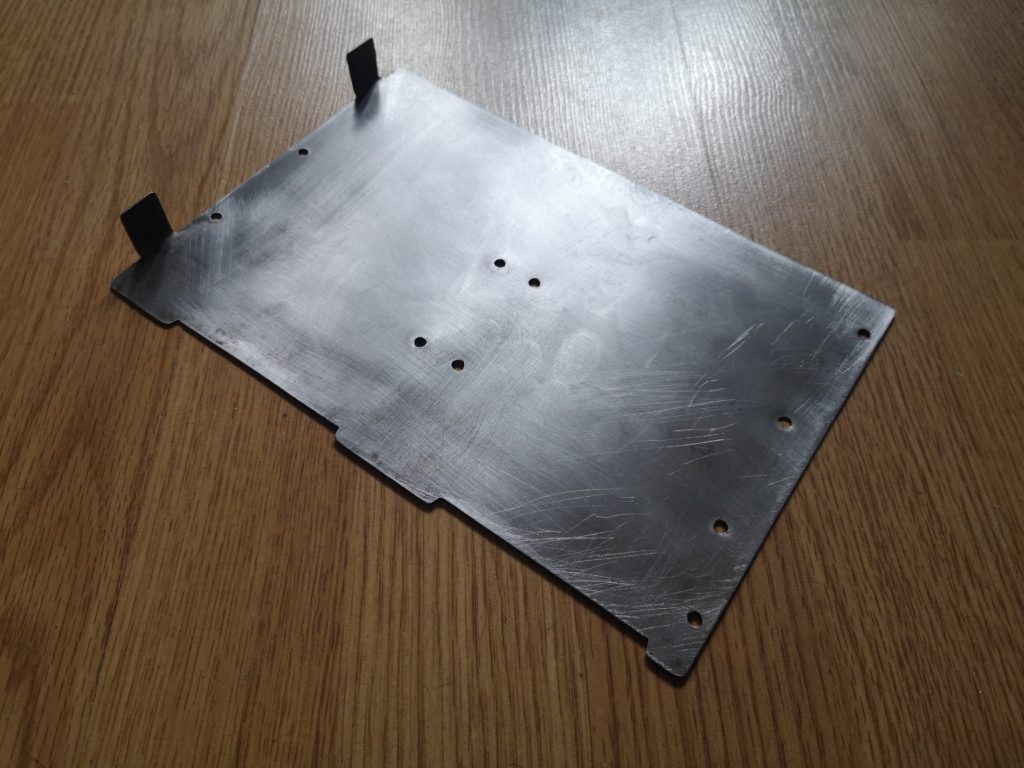
I decided that since there was so much room inside the IIx (it was designed for a 5.25″ hard disk), I would make an adapter bracket to take two hard disks side by side. This required making the physical bracket, matching the interfaces to what was already there, as well as making up my own double headed SCSI cable of the correct length, and obtaining a Molex extension and “Y” splitter. I have also ordered a small but quiet 40x10mm fan that I believe will be able to encourage airflow through the rear vents and over the disks as one of the disks gets quite warm (it is a 10,000rpm 18GB drive).

Hard Disk Bracket

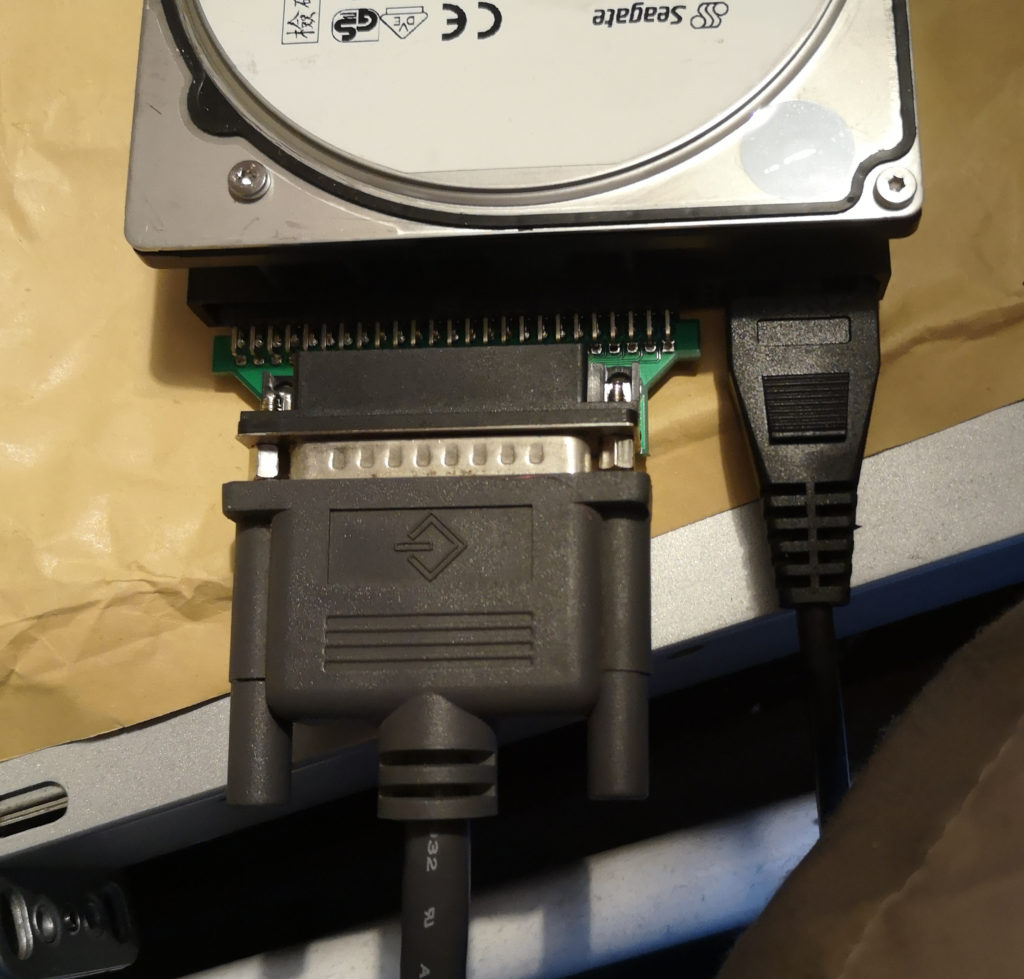
Secondly, as I had a few drives to format, I decided a needed a faster / more elegant way to connect and disconnect the drives quickly to format and test each one. I bought a dual voltage mains connected Molex Power adapter and pinched the DB25 to 50pin IDC adapter from my SCSI2SD board.

Drive Connections

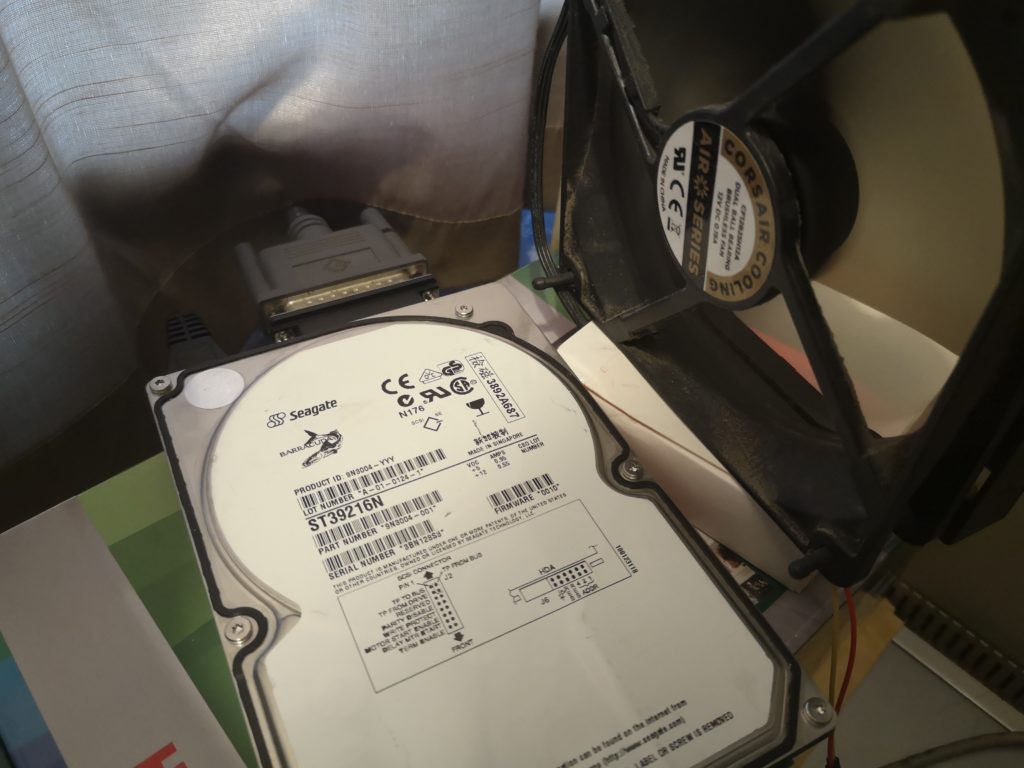
I placed a fan I usually use to cool my overheating work laptop next to the disk to make sure it had sufficient cooling.

Disk Cooling

Drive Settings

How sensitive to incorrect termination settings your setup is depends on the specific Mac – you should set it correctly, but you might not notice sometimes as you seem to get away with it on some machines. The main jumper settings that needed attention on the disks I was using were…

  • Termination enabled (on the last internal and external device)
  • Termination power from bus
  • SCSI ID

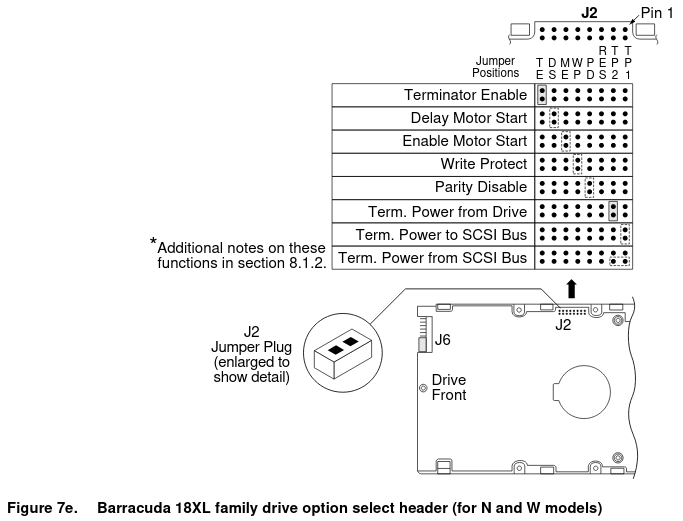
Specific to the model of Seagate drive I was using (the ST39216N), I used J6 to set the SCSI ID and J2 for various (mostly termination related) settings. The LED output was also on J6, but I did not use this. Unusually, these disks have a built in activity LED – I don’t think I’ve seen that before. The manual for the drives I was using can be found here. Remember to search for the drive type that you have to find the correct settings, as it is unlikely that everything on your disk will be identical. If your drive does not include termination, you may need to ensure that there is a device which does on the end of the SCSI chain, or buy a stand alone terminator.

Disk Jumper Settings
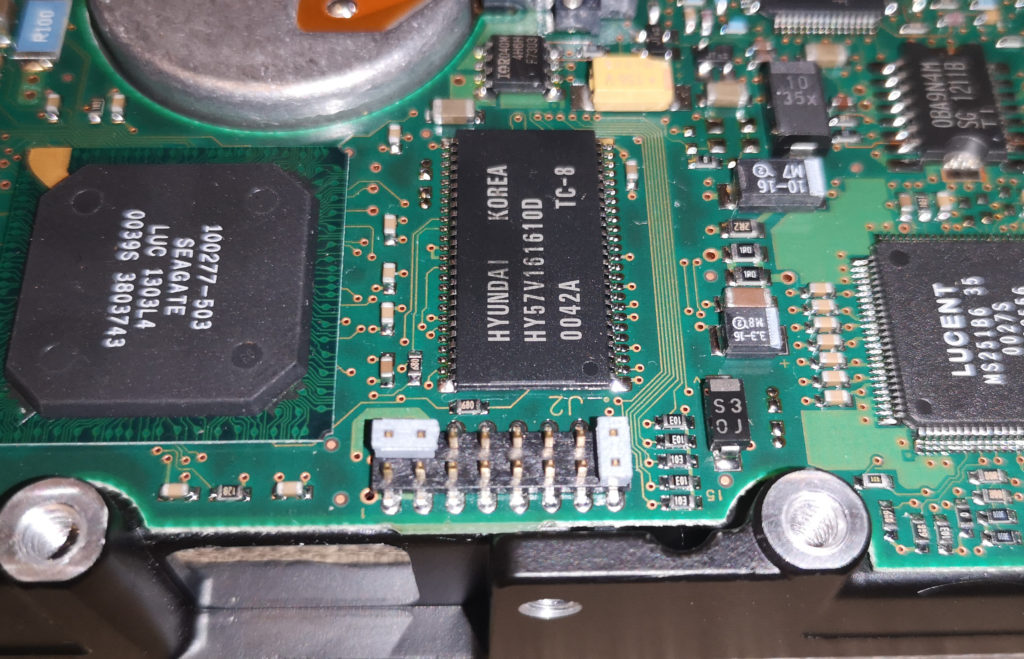
My Disks Jumper Settings

Following the details shown above from Seagate, I set my disk to “Term. Power from SCSI Bus” and “Terminator Enabled”. The termination power setting is the one I understand to be correct for Macs, and I enabled the built in terminator because the disk was the only device connected externally to the SCSI bus. Only the final item on either the internal, or external SCSI connector needs to be terminated, terminating other devices or no devices will potentially cause issues. Note that the IIfx is weird so look for additional instruction if you are lucky enough to have one! The following photo shows my settings on J2. J2 and J6 both use 2mm jumpers on this disk. They can be bought from eBay if you need any.

Jumpers Photo

Software

You will need the following software (alternatives are available) :

  • Macintosh System 7.5.3 Disk Tools
  • Drive Setup 1.7.3 (Patched)

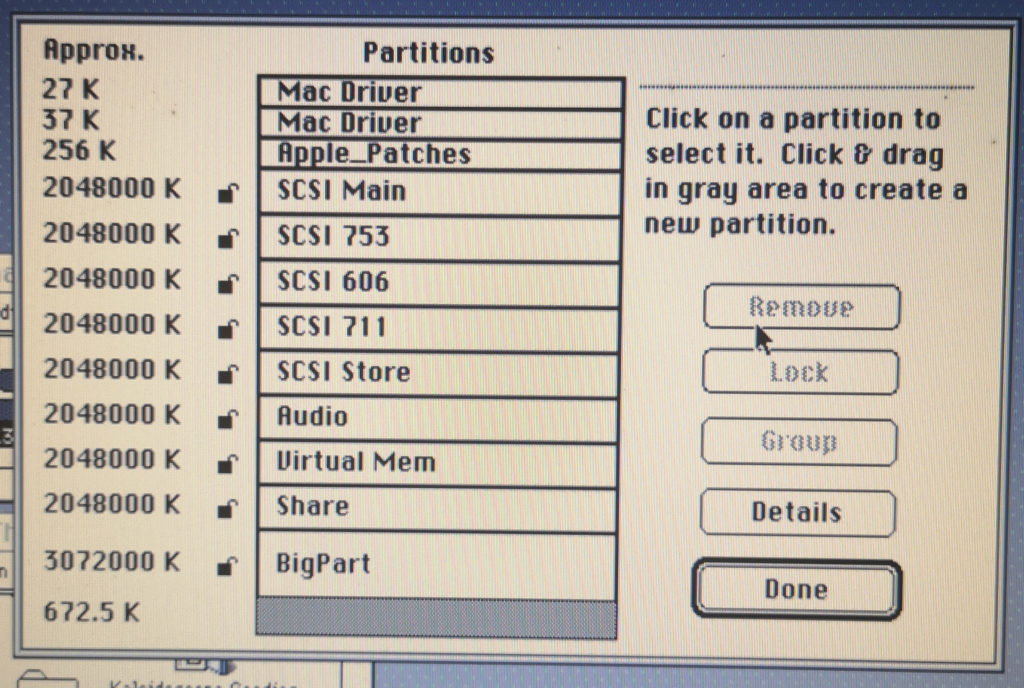
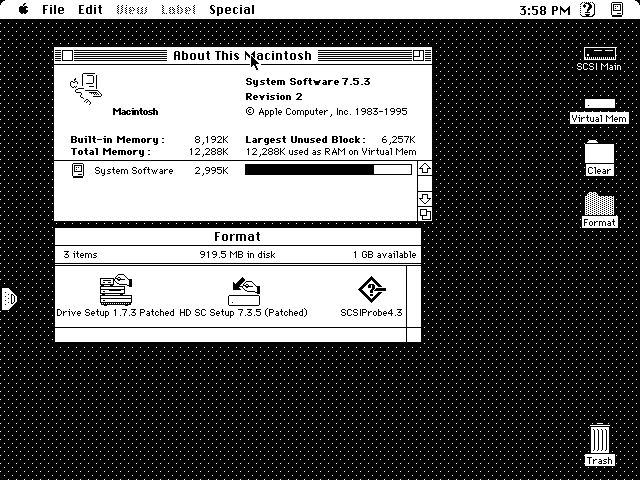
System 7.5.3 combined with Drive Setup 1.7.3 allows you to format a disk in 4GB partitions and should run on anything back to a Mac Plus if it has enough RAM (possibly earlier machines with some creativity). While I wouldn’t pick it for a daily driver OS on something like my SE, it is fine for running the disk tools. From my limited testing, these 4GB partitions appear to be bootable and usable from System 7.1 (with Finder 7.1.3 installed to get the Scriptable Finder and a few other features), which covers my use case as this is my preferred system for the IIx. If you’re planning to frequently use older operating systems, I recommend keeping partition sizes at less than 2GB. Note that limit on the number of partitions is quite high – they are treated as open files and you are allowed up to something in the region of 170 open files. Extensions and Control Panels are also counted as open files, so you don’t want to get too carried away, but you are more likely to run out of room on your desktop in terms of pixel real estate, than hit the partitions limit with 2GB partitions.

Drive with Many Partitions

I have created a disk image that boots Most Macs that have SCSI and automatically launches the Drive Setup utility to allow you to format your new disk. I believe it will boot machines from the Plus up to the Power Macintosh 8500. The only pre-G3 machines I don’t believe it will boot are the 7300, 8600 and 9600 – I’ll see if I can solve this at a later date! Note that these machines all have CD drives so this is less of an issue as you can easily write a boot CD.

The version of Drive Setup is patched and allows the software to work with non-Apple disks. The version selected allows you to up to 4GB partitions even on older (e.g. 68030 and probably older) machines. You can either write the disk images to floppy disk and boot from it, or just fetch the patched version of Drive Setup from it and use your own OS. Note to use this version of Drive Setup you’ll need to be running at least System 7.1.2, or possibly even 7.5, and you can’t format the disk that you have booted or launched the application from.

You can download my disk image from here as a Mini vMac / DOS style disk image :

Bootable Drive Setup ".dsk"

Or here as a Disk Copy image :

Bootable Drive Setup

Formatting

Prior to starting up your computer, make sure your jumper settings on your SCSI disk are correct, connect it to the SCSI bus (internally or externally), then connect the disk power (the Molex connector). Make a note of the SCSI ID you have used so that you can select the correct disk to format. Then, either boot your Macintosh from a floppy of the Bootable Drive Setup image, or otherwise from your existing System install if it is new enough.

Note : When booting from the Drive Setup floppy, you will not see the desktop or Clock in the upper right. This is normal.

Bootable Drive Setup

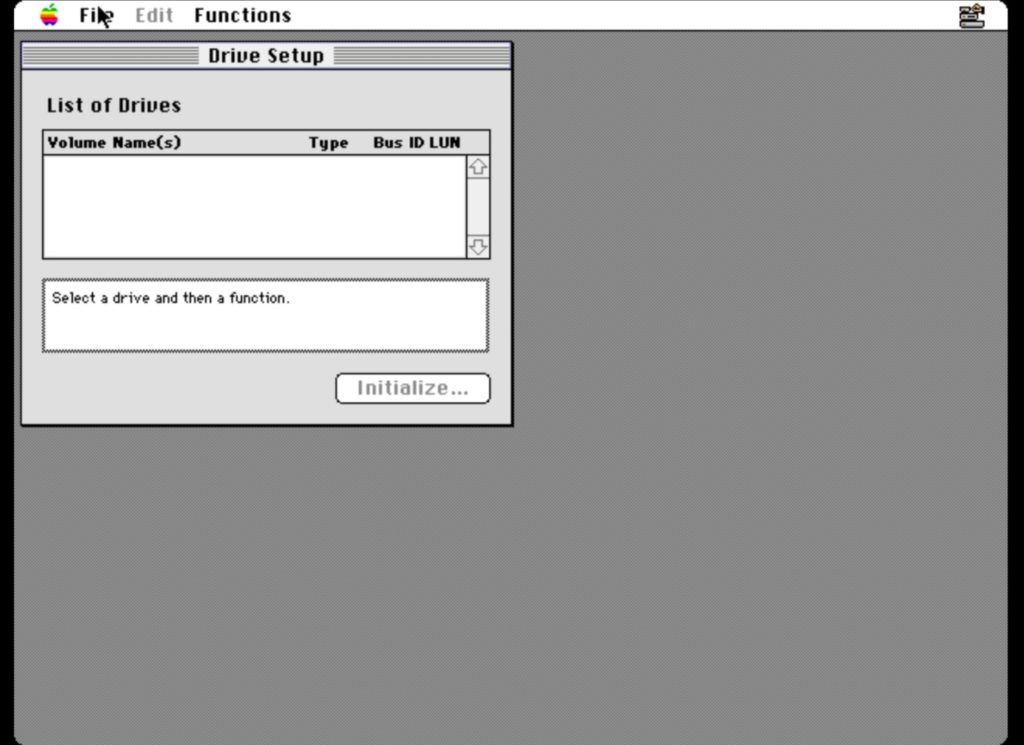
Once you reach the desktop, the new disk may appear if it has been previously formatted, don’t worry if it doesn’t. If the drive to be formatted does mount, unmount it by dragging the disk icons for all of its partitions to the Trash / Wastebasket. Launch the patched version of Drive Setup.

Drive Setup 1

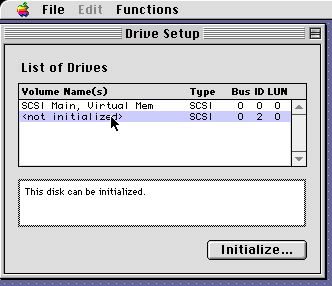
The new disk should appear in the list, identified by its SCSI ID which you most certainly made a note of earlier. It will also be identified as “<not initialized>”. Select this item (make absolutely sure you select the right one or you could delete your files!). Click Initialise (“Initialize”).

Drive Setup Initialize

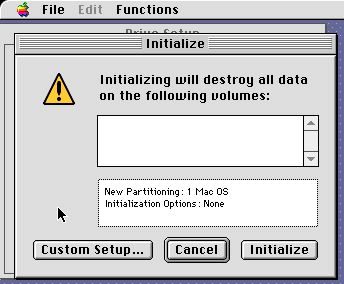
Click on the “Custom” button.

Drive Setup Customise

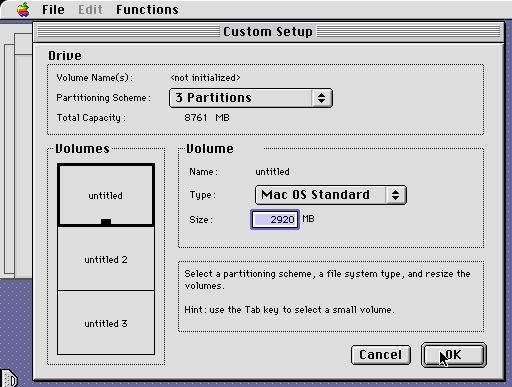
From the drop down menu, select the partitioning scheme that best suits your needs. I chose to divide my disk into the smallest number of equal parts that resulted in partitions les s than 4GB. This resulted in 3 partitions of approximately 3GB each on my 9GB disk. You can drag the little black tab on the selected partition to resize it.

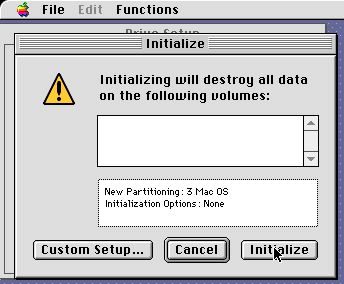
Confirm your choices (if you are sure).

Drive Setup Initialize 2

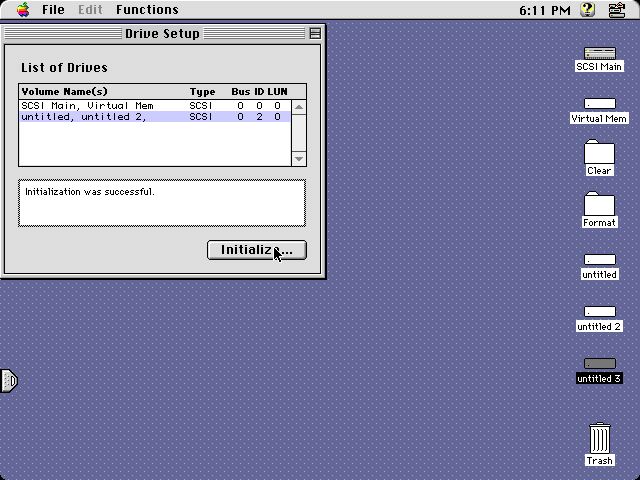
Drive setup will then format the drive, and mount the partitions as “Untitled” and a number (you won’t see this if you’re using the bootable floppy). Feel free to rename them.

Drive Setup Done

At this point you are basically done. You can install your software on the drive and boot from it if needed. I particularly like that this method uses the Apple driver rather than a 3rd Party disk driver.

If you booted from the Drive Setup floppy, quit Drive Setup and you will be asked if you would like to shutdown or restart.

Appendix A – Using Apple HD SC Setup v7.3.5 (Patched)

It is also possible to format your drive using the other formatting tool “Apple HD SC Setup”. I don’t recommend this for a number of reasons.

  • I find that it sometimes crashes with large disks
  • It is very slow – it takes 15 minutes to do with what Drive Setup does in 20 seconds
  • When you create a completely custom partition scheme, it doesn’t seem to enable the mount on startup functionality on your partitions, or format them.

Do not be mistaken in thinking that the application has crashed unless it throws a System Error – it is really slow when you format a 18GB disk with it.

Where Apple HD SC Setup seems to provide more functionality than Drive Setup is in the flexibility it gives in creating partitions. You can easily (if slowly) delete, create, size and locate individual partitions, and it offers more formatting options (AUX) than Drive Setup. I have used Apple HD SC Setup to modify existing partition schemes and then used Drive Setup to re-enable mount on boot. Note that the menu option in Drive Setup is picky. I found that I had to restart, then unmount all partitions of the drive, then launch Drive Setup and select the disk before the appropriate menu item for setting the correct flag appeared. It may be worth using a 3rd Party utility to do such work instead.

Finally note, there have been times when I’ve broken the driver on a disk and it will not mount. Selecting Update Driver in Drive Setup has not helped… but doing the same in Apple HD SC Setup has. This is a useful thing to know when trying to save yourself after you’ve trashed a disk.

Appendix B – Booting from Individual Partitions

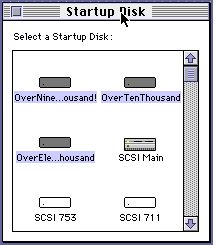
I have been having some issues booting from individual partitions on my Mac IIx. When it first arrived it would only boot from the first partition on any physical device. I later installed some software including the Startup Tuner system extension as I understood this fixed such issues and for a period of time I was able to boot from any extension… until yesterday. I do not know what has changed (other than there are now two devices on the SCSI bus), but I can no longer select a specific partition in Startup Disk (it selects, but if I quit and return, all partitions on that drive are now selected).

Startup Disk

Any advice welcome – I can’t remember if this is a disk driver issue, a ROM issue or a System software issue. I believe that the functionality wasn’t always there, and that you have to do specific things to enable it on older machines like the IIx… but my memory of the specifics fails me!

UPDATE! I’ve found that using “Startup Disk” from Mac OS 8.0 or 8.1 solves the issue. It doesn’t need to be installed in the System Folder, so I just keep a copy on my desktop.