Some G3 and G4 processor upgrades for beige macs from the 90s have dip switches for setting the processor and bus speed, as well as a special switch for when you install it in a PowerBase (a clone). With so much information falling off the internet and getting harder to find, I thought I’d post the settings for some cards here.
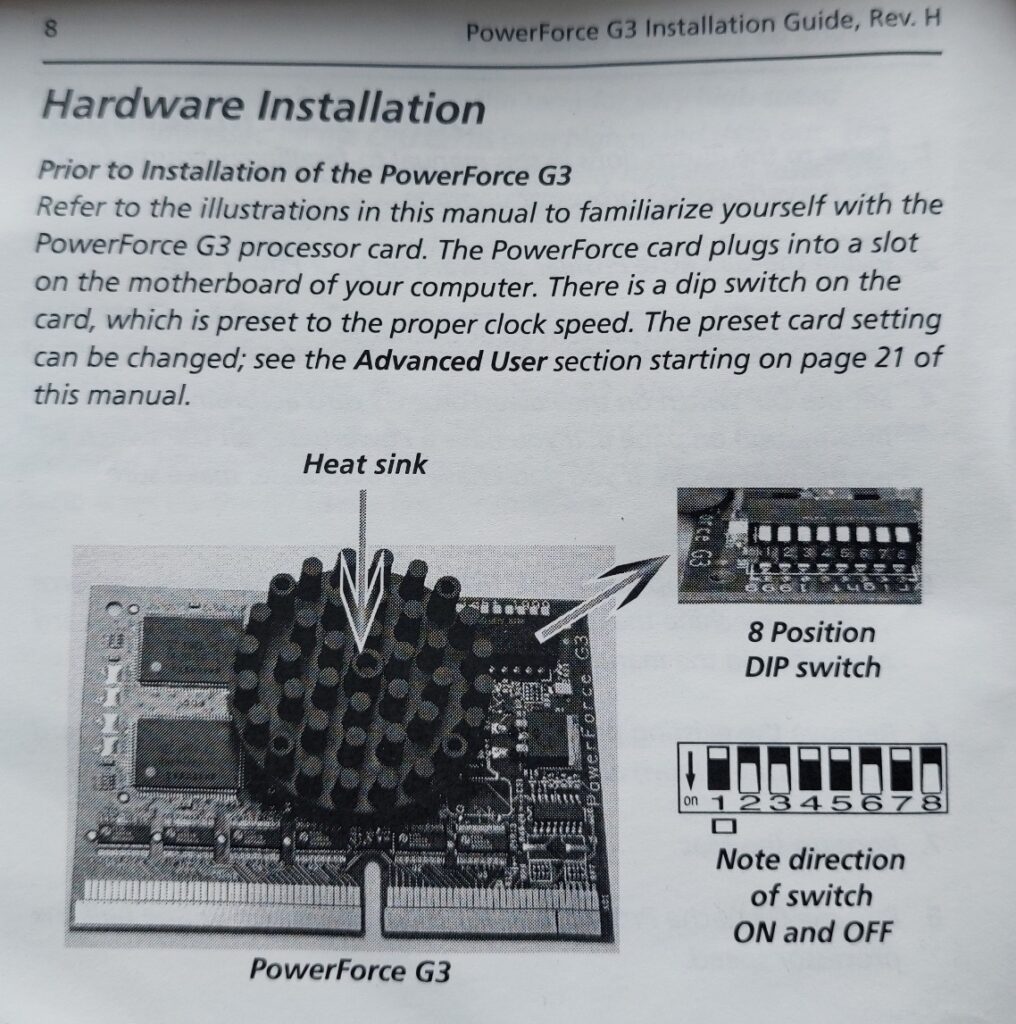
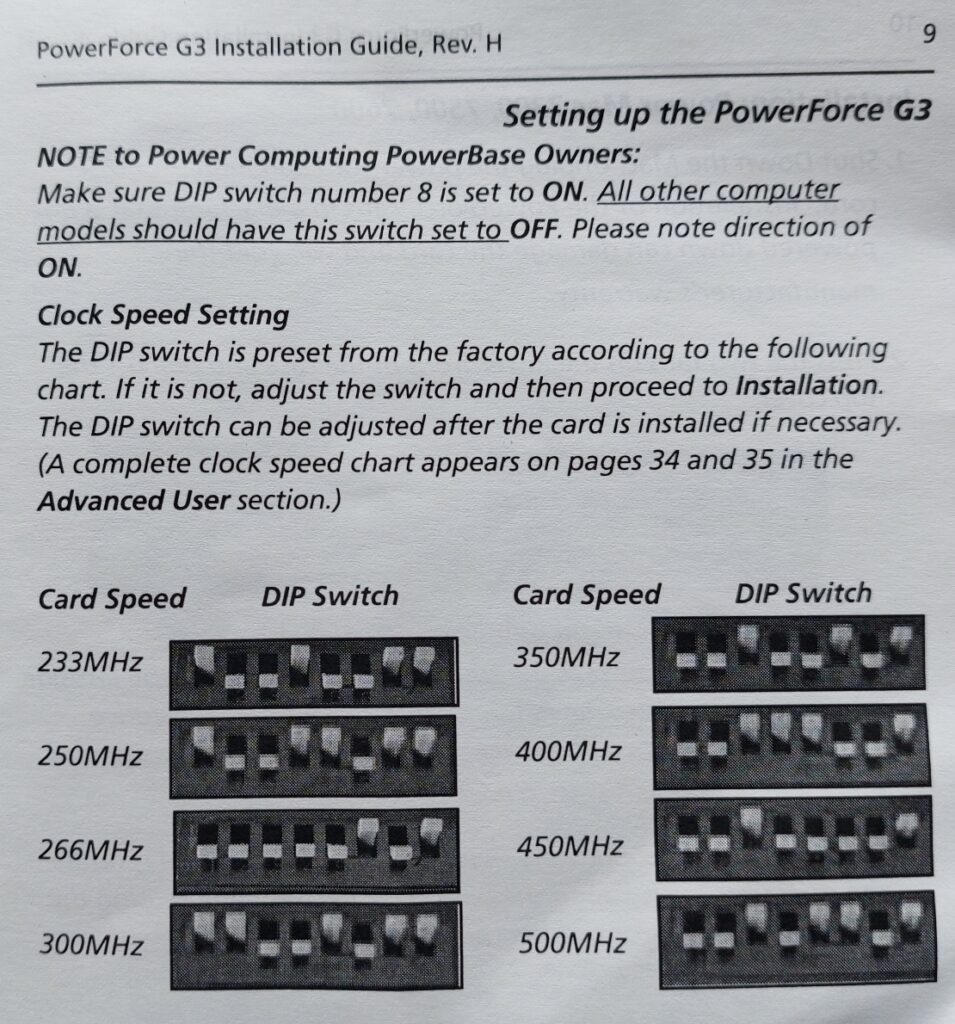
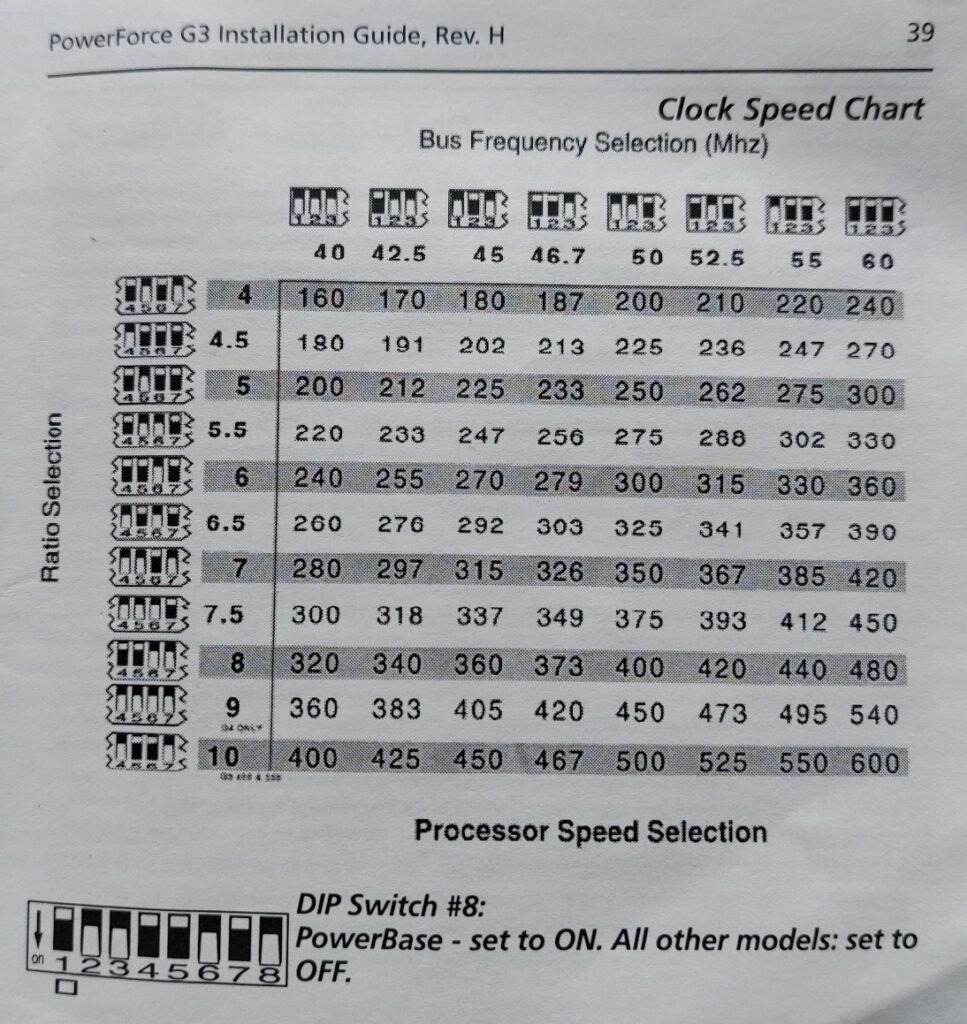
PowerLogix PowerForce G3 Speed Settings
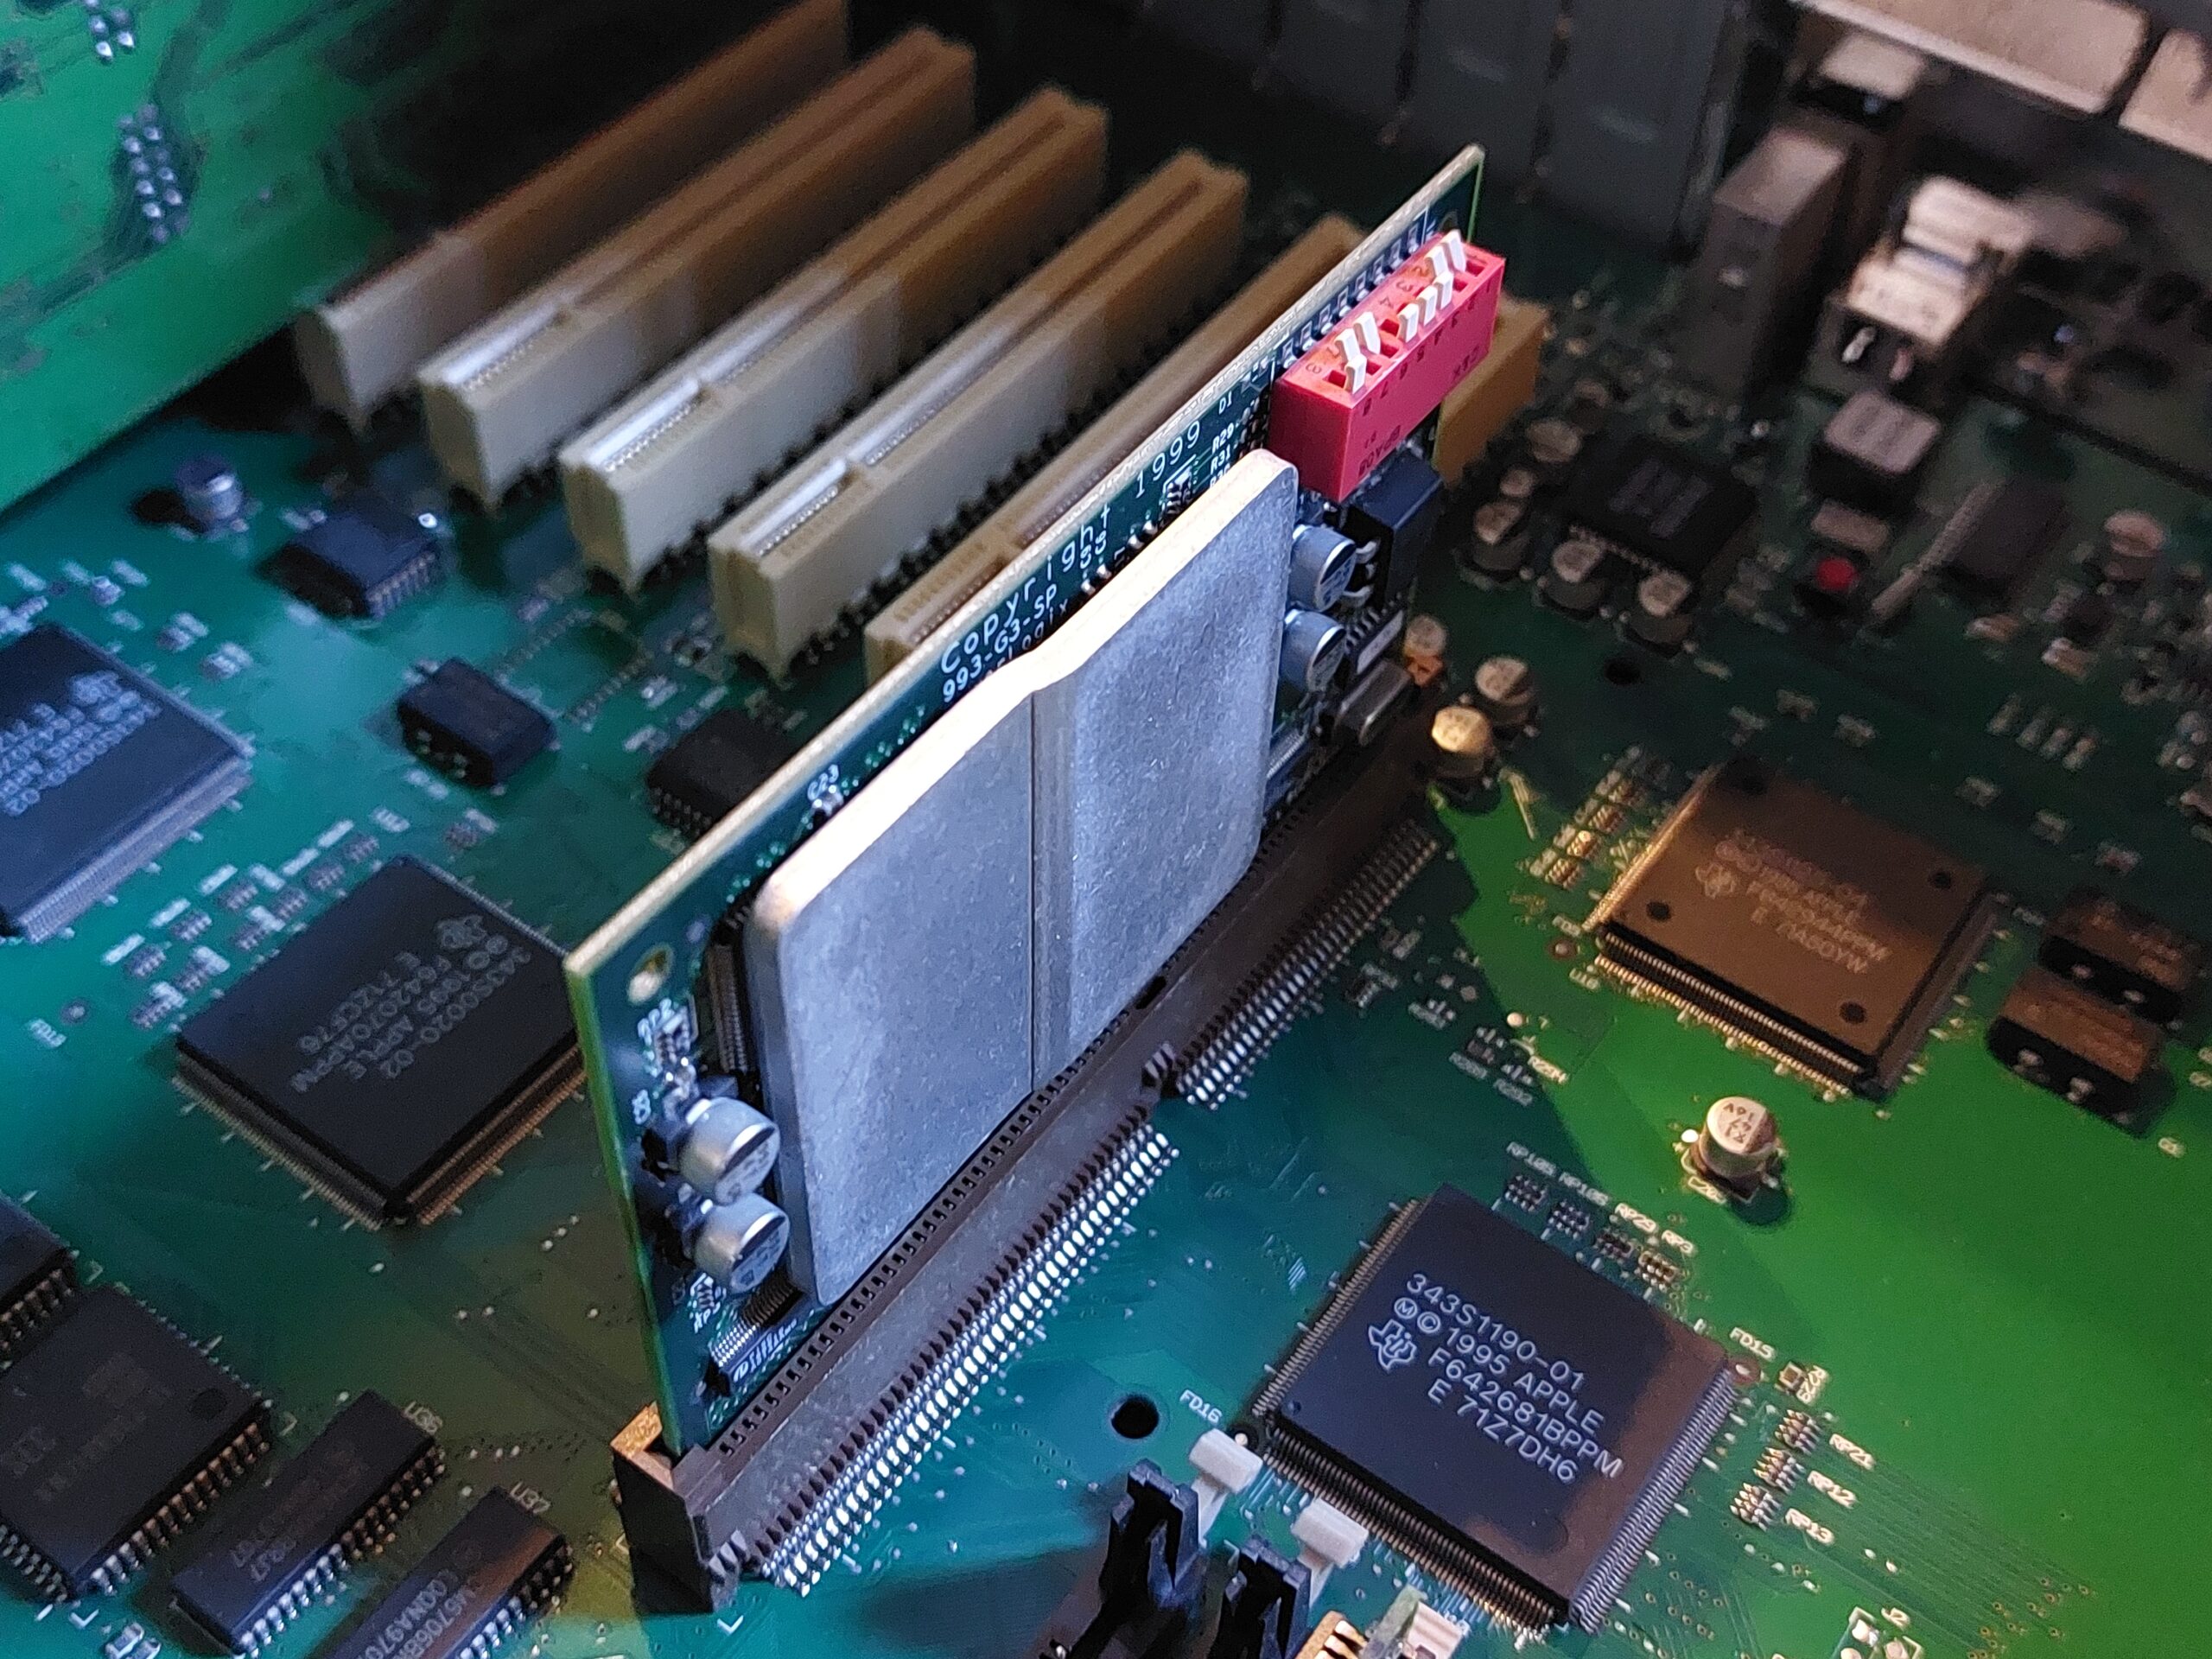
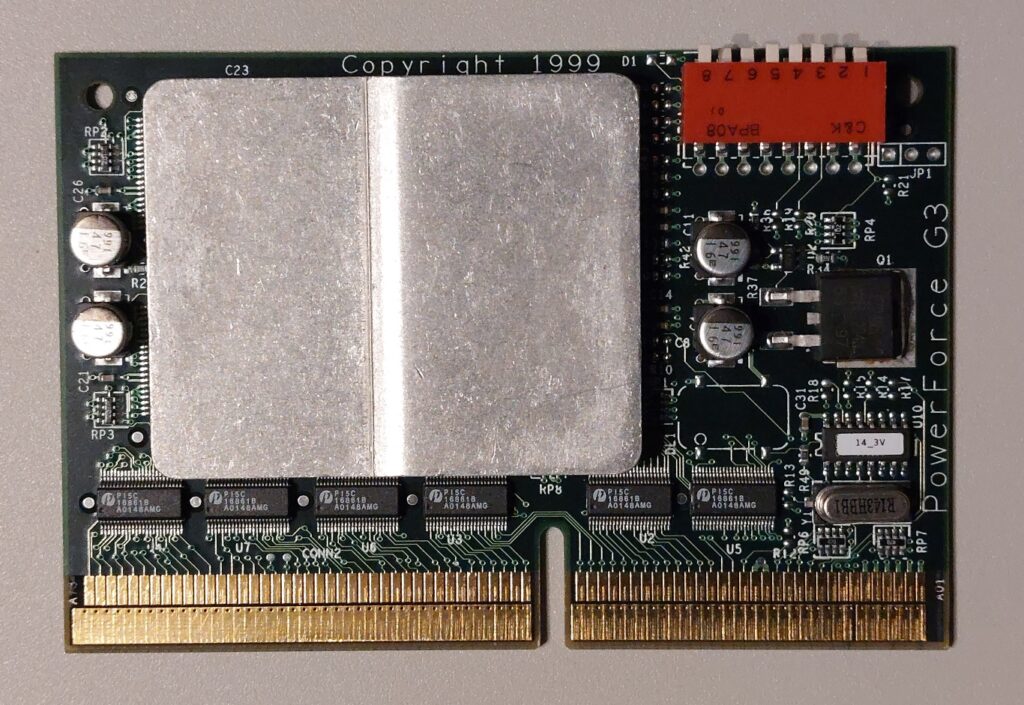
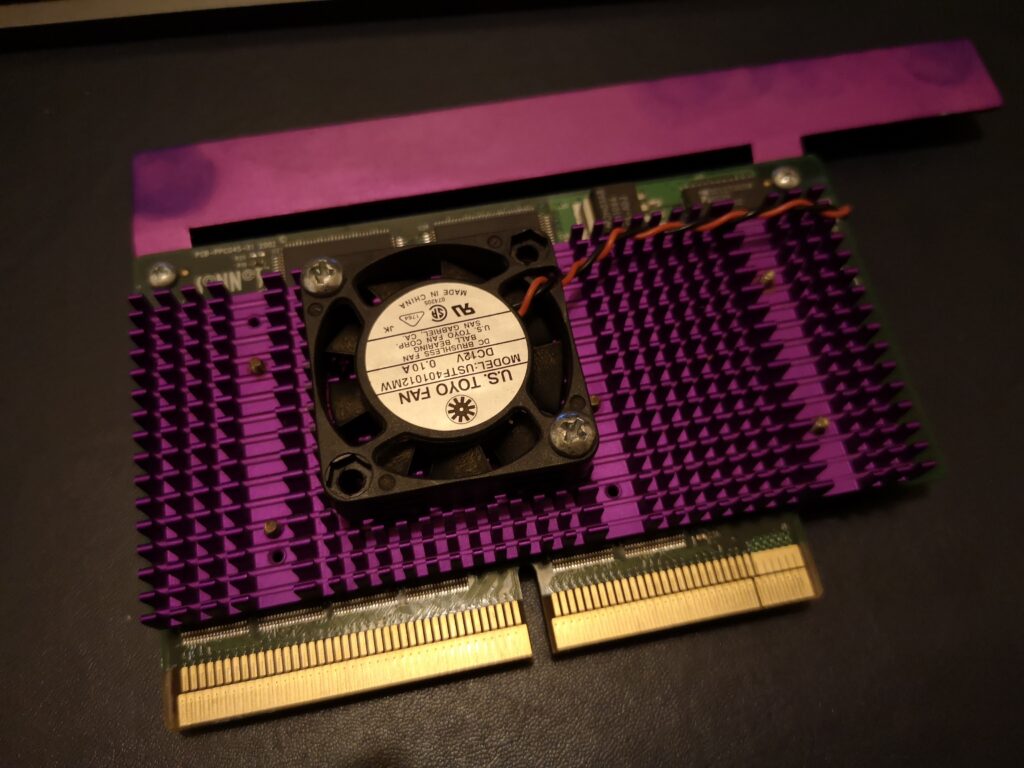
This is what my PowerLogix card looks like, it is a 400MHz, 1MB Cache G3 (PFG3 400/200/1) upgrade for PCI macs with the processor slot, for example things like the 7500 to the 9600, and some clones.
Here are the settings :
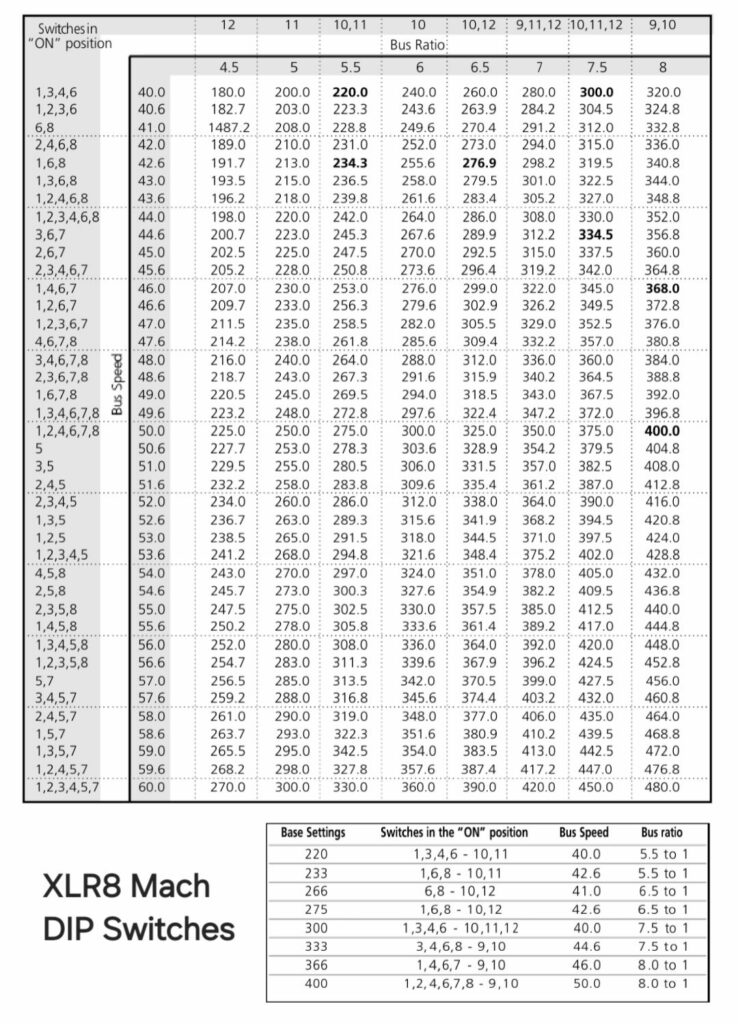
XLR8 Mach Speed Settings
The following settings apply to a number of XLR8 cards, including Mach branded cards. The first 8 switches seem to control the host bus speed, the remainder set the CPU multiplier.
You can also additionally set the Backside Cache speed using XLR8s software.
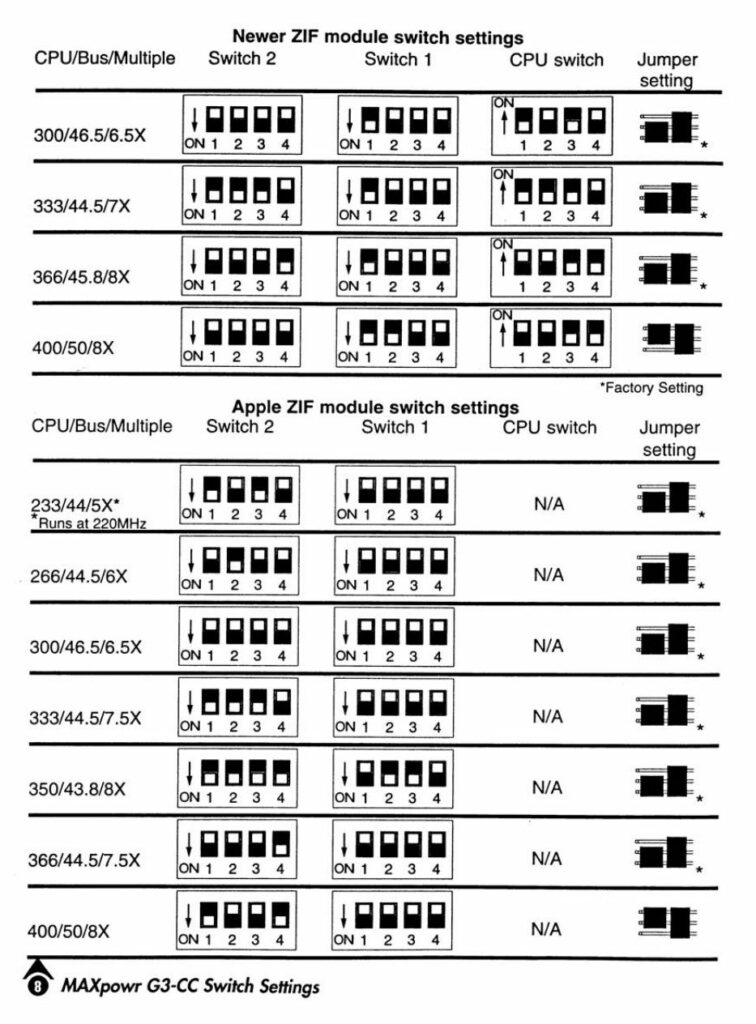
Newer Technology MaxPowr
See the following site for experimental research regarding the four switches on the non-ZIF variant, or the manual extract for settings on the ZIF card.
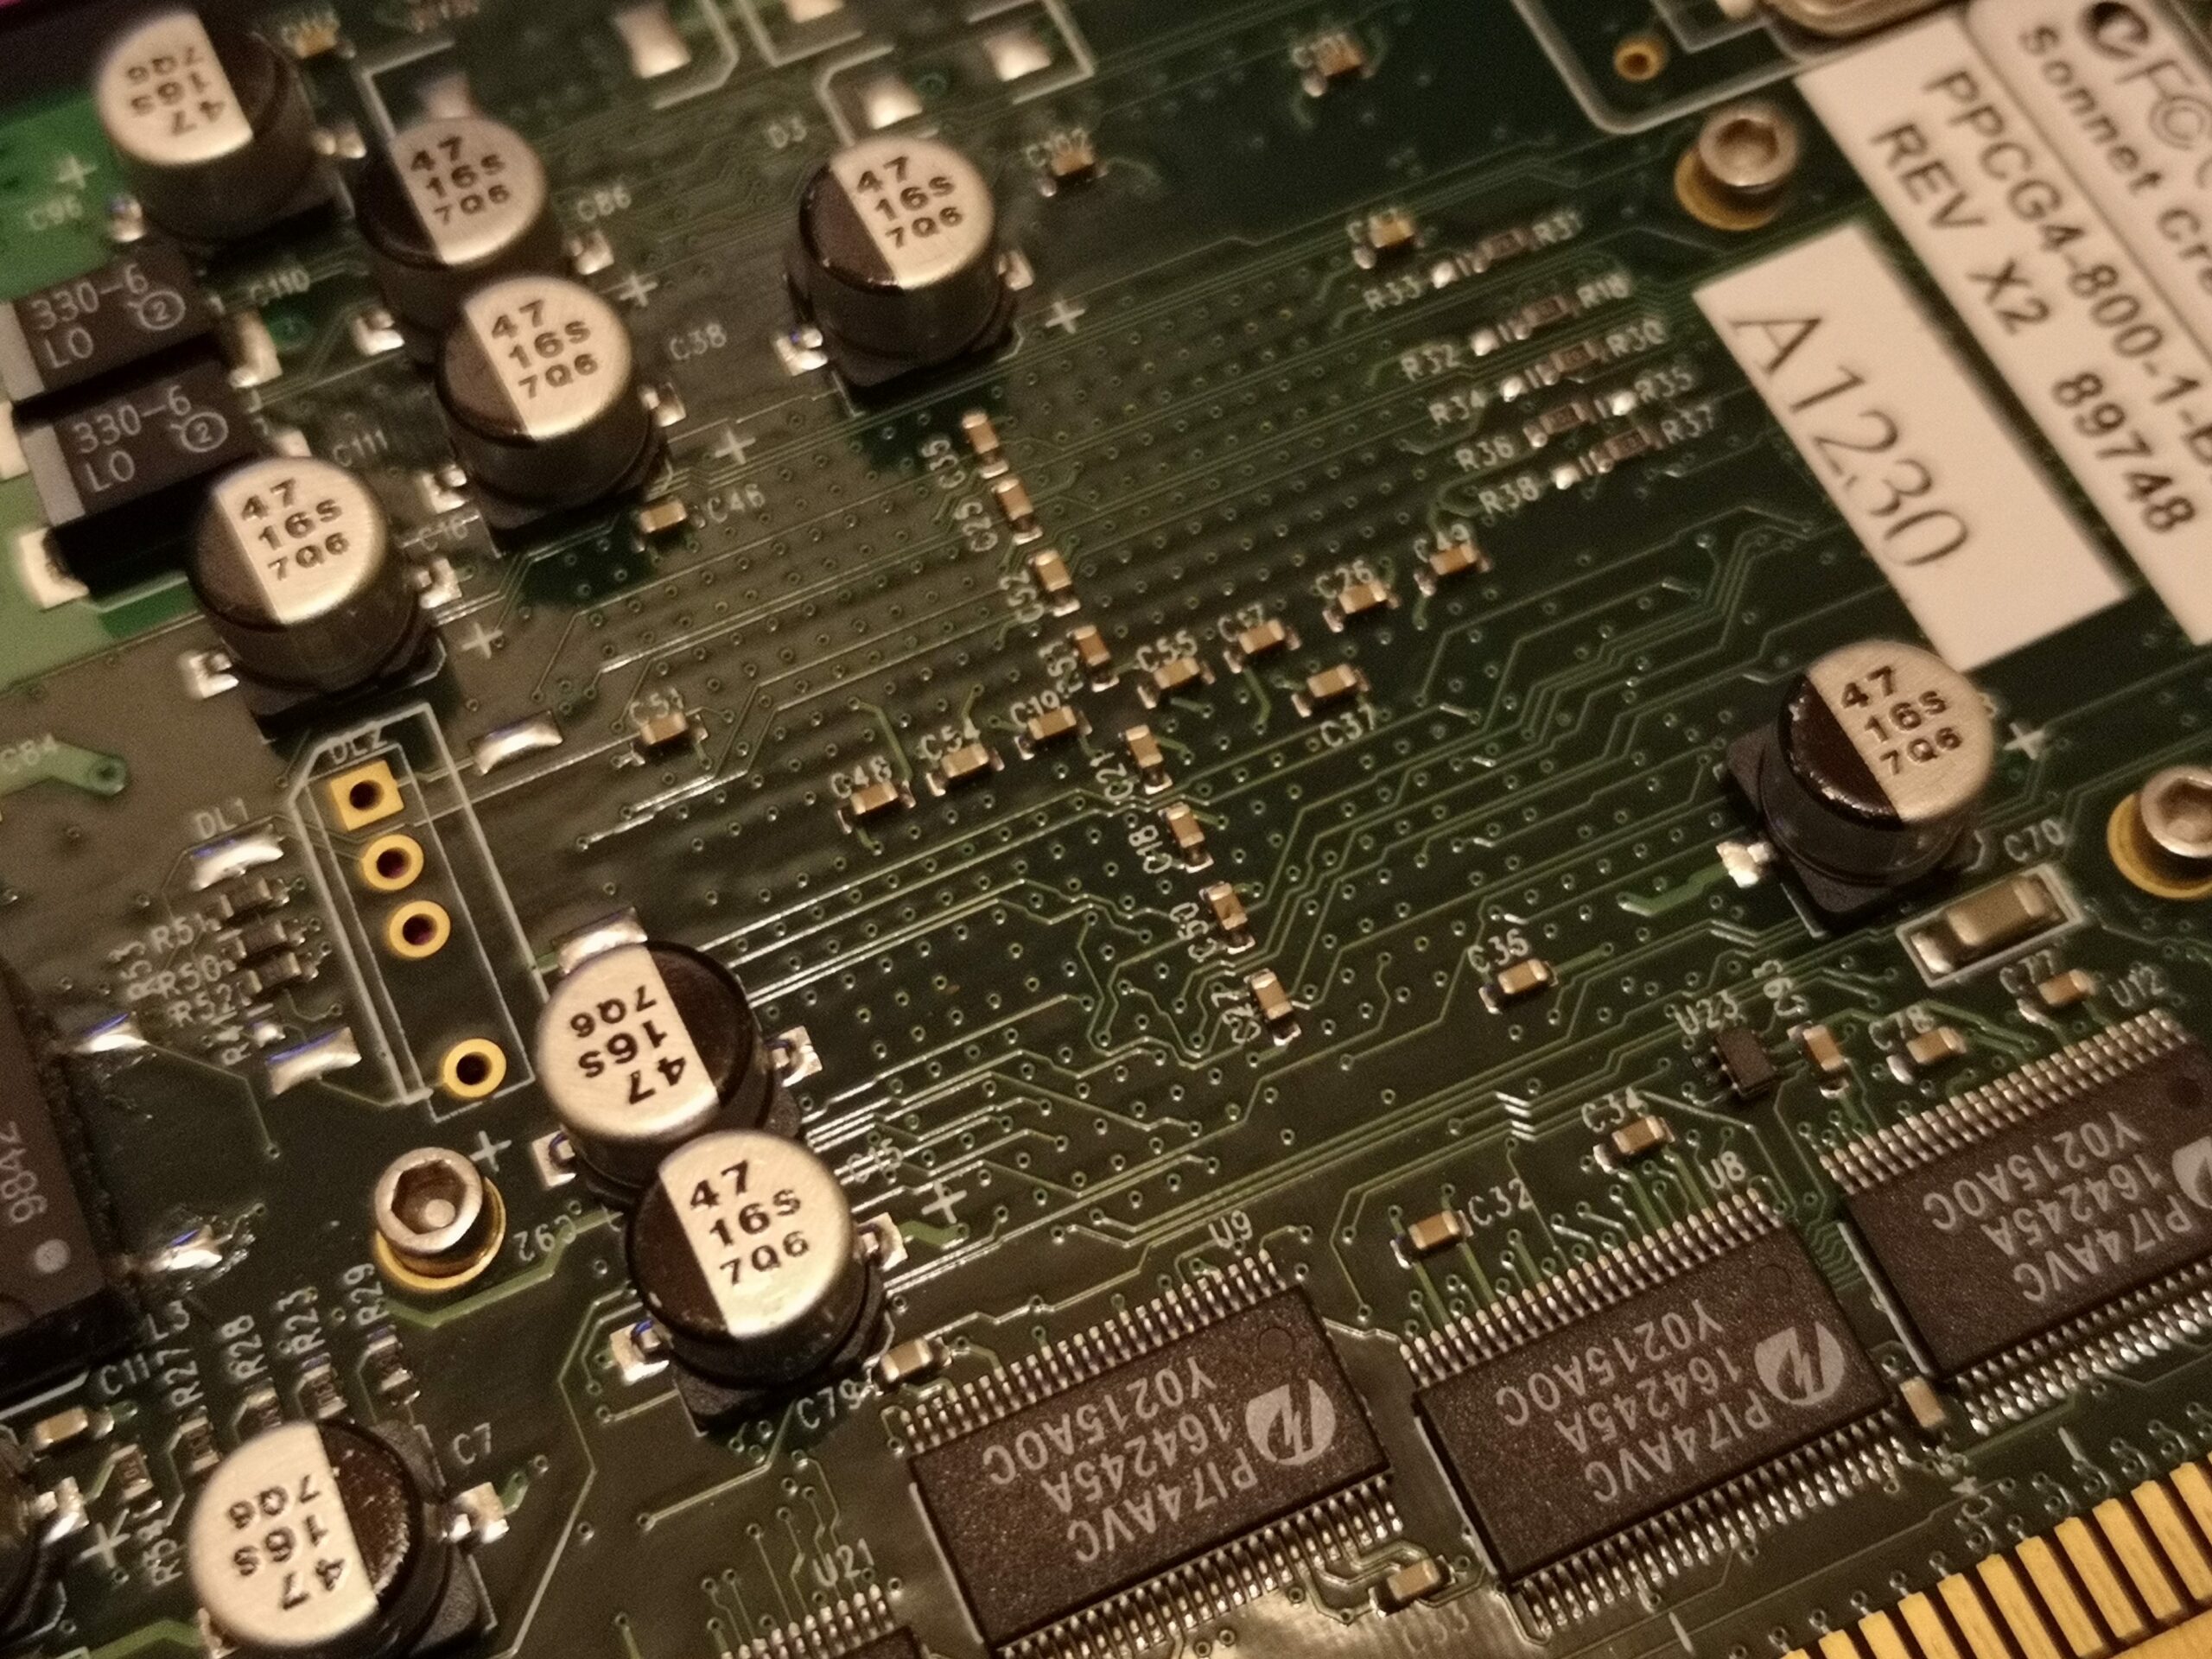
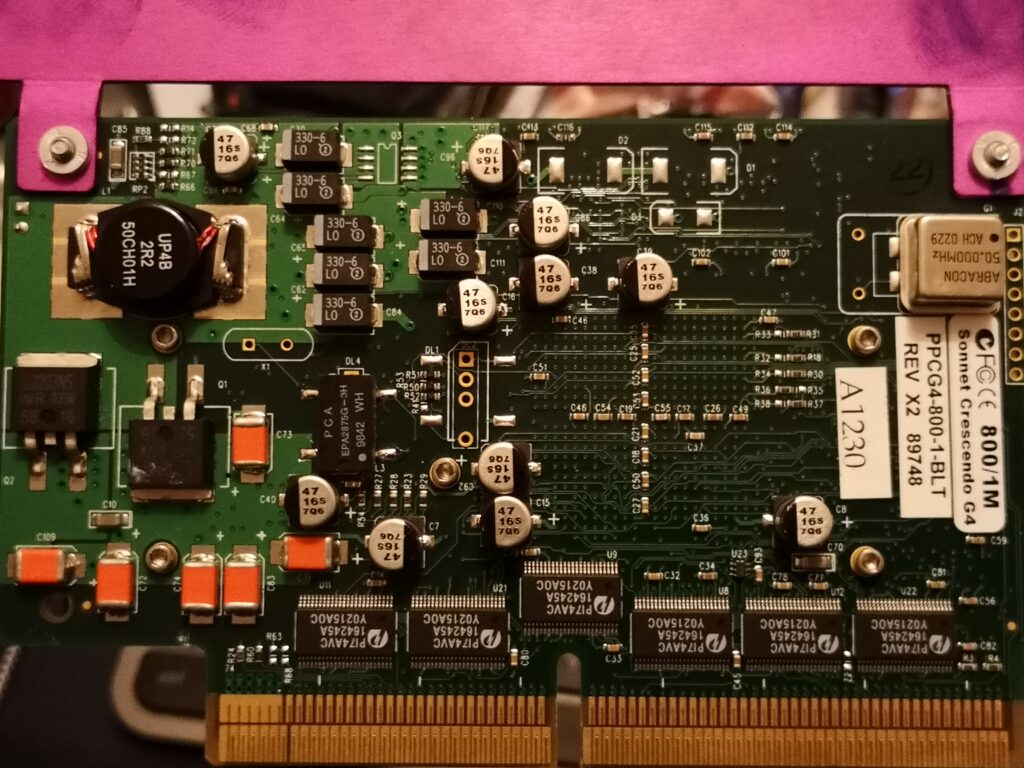
The Highest speed of Sonnets “PCI” (as in, for most PCI based beige Macs, rather than it fits in a PCI slot) G4 upgrade cards used a different PCB and Motorola’s 7455 G4 Chips. These boards can be a little unstable and I’ve never had any luck using them with the actual Sonnet drivers. These cards were available with a 700, 800 and 1000MHz processor.
The most stable solution I have found is to use the PowerLogix CPU Director drivers, with Speculative Addressing disabled.
To speed up the process of getting this set up, I have created an installer for Mac OS 9 which installs the PowerLogix software, as well as a system preference which has the settings already enabled as required.
The download is a .bin file, which can be opened in Stuffit Expander. Inside the .bin file is an installer application called Sonnet7455.
The process…
With the previous CPU still in the computer, install this software, once done, power down the computer.
Remove the previous CPU and install the Sonnet Upgrade.
Make sure the CPU card is firmly seated.
Seriously, double check it – they can be quite stiff and if they’re not properly seated you might kill the computer or card.
Really – check it again, I lost a 500MHz G3 like this. Stupid thing resisted so much I thought it was in properly, and it was one of the ones without the tall bracket so I didn’t notice that it was higher than it should have been in my 8600.
Press the “Cuda” button. Usually a little red tactile switch. Press it once, for about one second. Do not long press it. Do not press it lots of times.
Close up the case and boot the machine up. You will have lost all your mouse / date and time etc. settings due to pressing the Cuda button, so they’ll need resetting.
At this point you should be good to go, although these upgrade cards are known for having incompatibilities. I have seen the following issues :
Sometimes it doesn’t like my OEM Twin Turbo card. It works fine with my Radeon 7000.
It doesn’t like my ethernet card and will crash if I start transferring a larger file. It works find with the built in ethernet.
There are more compatibility issues listed on the Sonnet FAQs.